One of my favorite
things to do when it comes to building radio controlled model airplanes
is to try to find a one-off, or a prototype, or a never built aircraft
and turn it into a stand-off scale flying model with a wing span
in the 48” to 60” range. I’m especially fond of
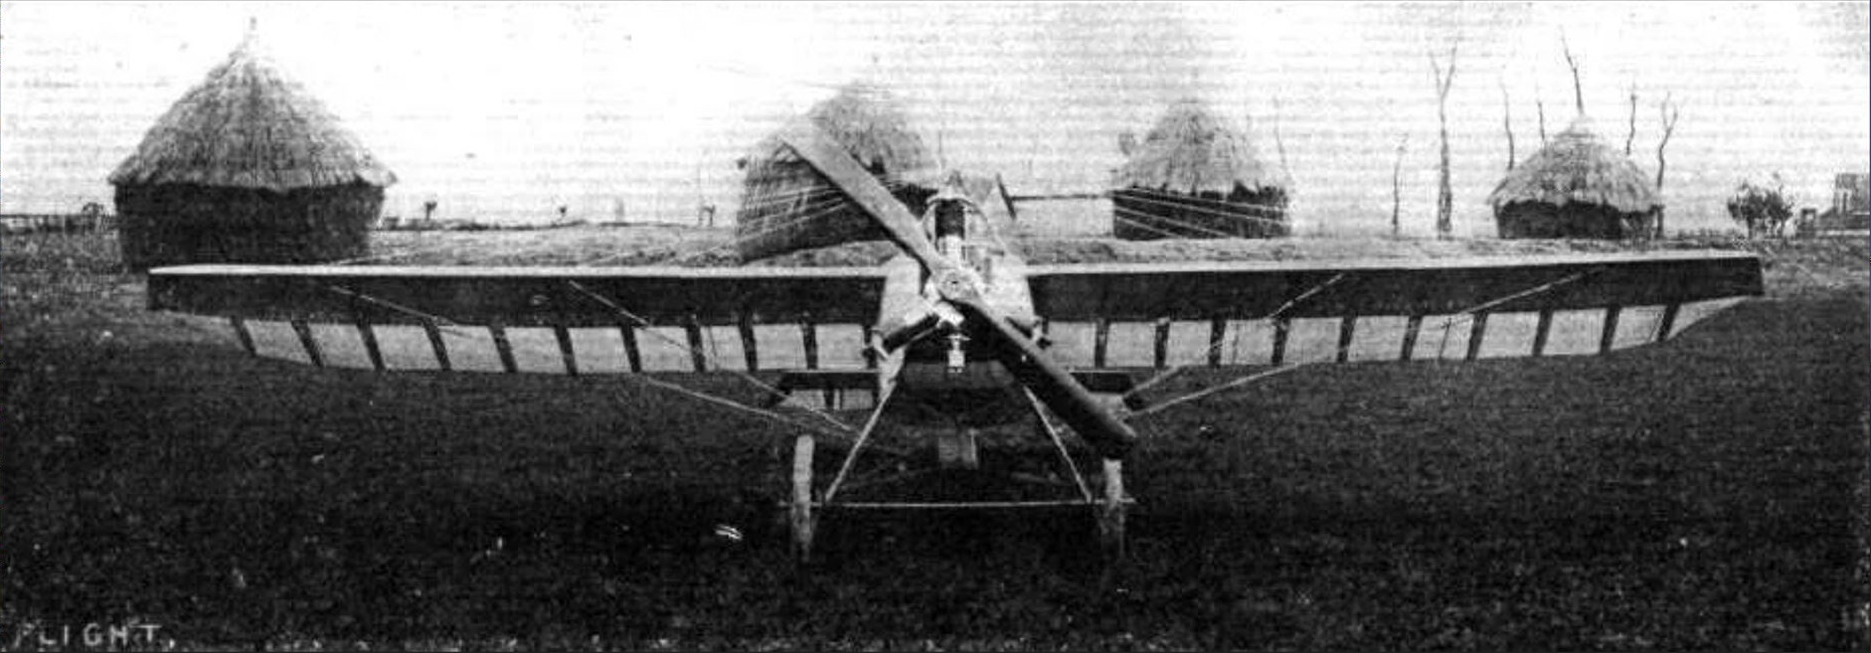
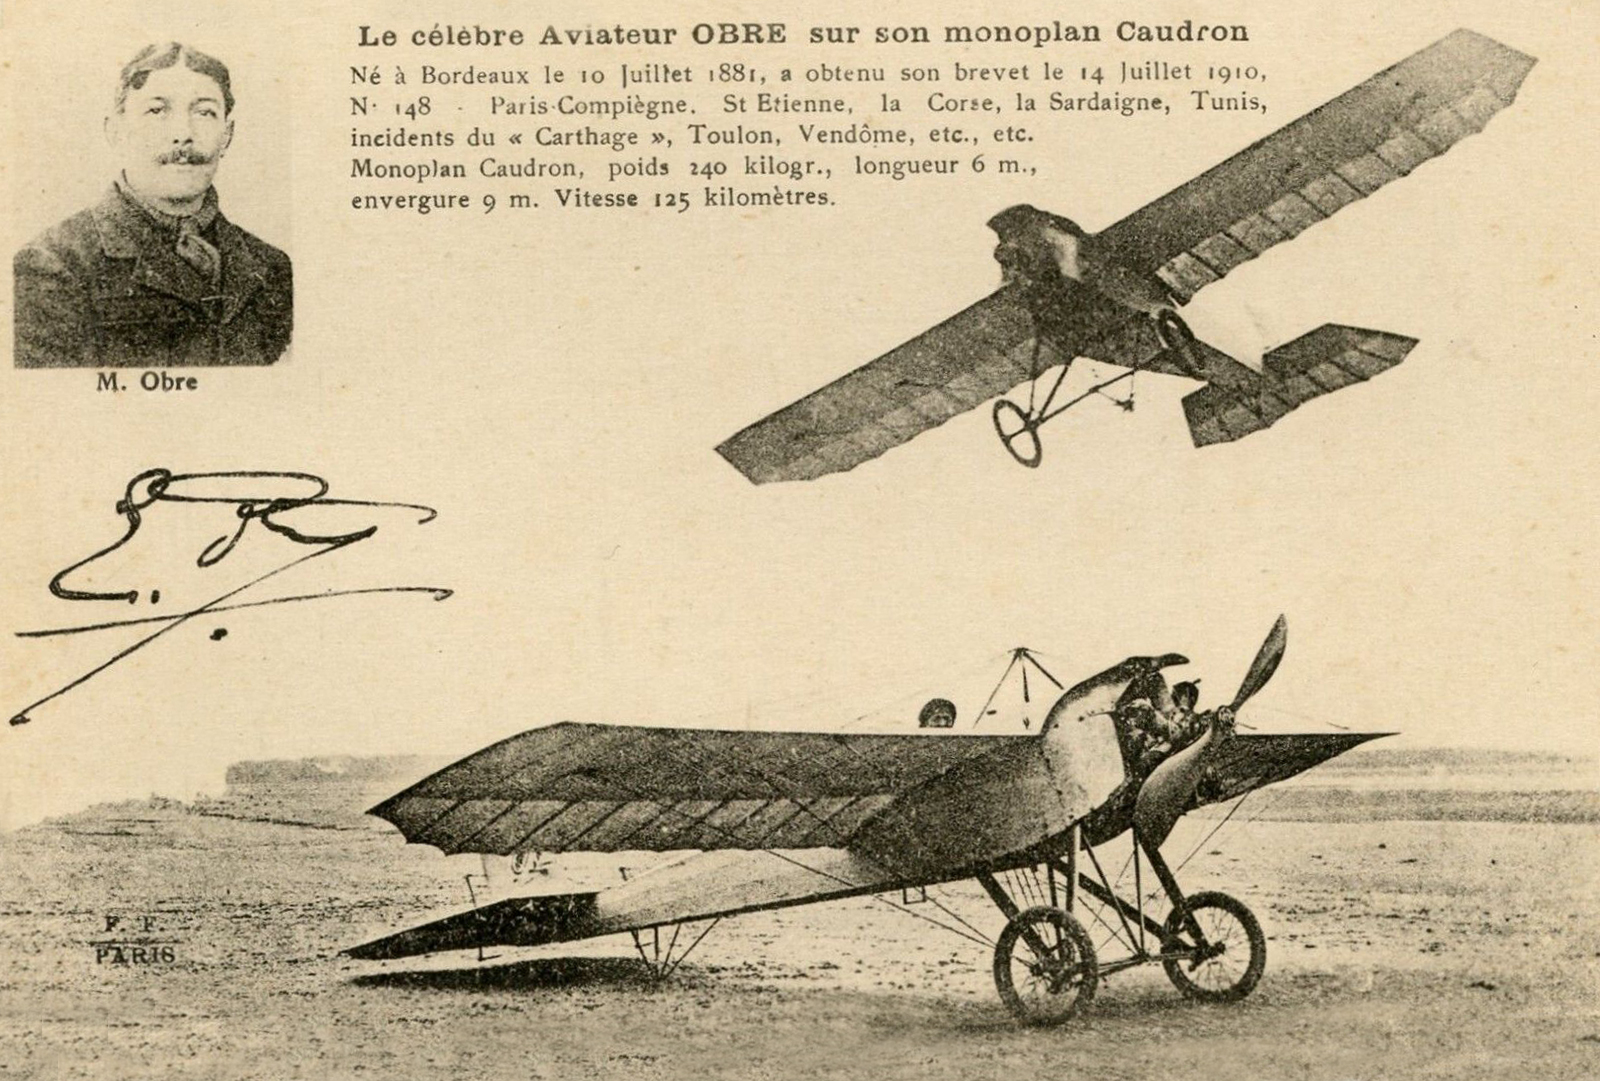
the early airframes all the way up through WW II. I chose the 1911
Caudron Racer because the only plans available were either small
free flight versions or giant scale behemoths. So I developed this
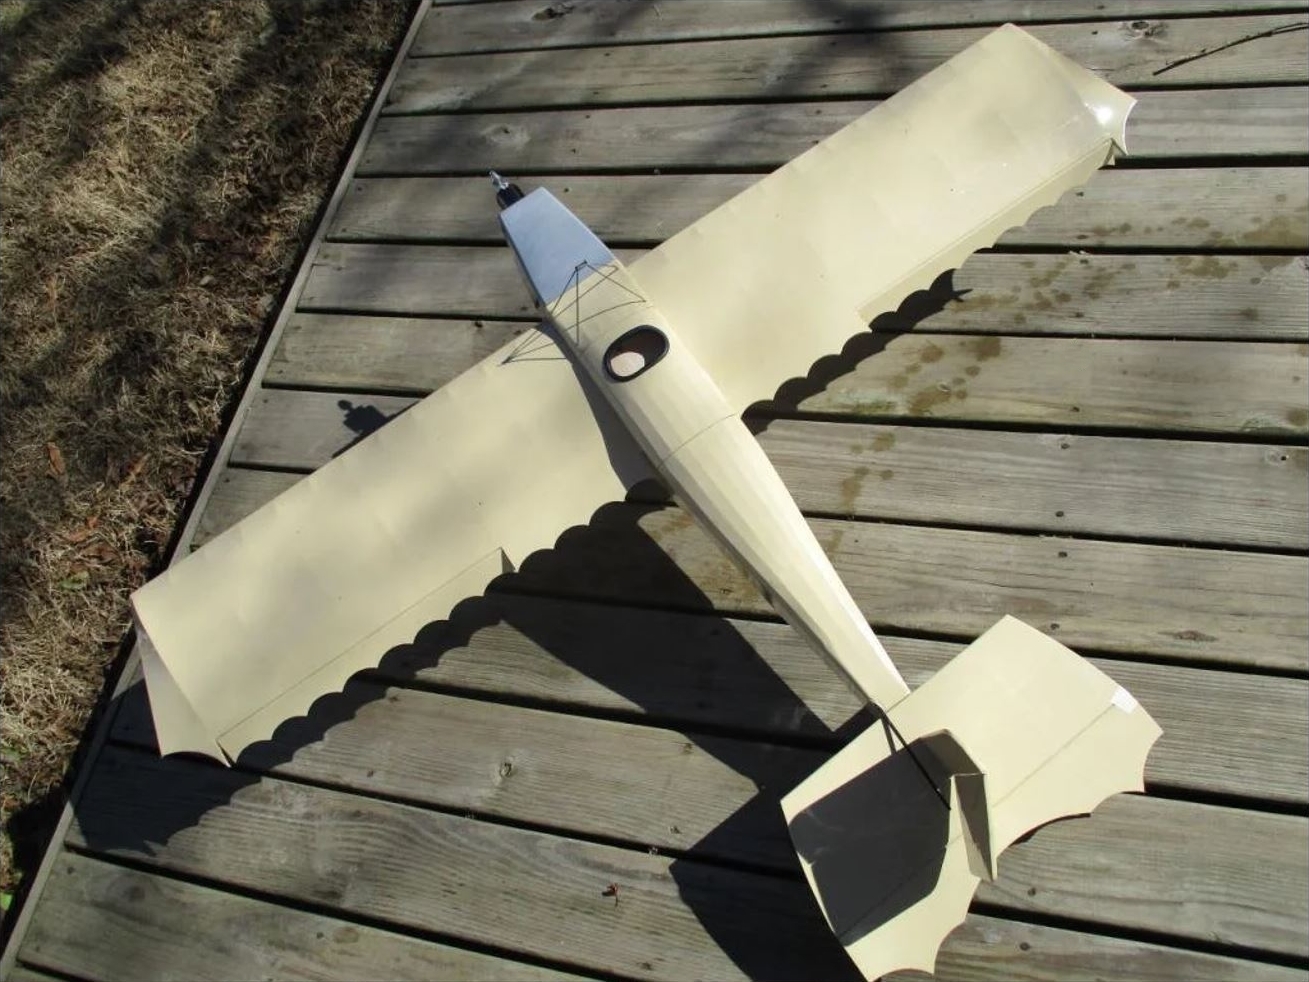
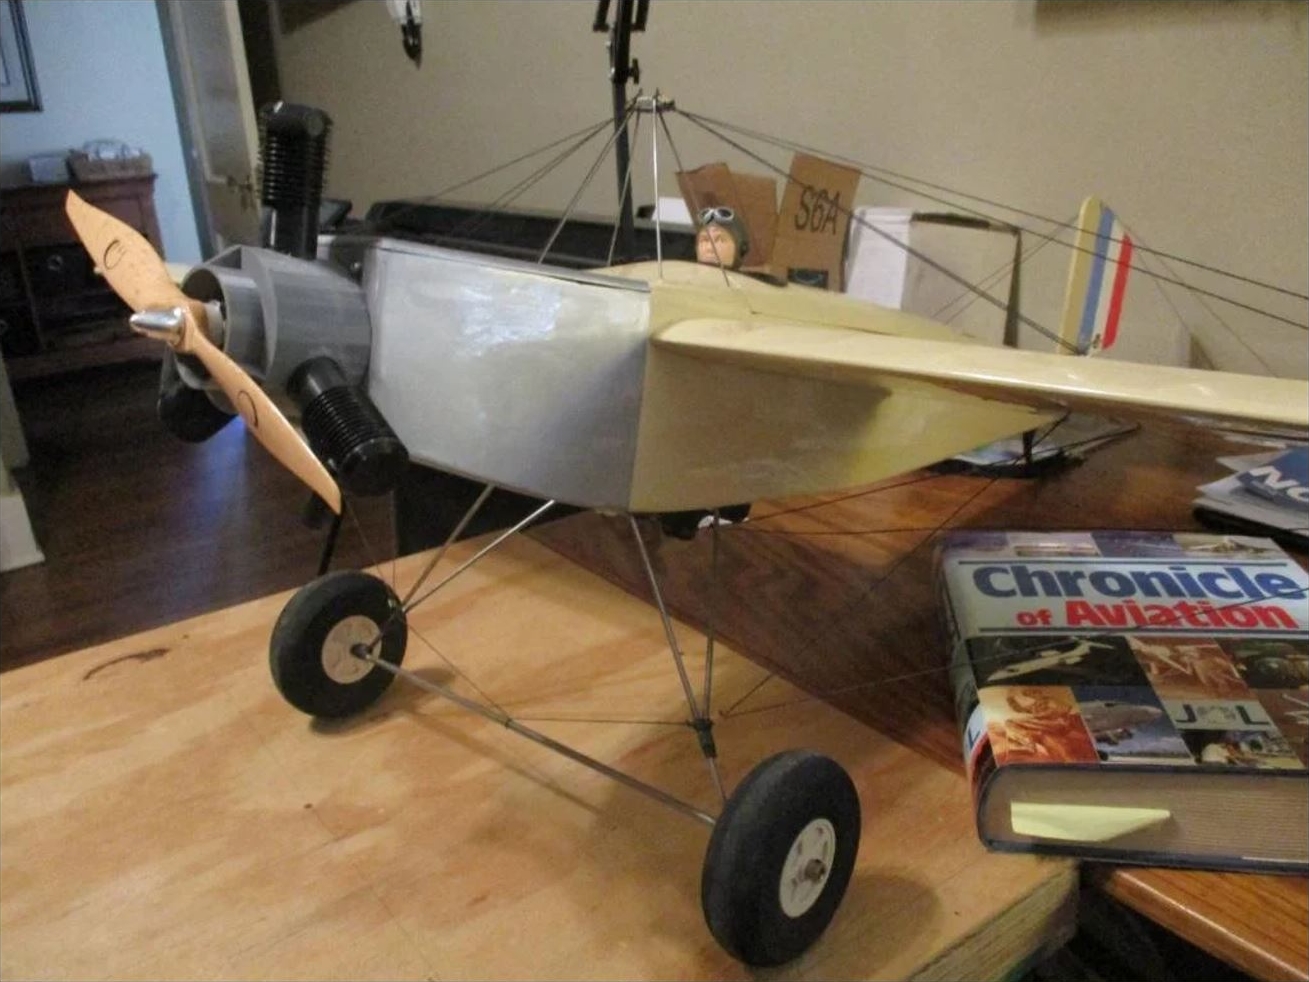
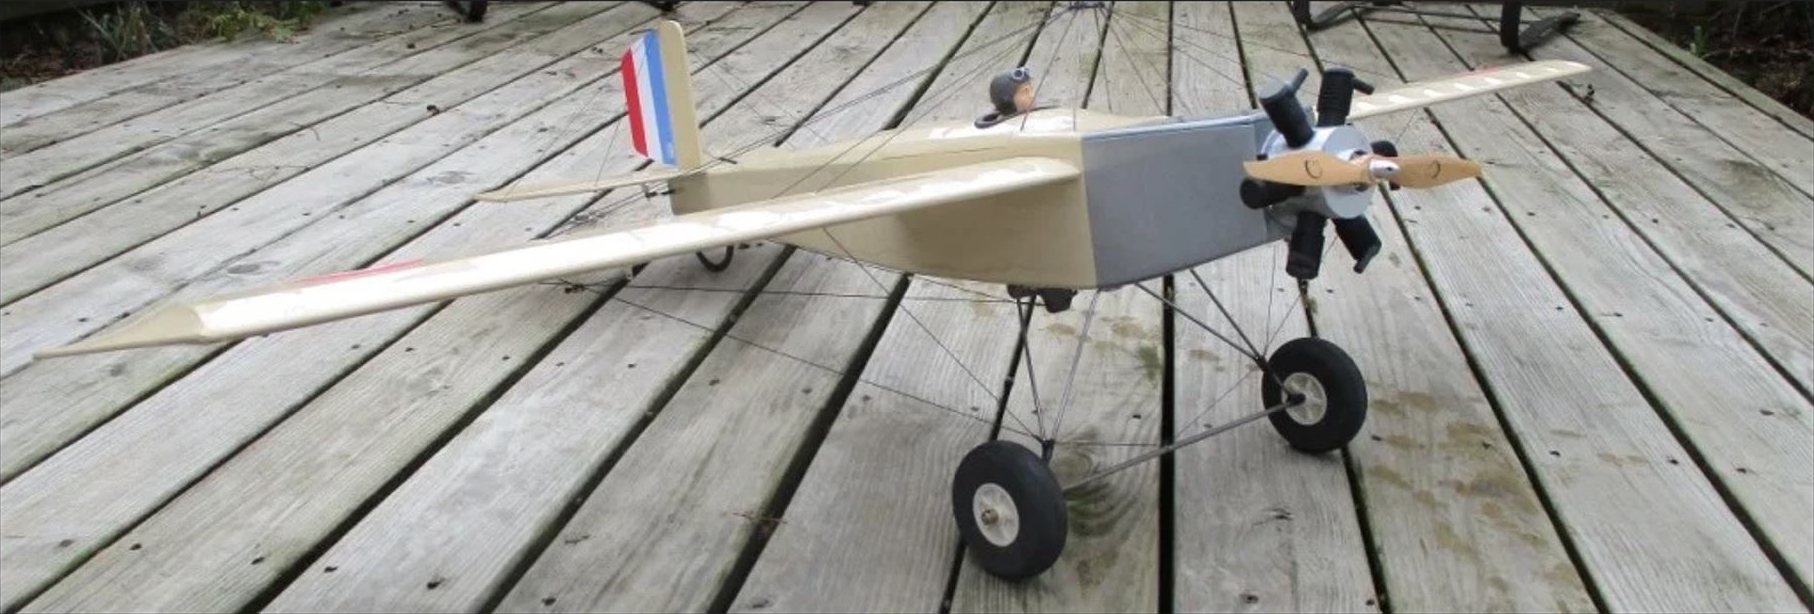
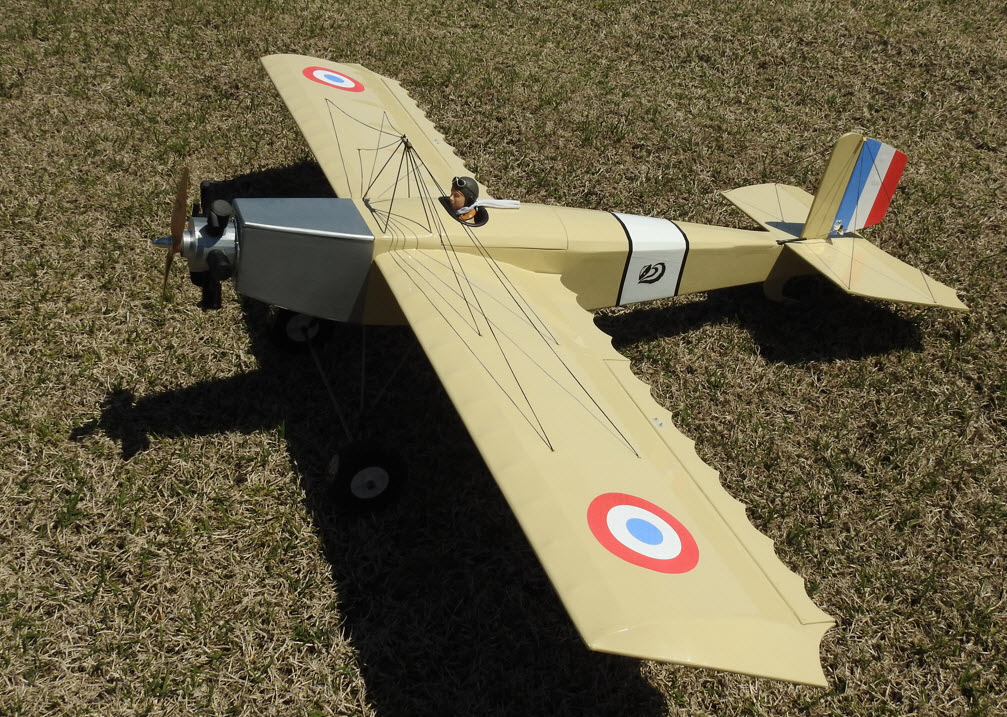
little girl... a 57” electric powered version of the M2.
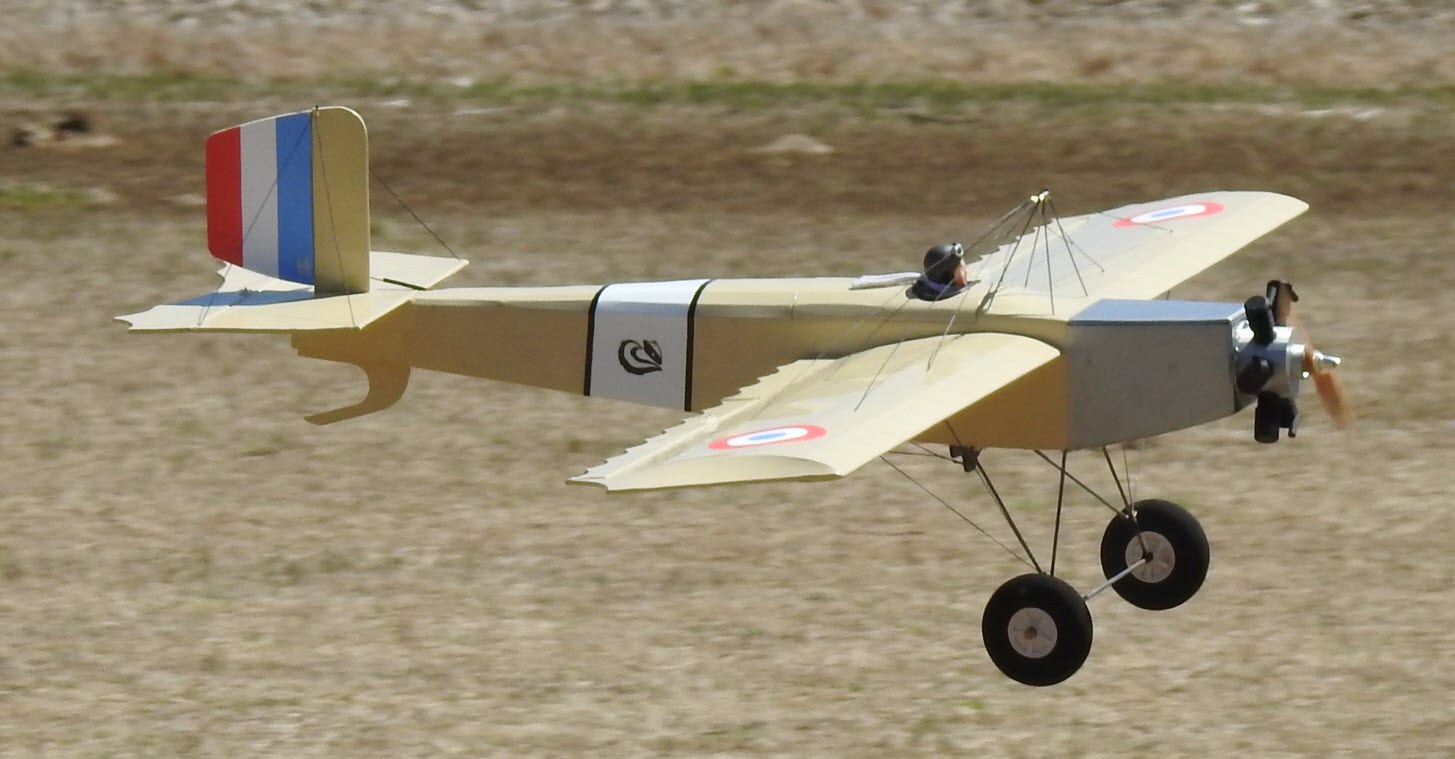
The retro look of this Caudron is quite successful
even if the cell is simplified compared to the full-size plane.
Video of the Caudron M2.
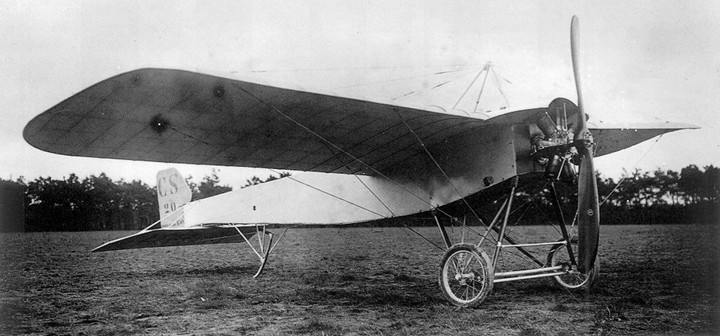
My research yielded only 2 historical documents
(Wiki), a couple of small sketches, and some very old B/W photos.
Documentation
from the period is quite rare.
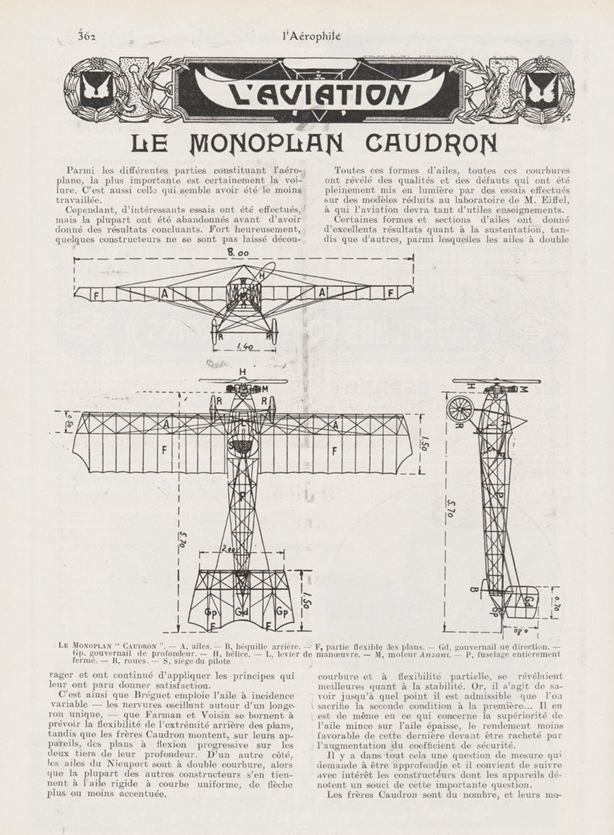
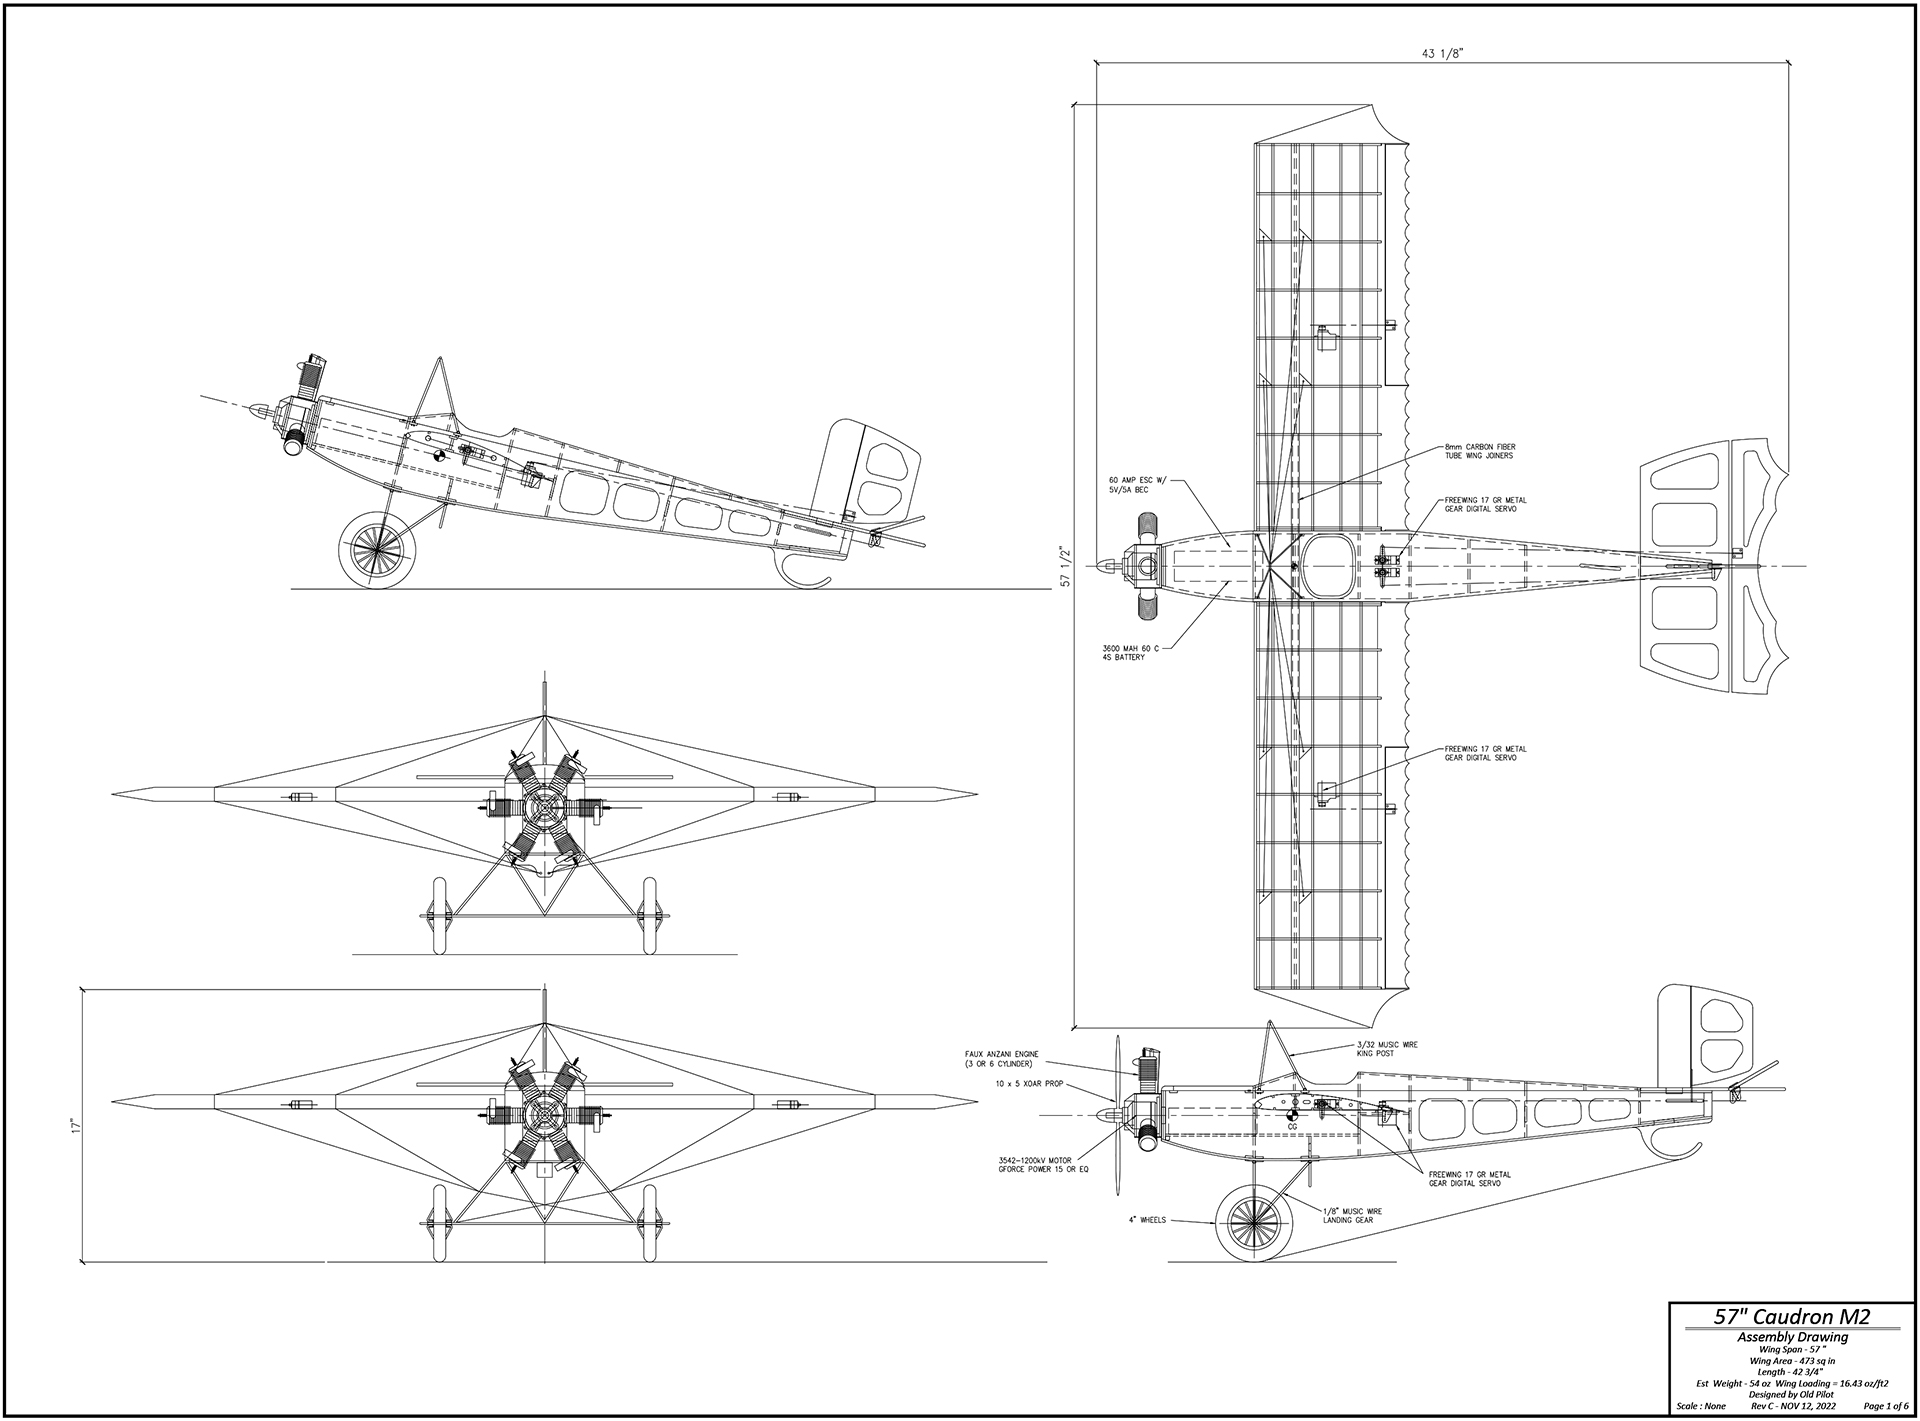
From that one sketch, I developed the general
arrangement drawing. Experience has taught me that an airframe of
this size has an estimated all-up-weight of approximately 4 1/2
to 5 lbs. I used that as a basis for choosing the airfoil, power
plant, battery, prop, and ESC. I also try to simplify the design
so that it would be easy to build, while retaining as much of the
flavor of the original bird as practical.
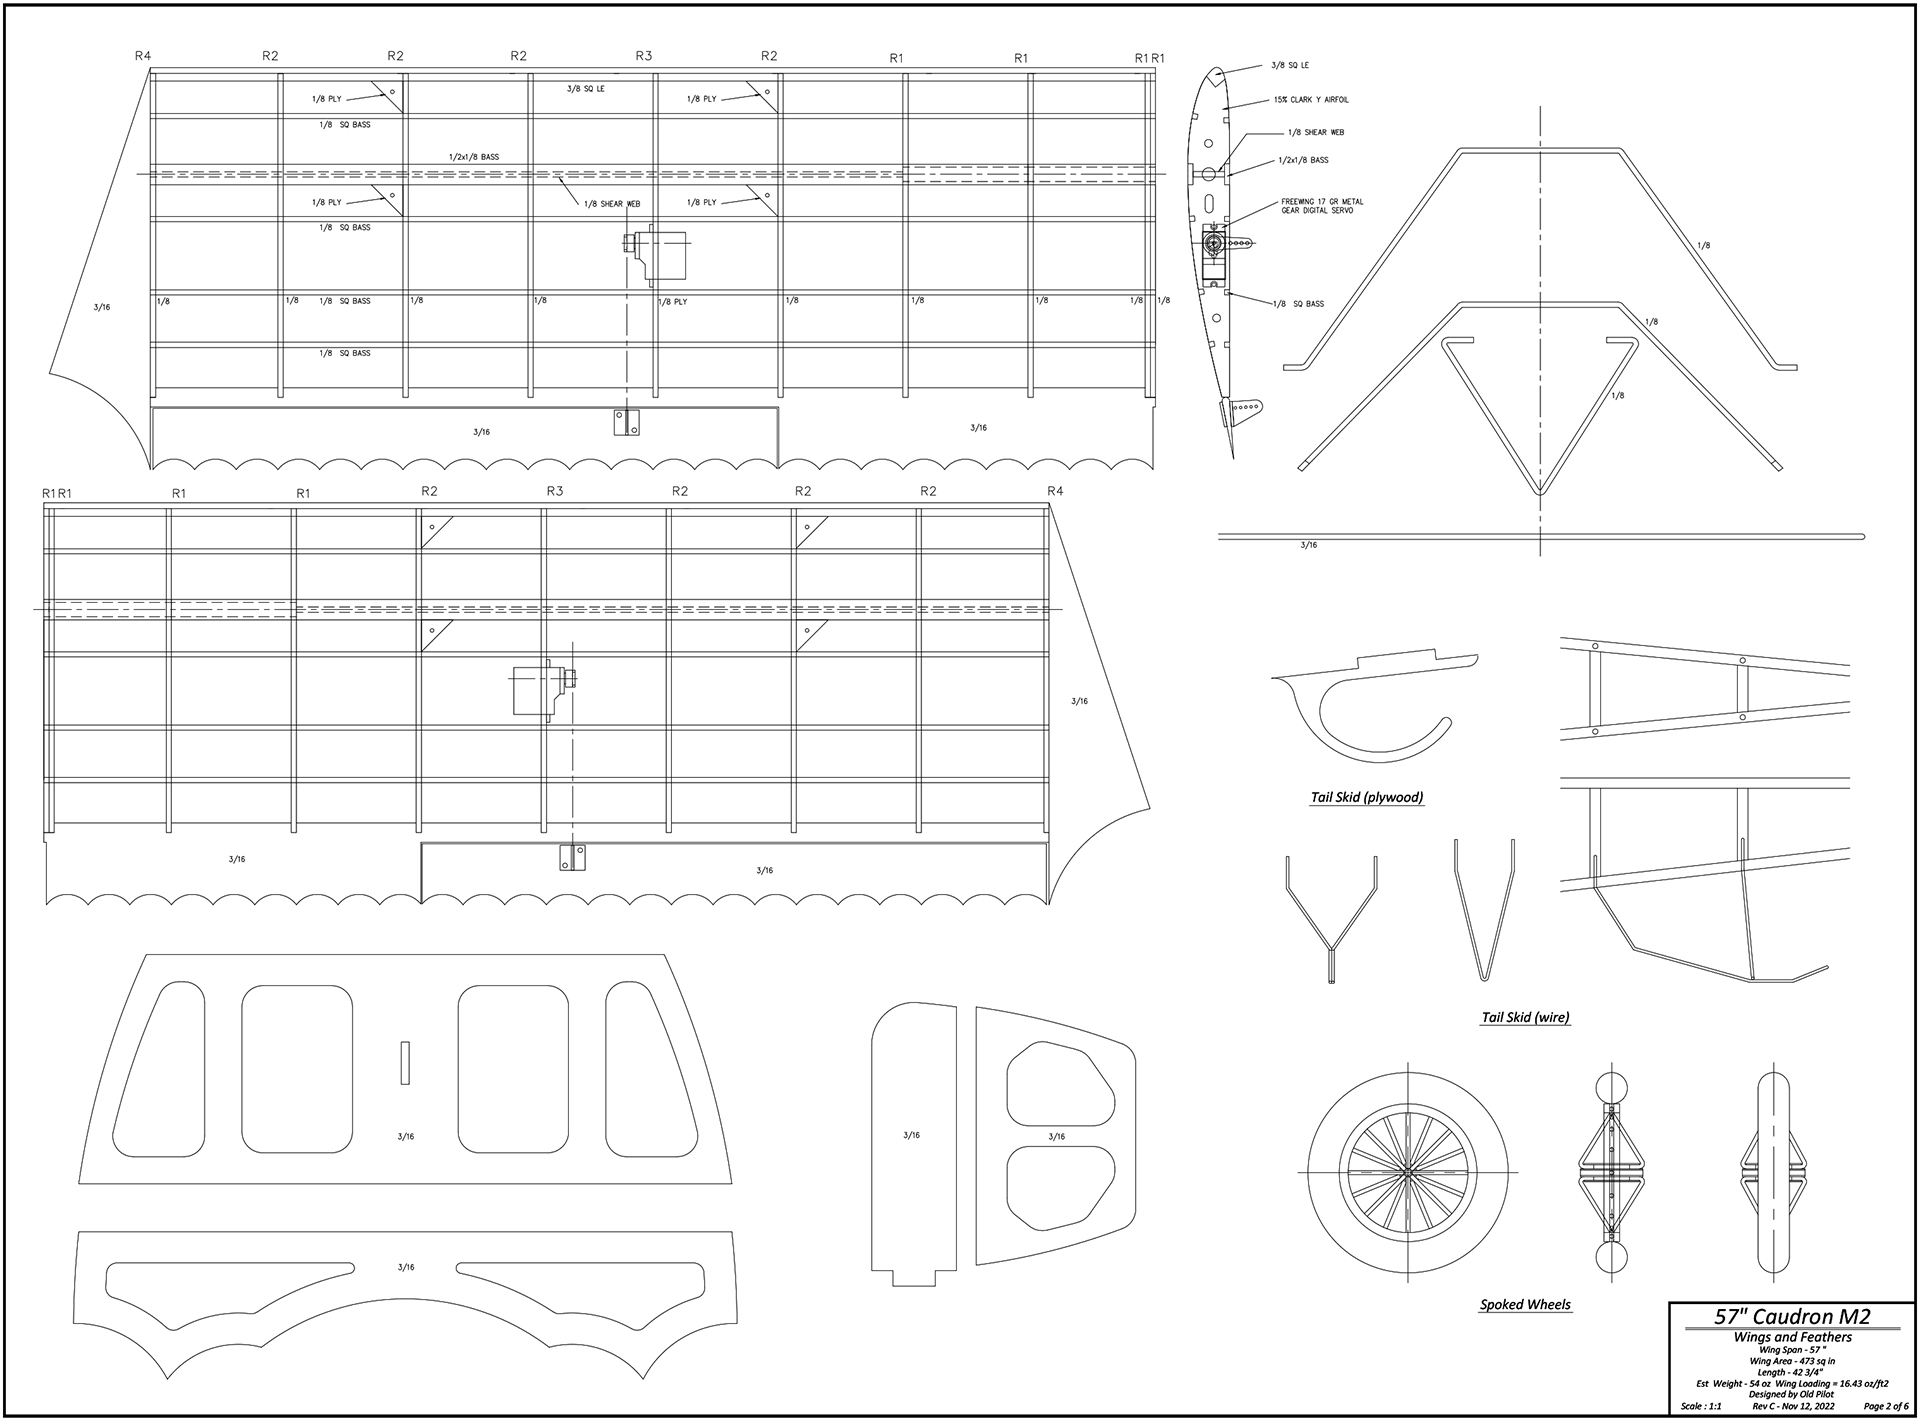
The original 1911 Caudron had an under cambered
wing, and for me, would be a nightmare to build and cover. A 15%
Clark-Y airfoil was the best choice. I could build a suitable spar
that would be easy to construct and strong enough to carry the wing
loading.
To further simplify the airframe, the built up
truss fuselage was abandoned for a slab type as was the stab and
fin. The post and tube pivot for the rudder was changed to a traditional
hinged rudder and fixed forward fin. Standard push rods and control
horns replaced all the pull-pull systems of control. The landing
gear wire and tail skid were also modified. Tab-in-slot construction
of the fuselage and formers made for an easy, self-squaring assembly.
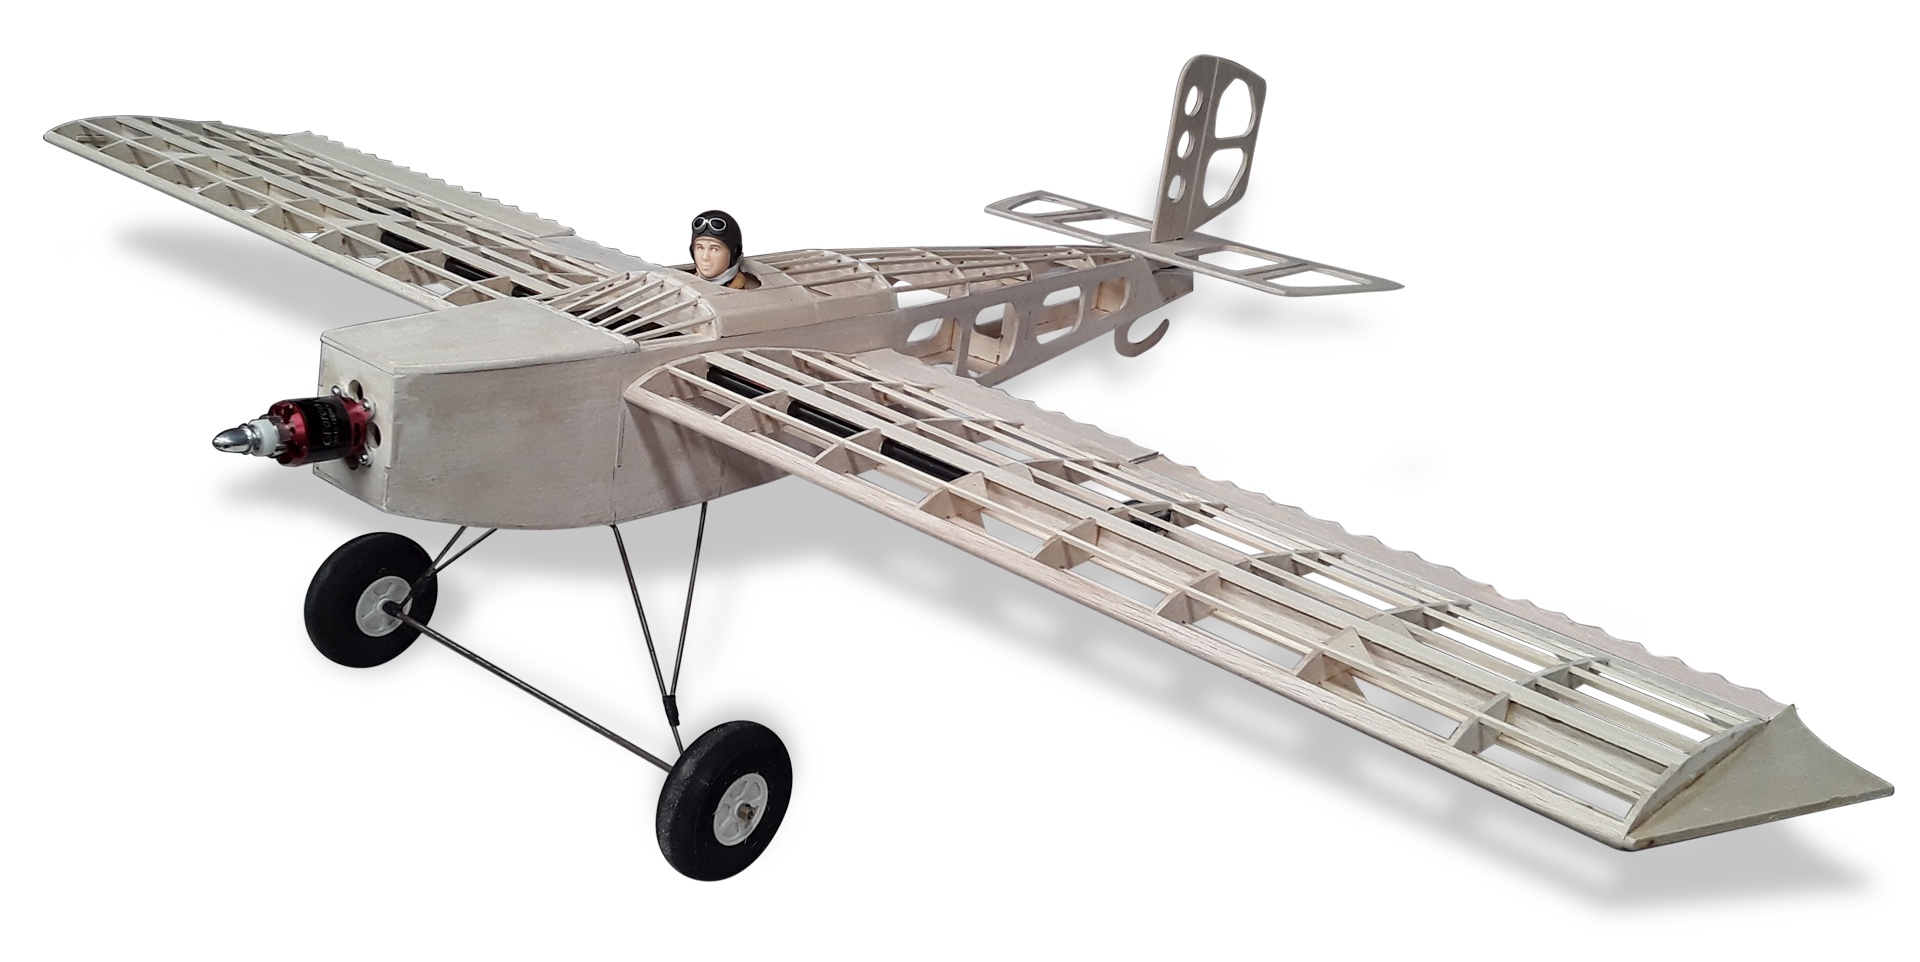
I ended up with this:
The plans and
cutting patterns for the Caudron M2 are available in PDF format.
Right click on this
link then "save the link target as..." (560
KB Zip file.)
Motor : 3542-1200kV
Prop: 10x5
Battery: Li-Po 4S 3600 mAh
ESC: 60A with BEC 5V/5A
One of my friends on RC Groups noted that I’d
taken a fairly complicated airframe and reduced it to a “tarted
up Ugly Stick” with a Cub wing and a simple turtle deck. Exactly!
My kind of build!
Even though this airframe is fairly easy to construct, I would
not recommend it for a novice builder’s 1st airplane. It still
has some challenges.
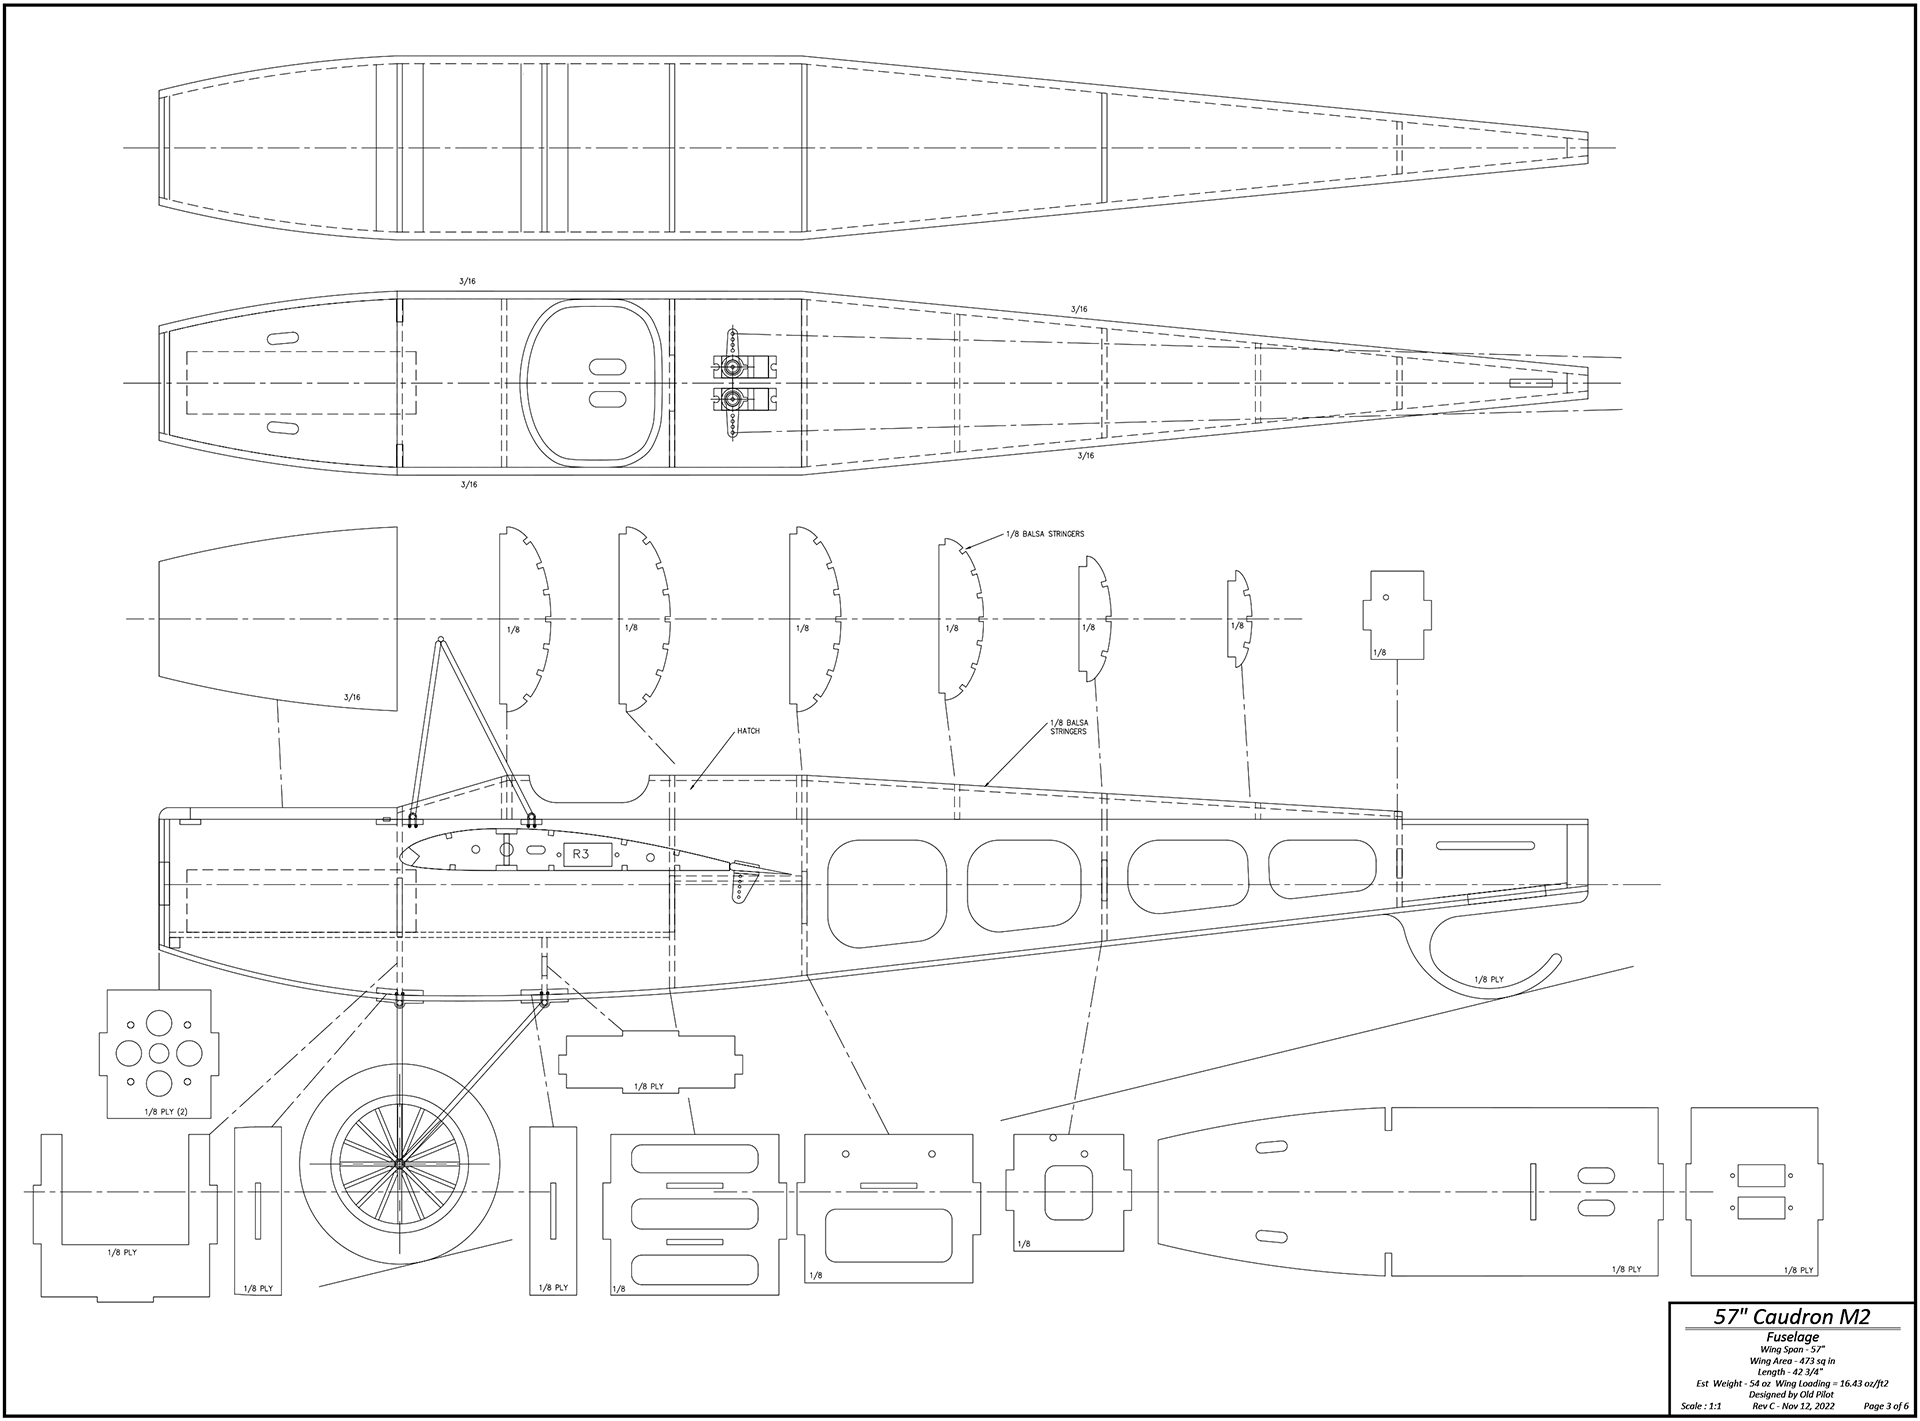
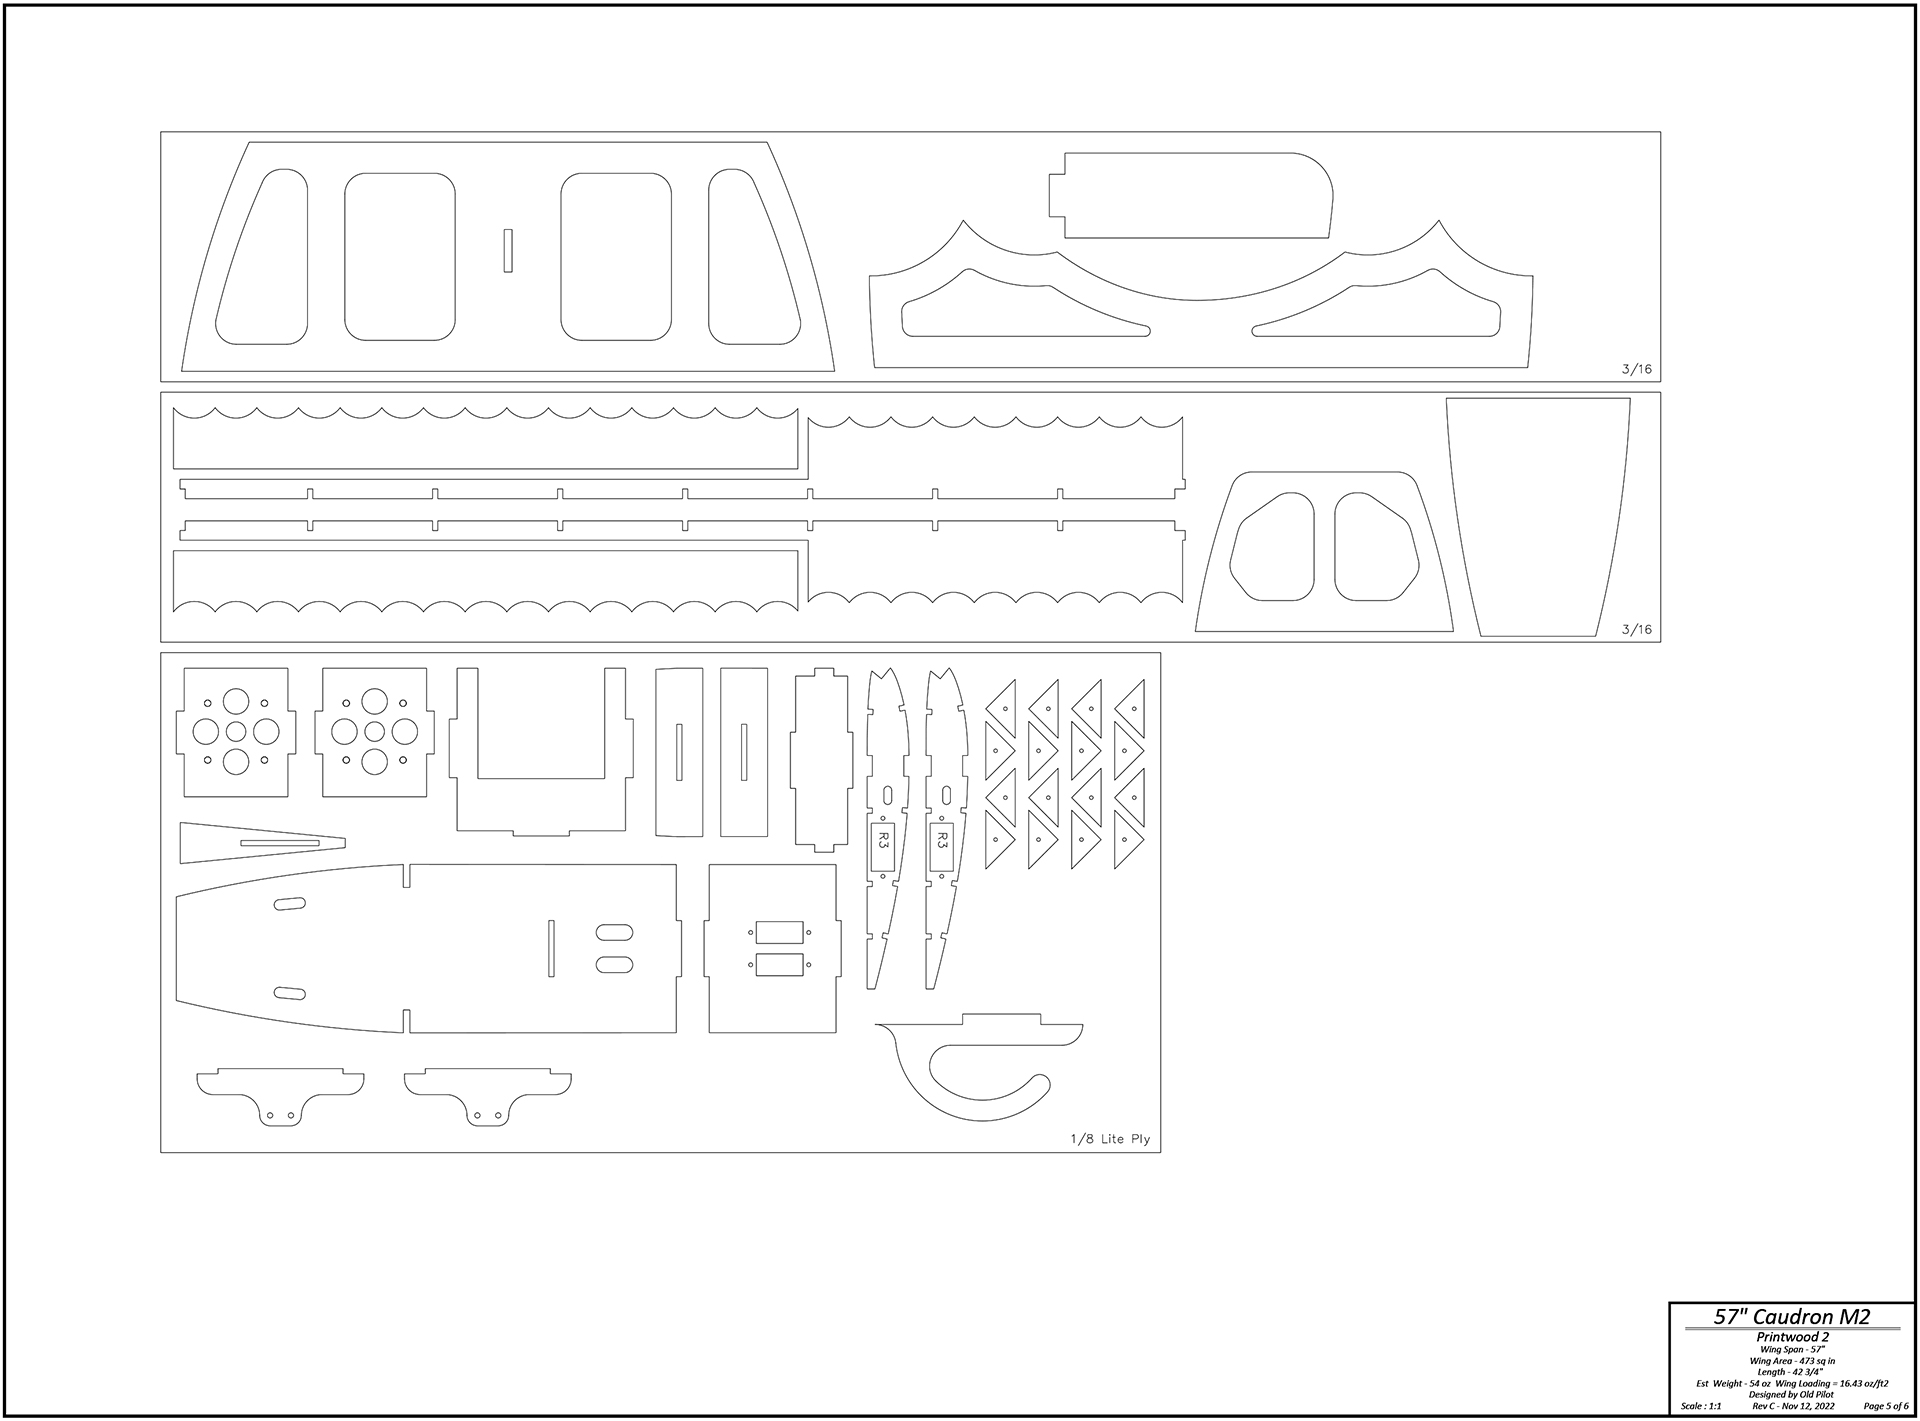
The next step was developing the detailed drawings of the assembly
and piece parts. The drawings are available for download from this
site. Please note that all the drawings are printed on Arch E size
(48x36) at 1:1 scale. Only the general arrangement drawing is printed
to “fit”.
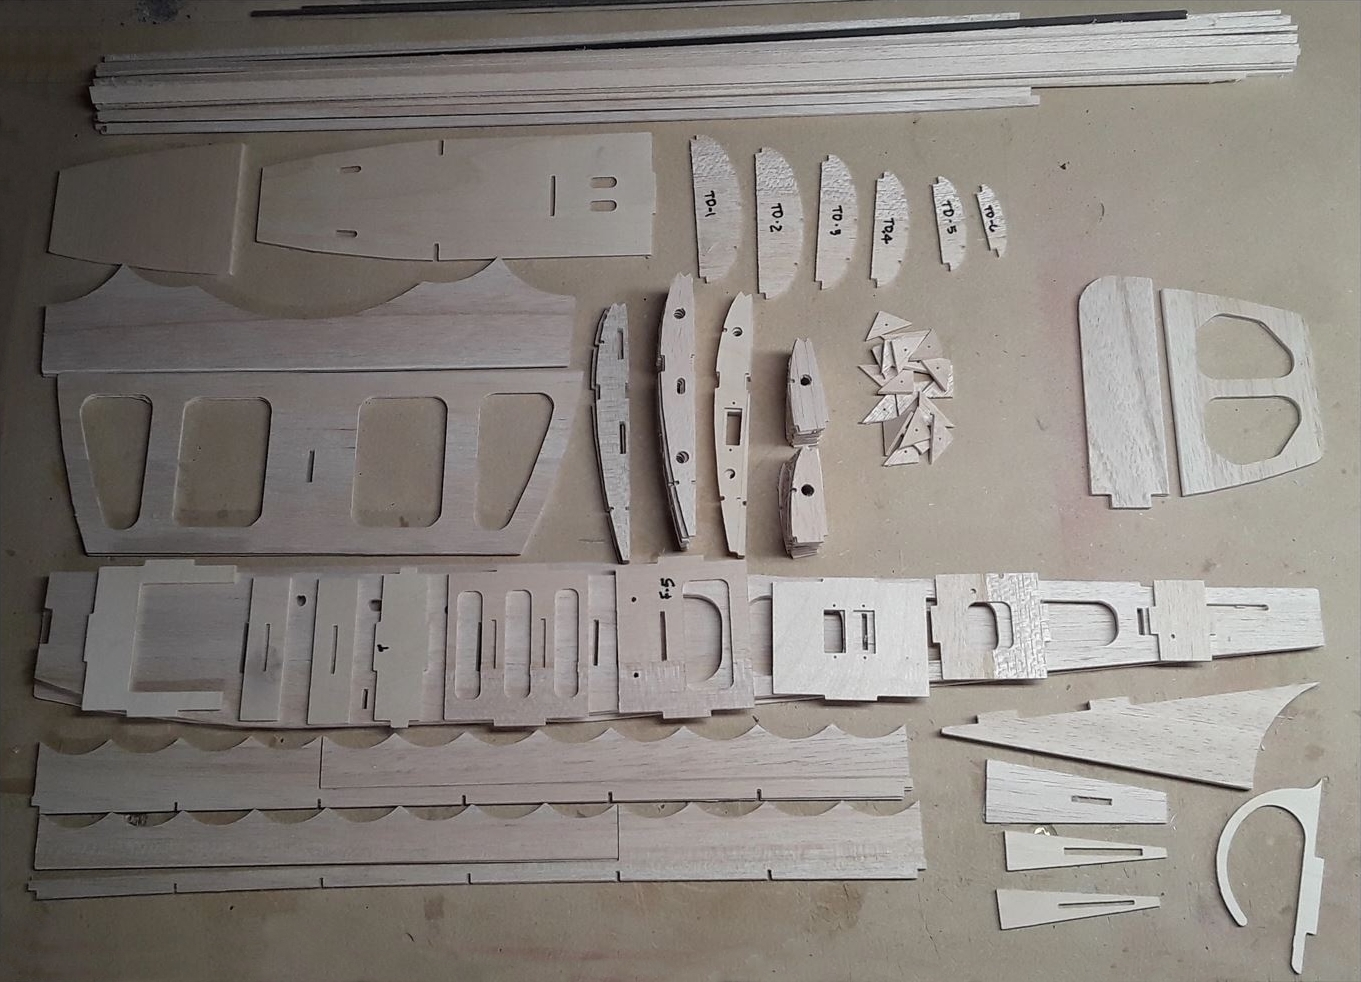
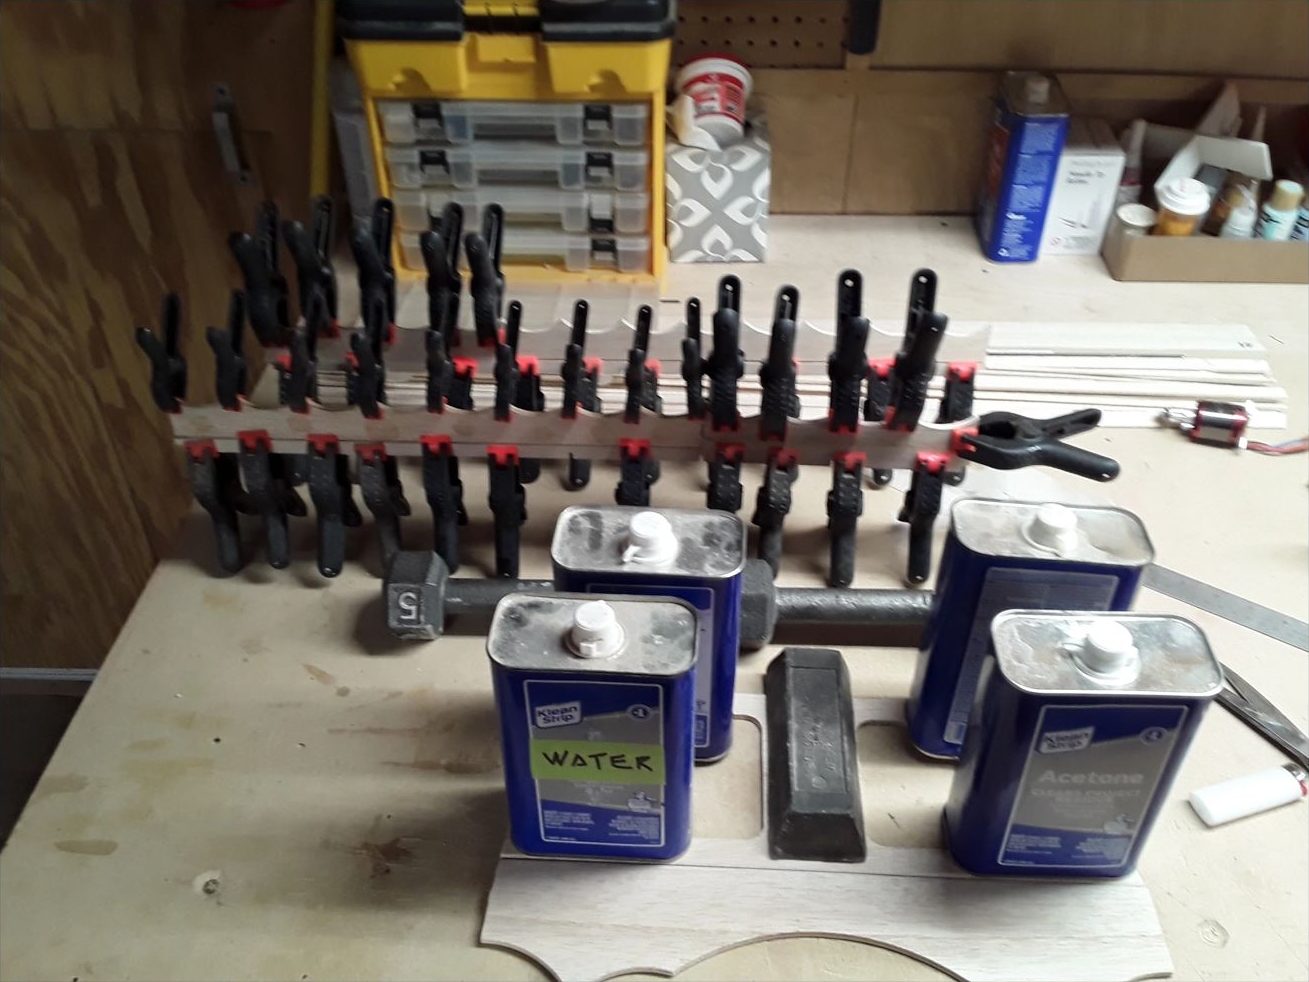
A milling table saves time
on cutting parts.
Once all the parts are cut, it’s time to
build...
The "kit" is ready
for assembly.
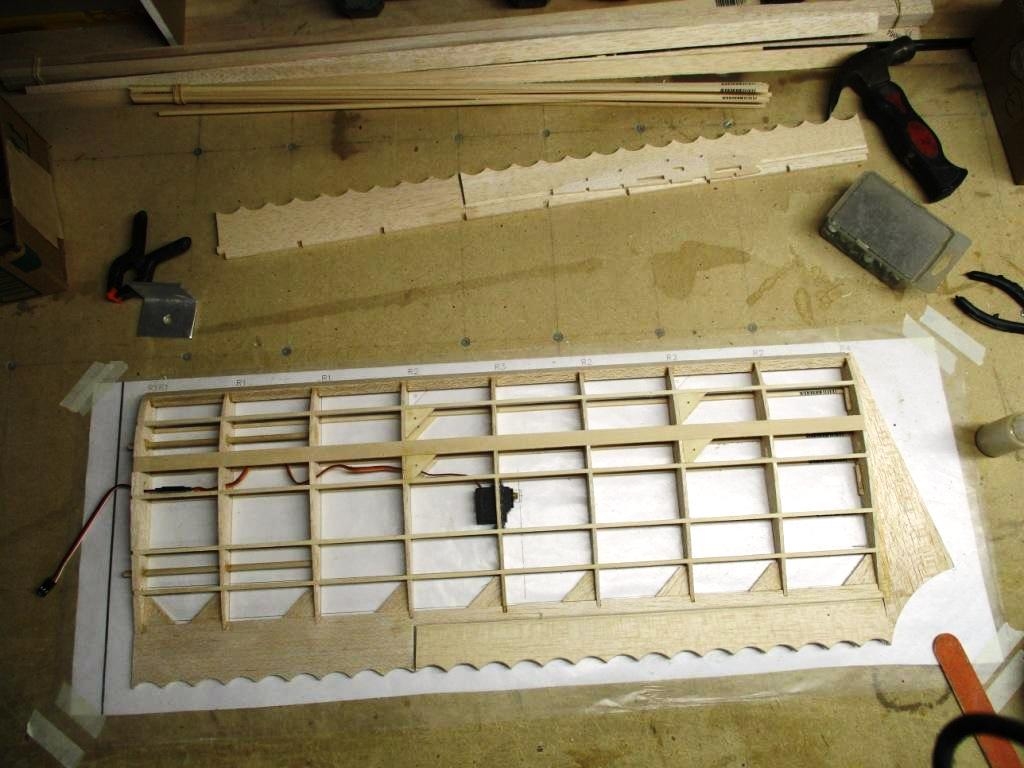
I always start with the wing and the tail feathers
followed by the fuselage. When I build a wing, I’ll tape the
appropriate wing half drawing down to my build board, cover it with
waxed paper and then position and pin the bottom spar cap. Then
I locate and glue the ribs in place, making sure each piece is square
and plumb, then the shear webs, and then the top spar cap. Leading
and trailing edges follow. Sheeting the leading and trailing portions
of the wing adds torsional stability. I used secondary stringers
for this wing. Repeat for the other wing half. Then I’ll install
the wing servos and route the wiring. I’m old school, so I
sew all my flight control hinges.
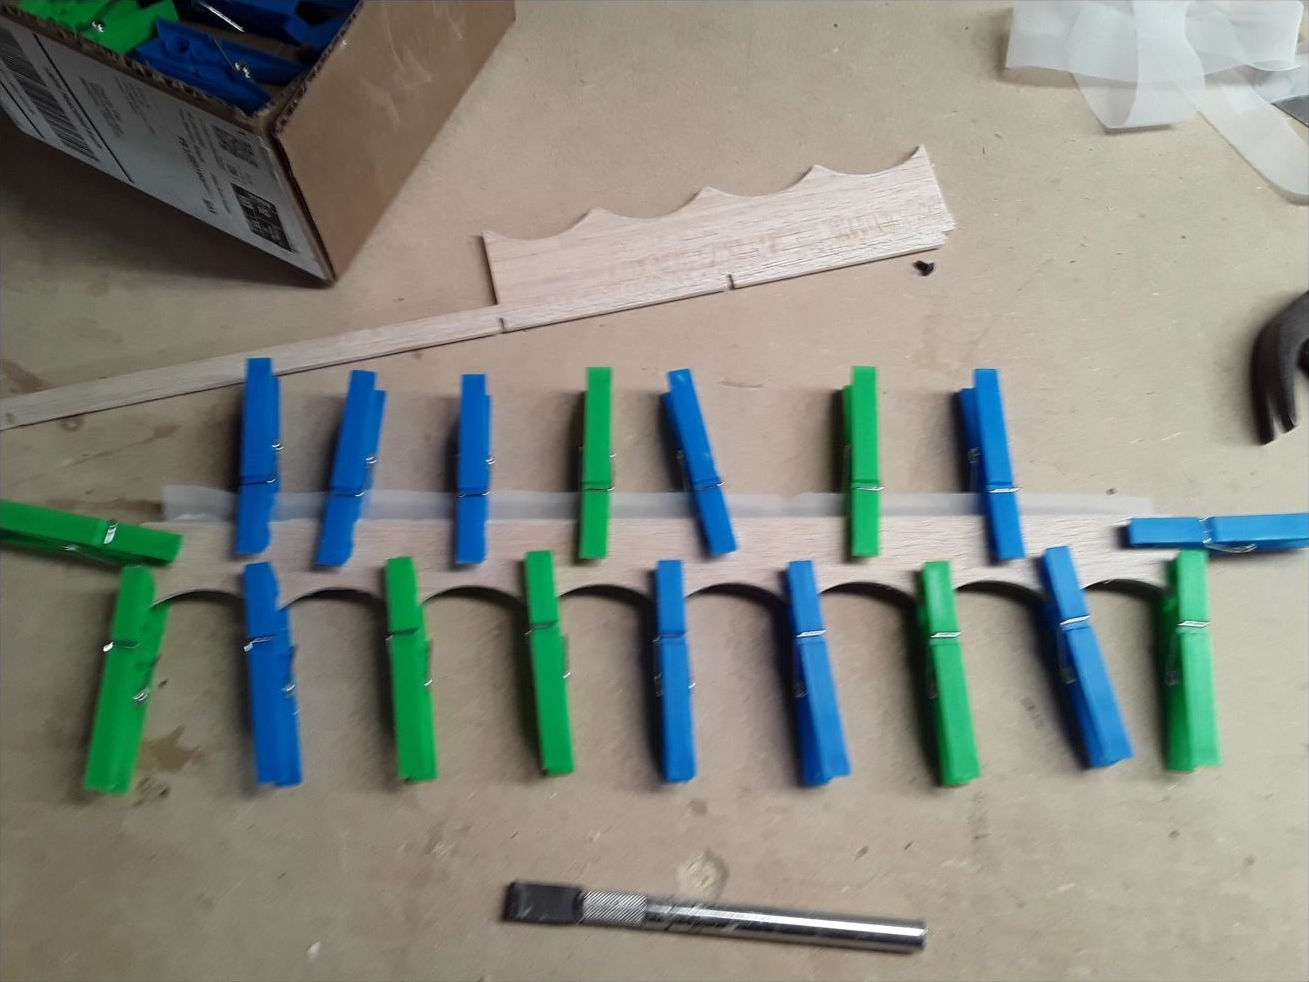
Assembling the
rounded cut trailing edges.
Wings and tails assembled.
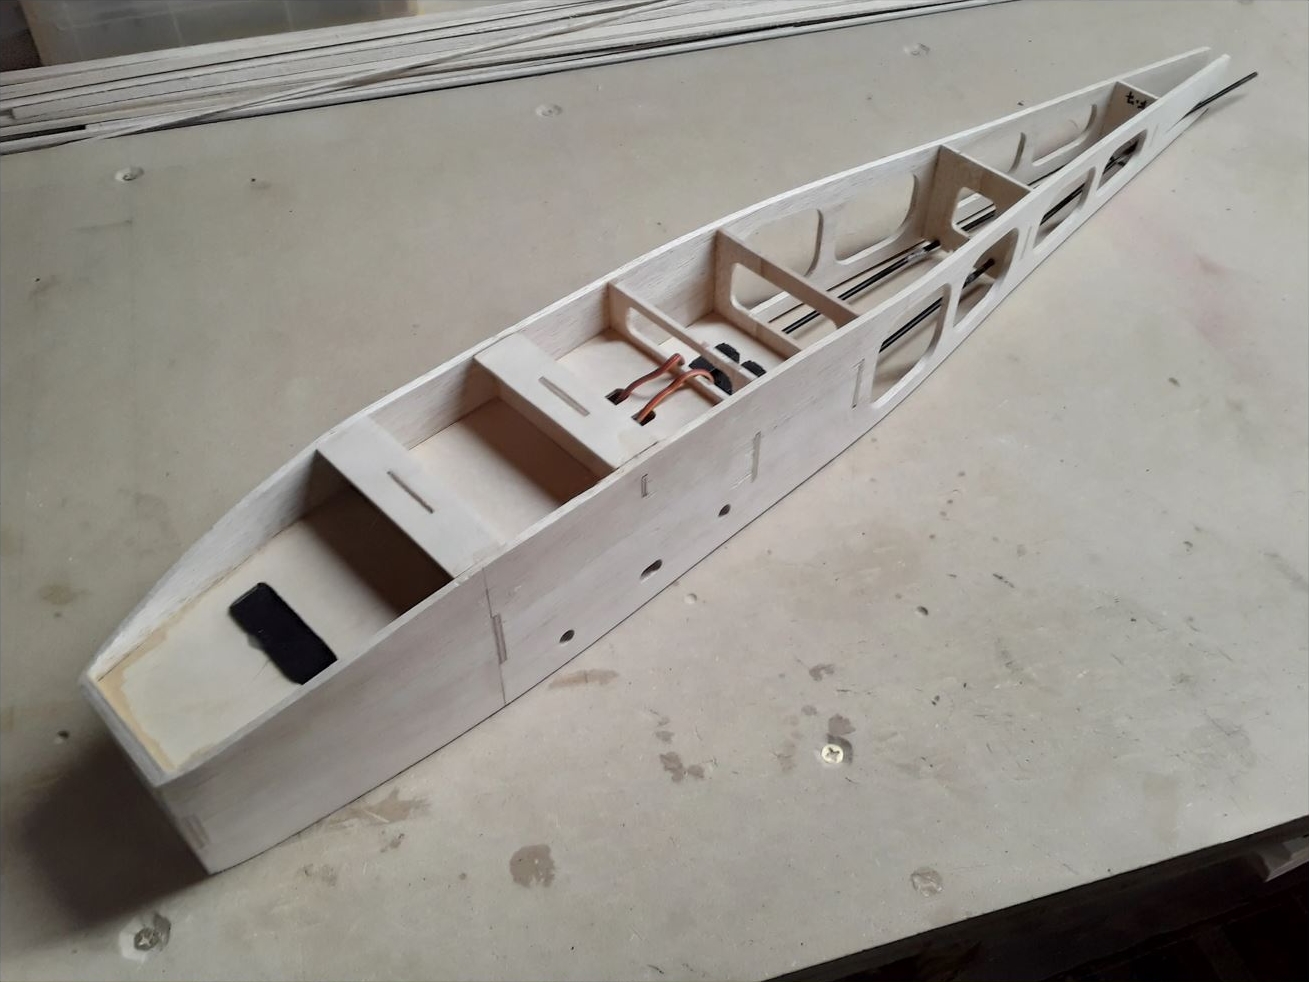
I use the tab-in-slot method for slab type fuselages
to ensure alignment, but T-pins and cribbing will also work. I always
leave the top of the aft fuse until last. It makes it easier to
route the push rods from the servos, through the formers, to the
elevator and rudder..
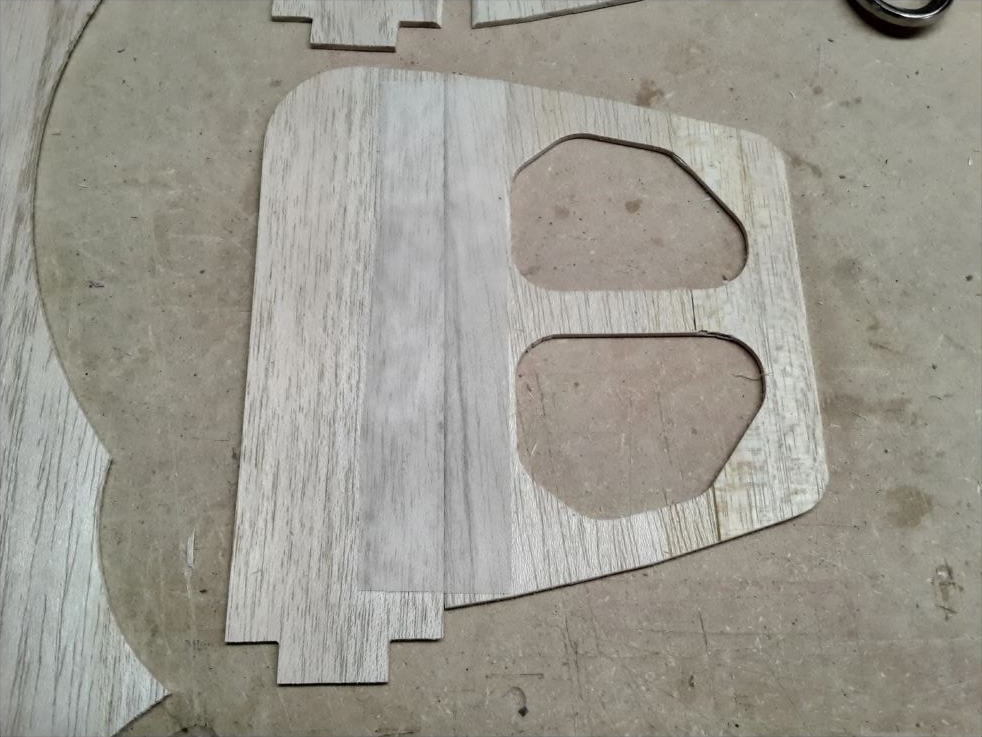
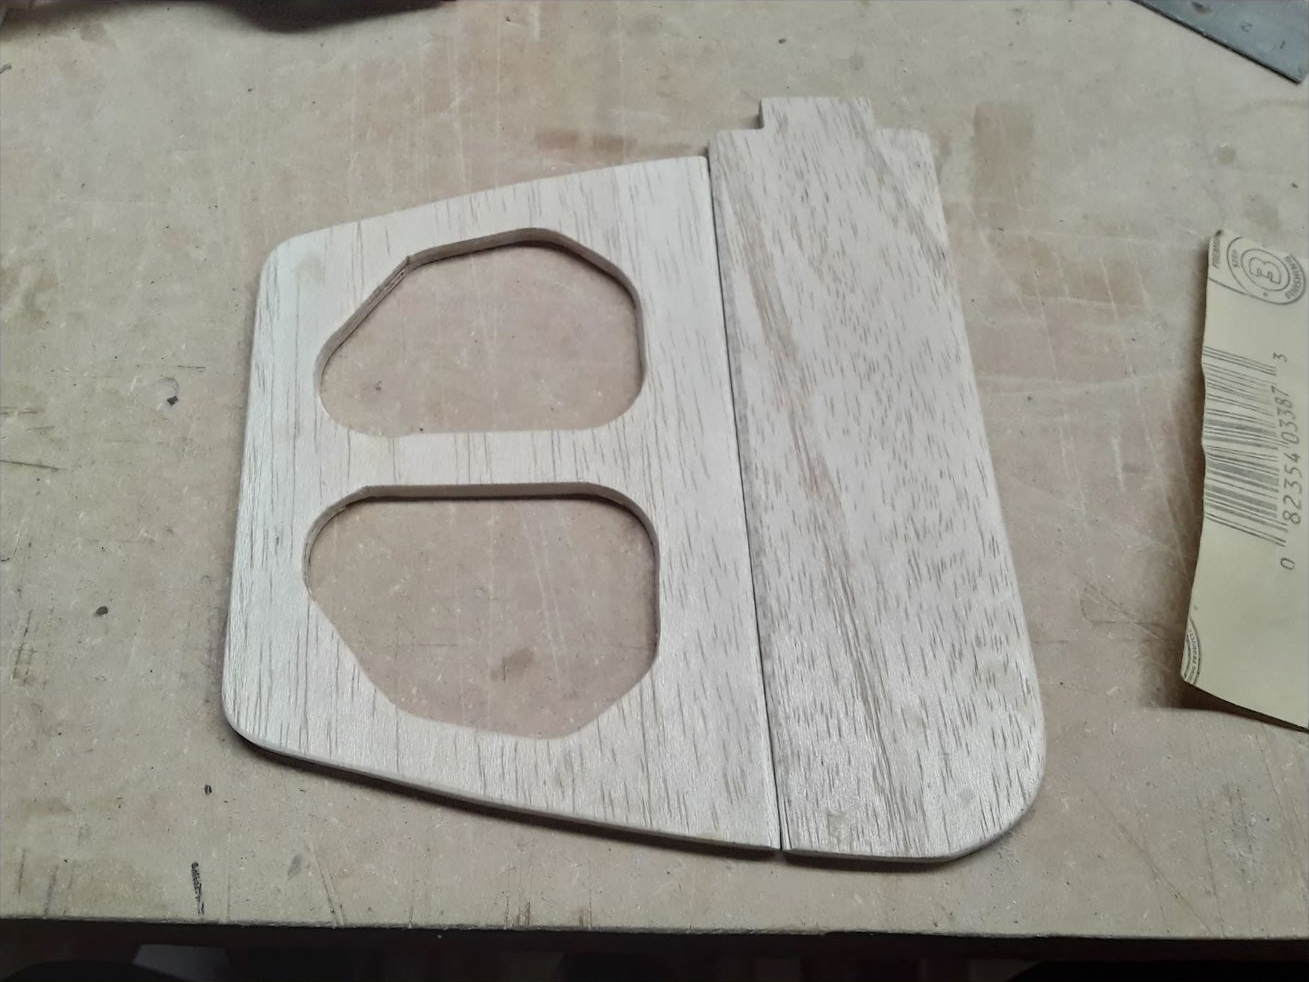
Manufacturing
of the fuselage. The openwork sides are mortised so that couples
can slip into them.
The fuselage is
a fairly simple body.
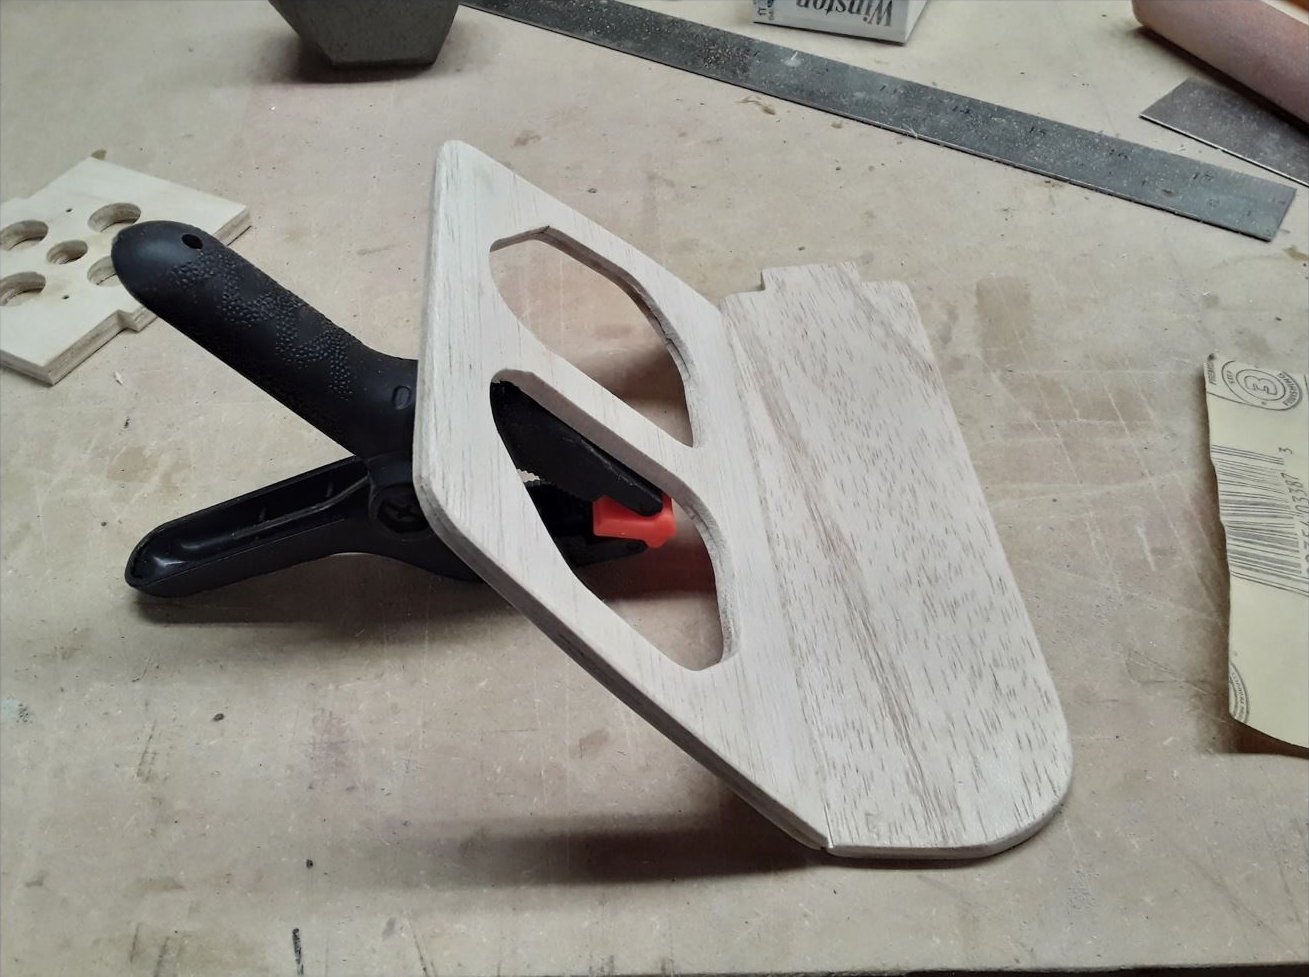
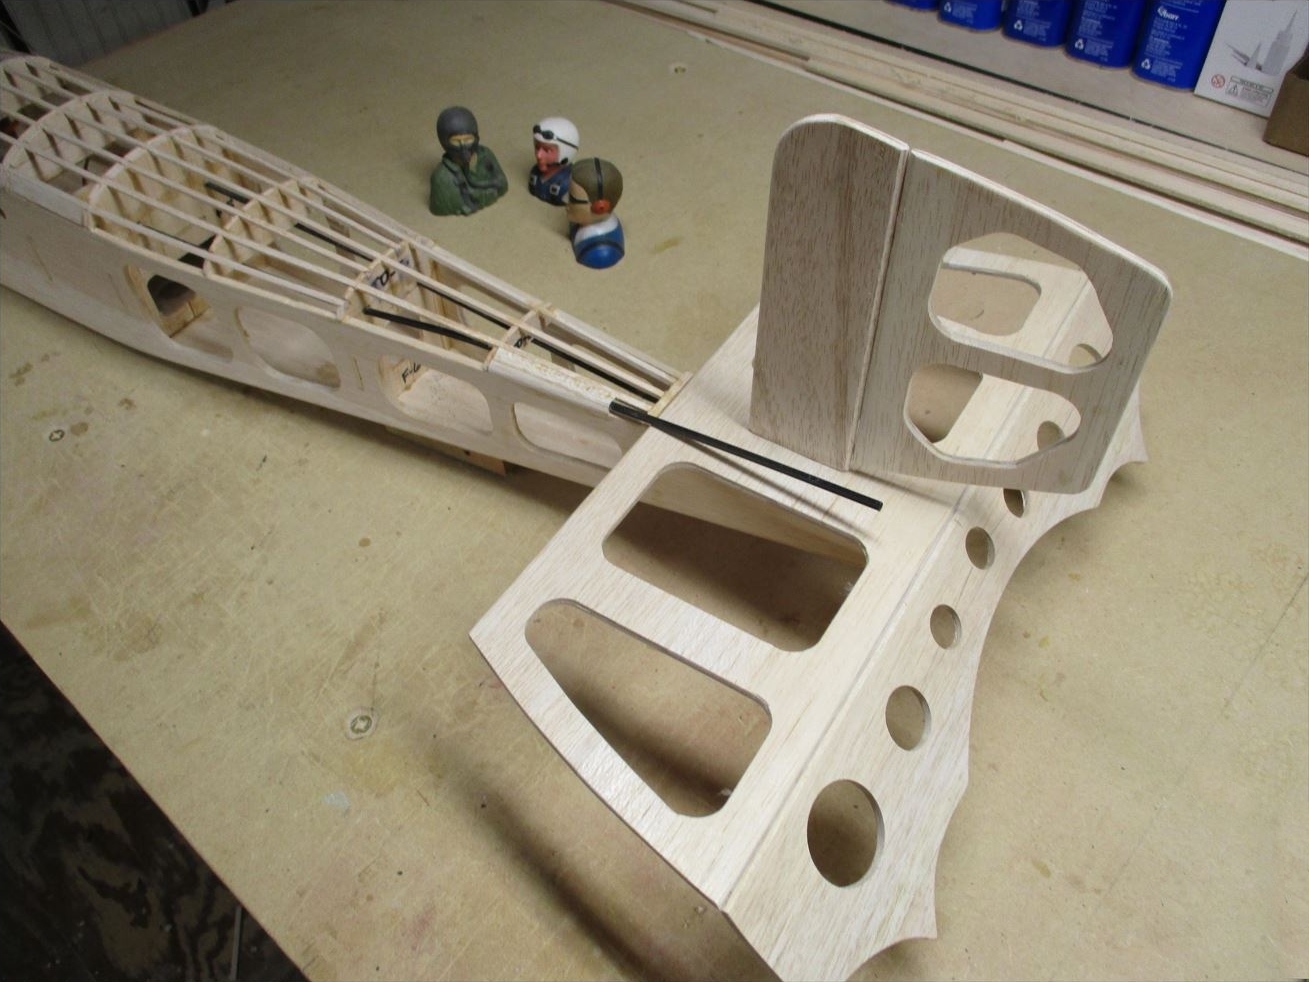
You can see how the tab-in-slot method simplifies
the fuselage assembly. My supervisors approve !
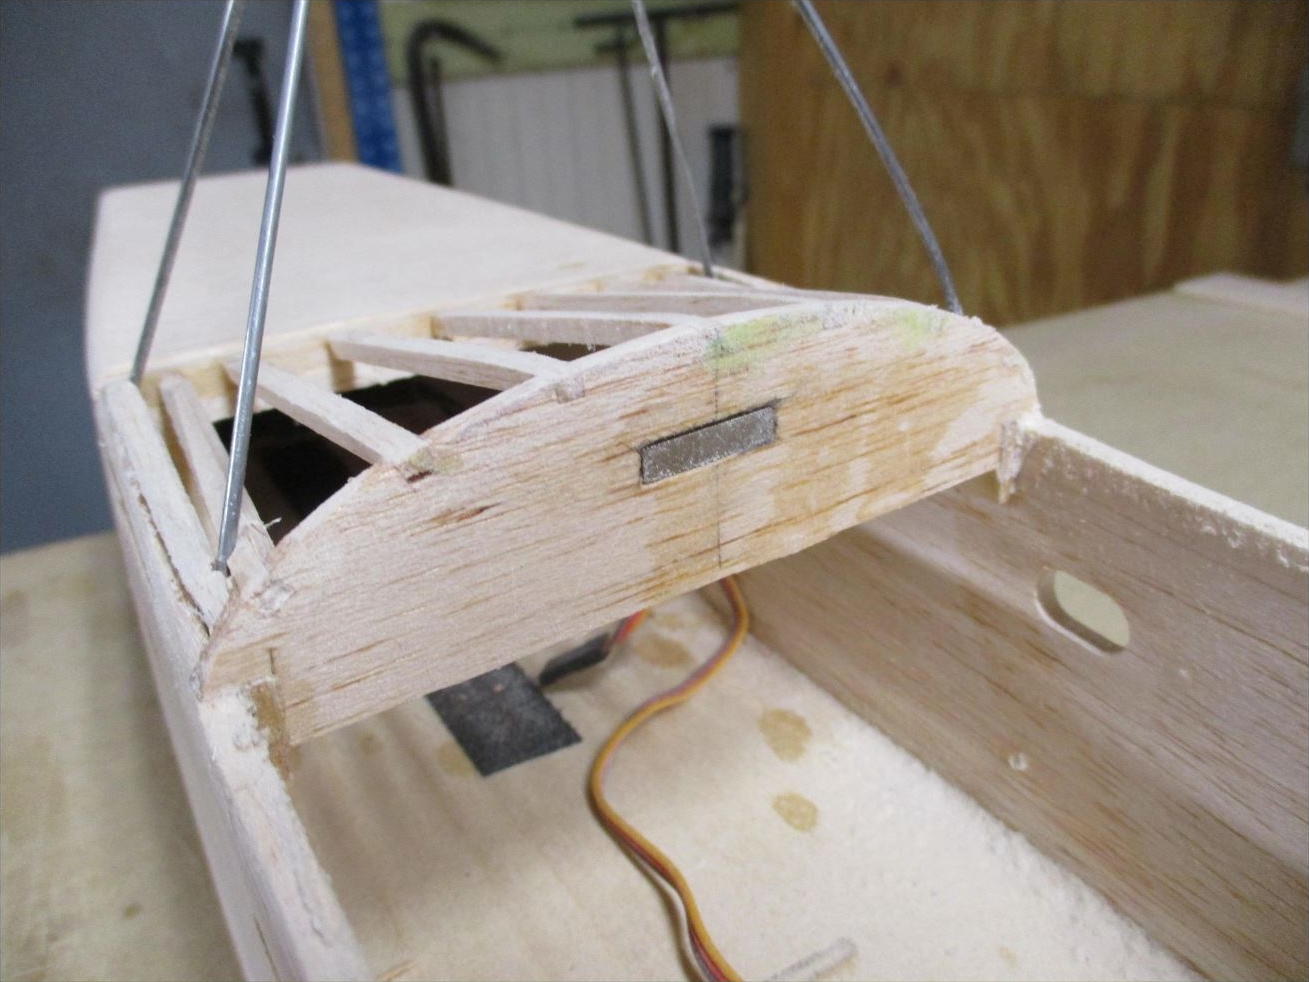
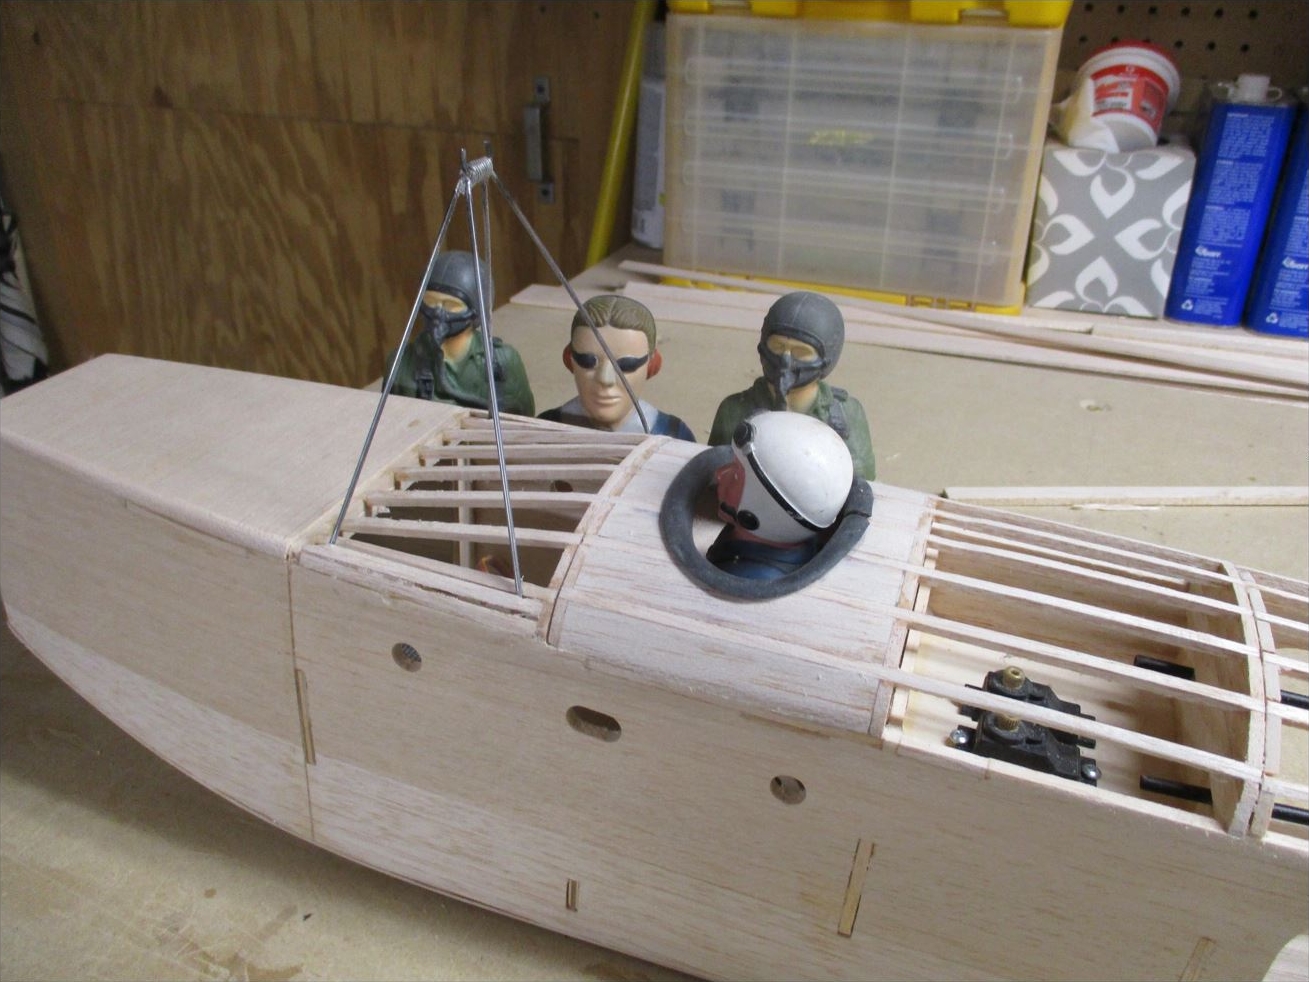
Once the fuselage is framed, I added the turtle deck, servo hatch/cockpit,
king post, and battery hatch.
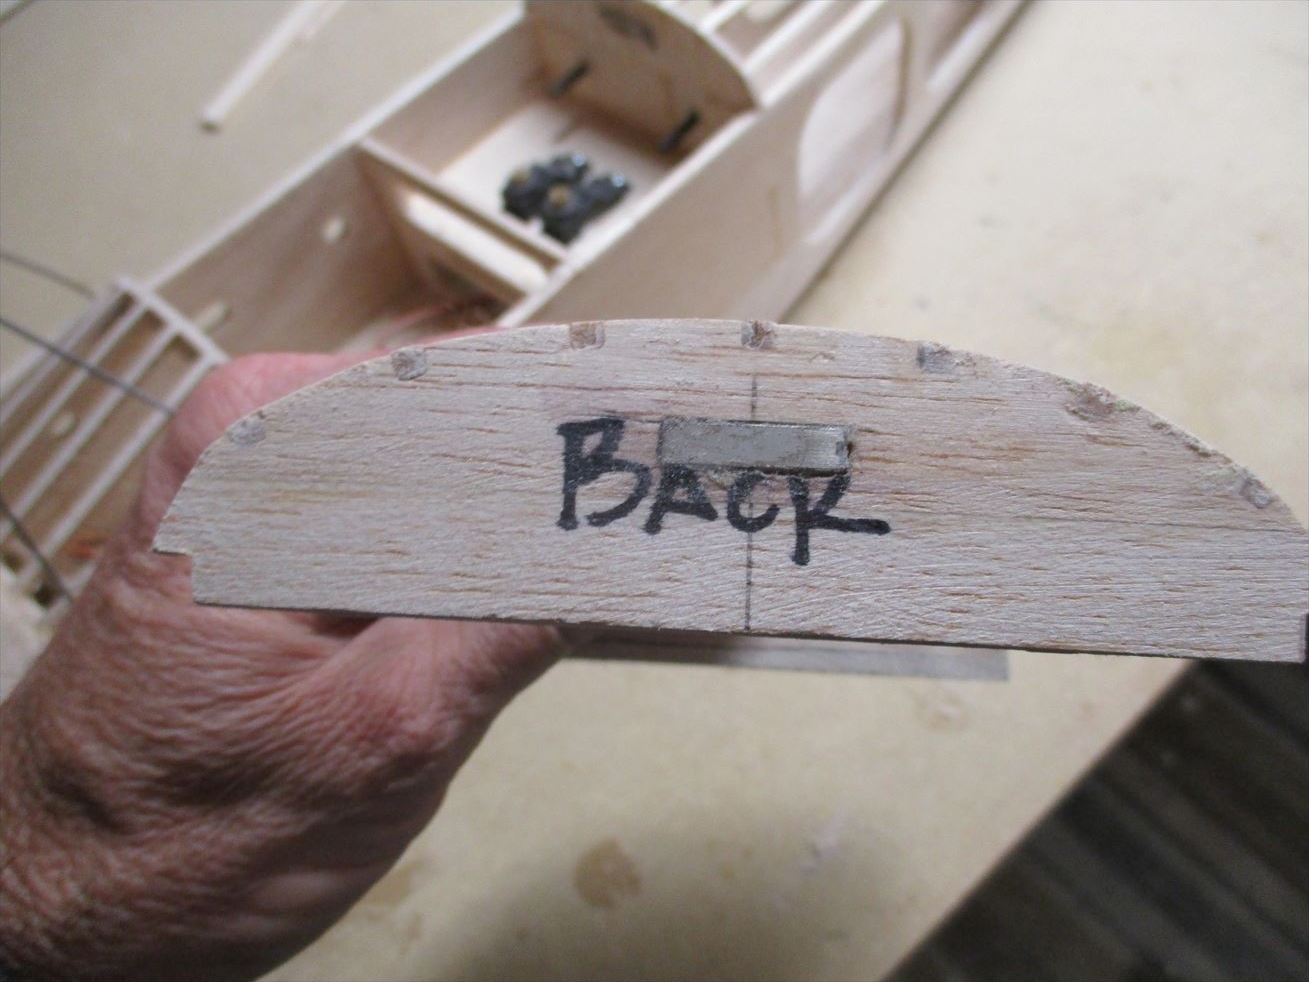
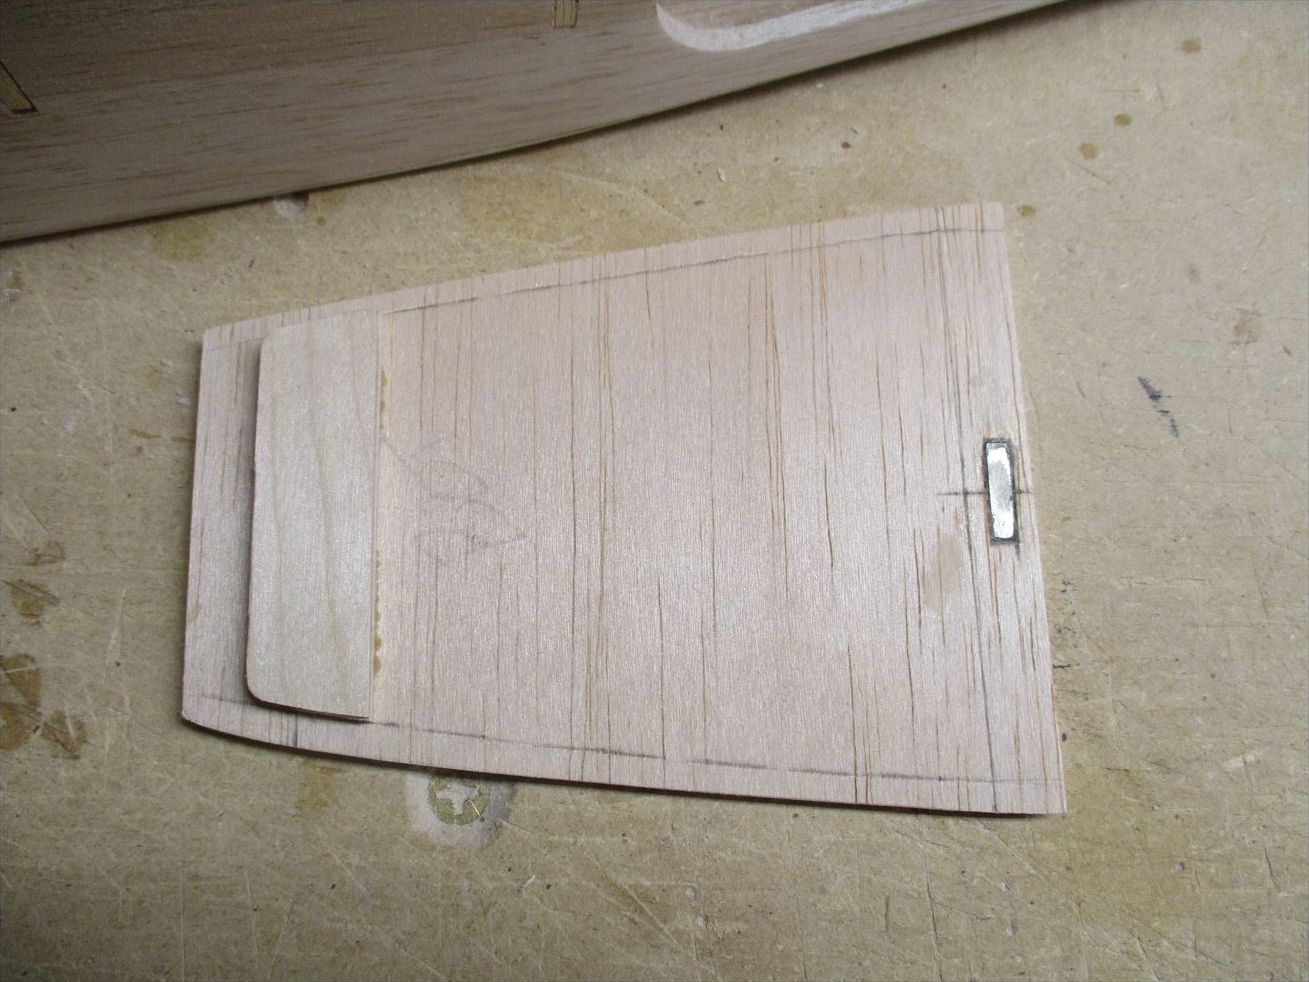
The cockpit is
removable to access the remote control equipment.
Fixing is ensured
by magnets.
The battery compartment
is at the very front. A ring of Velcro goes under the intermediate
floor.
The removable
front cover allows access to the battery.
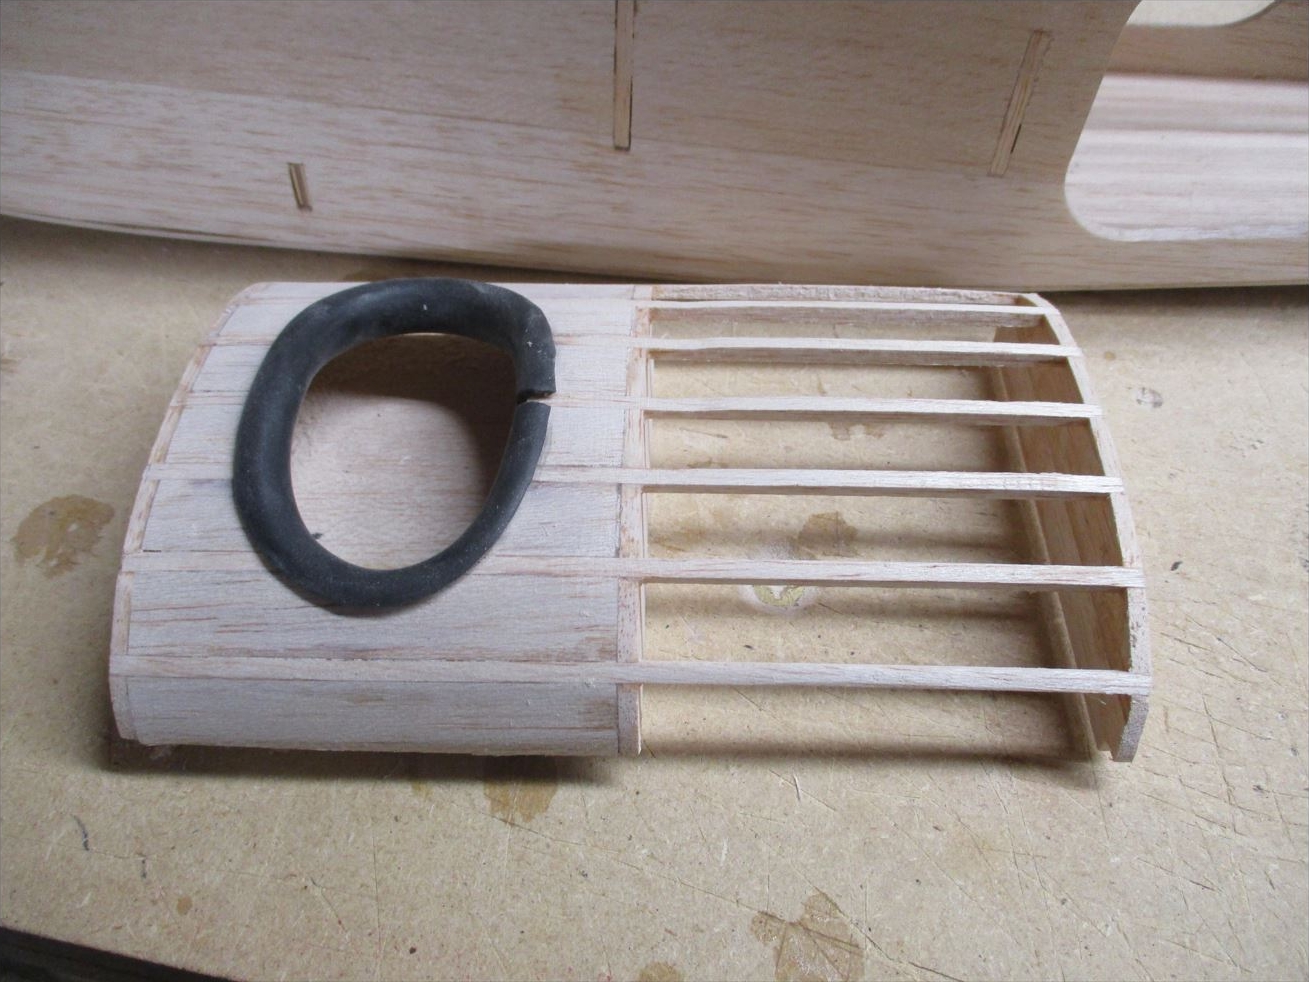
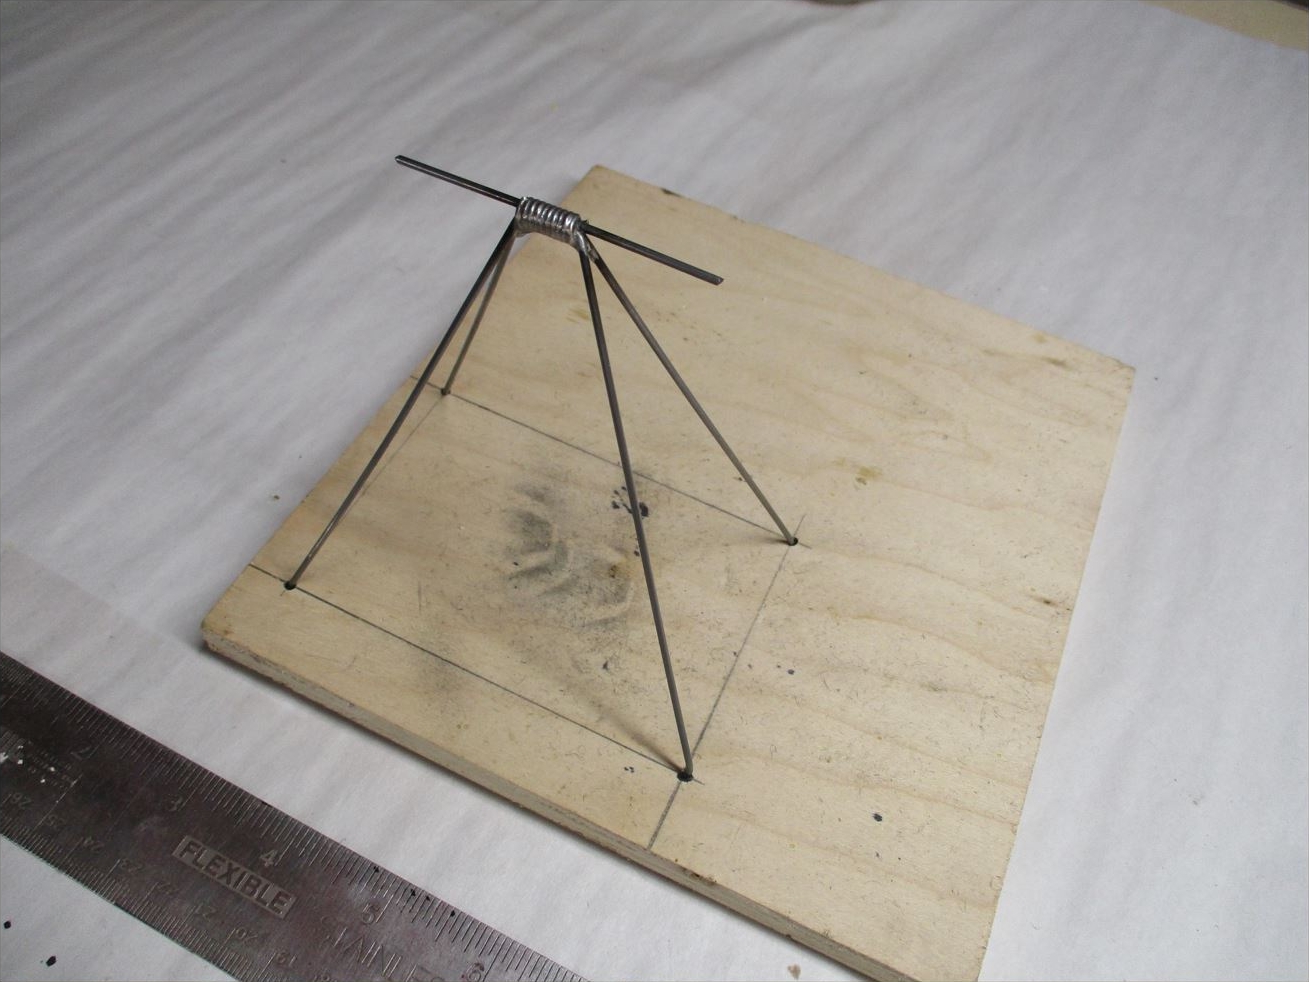
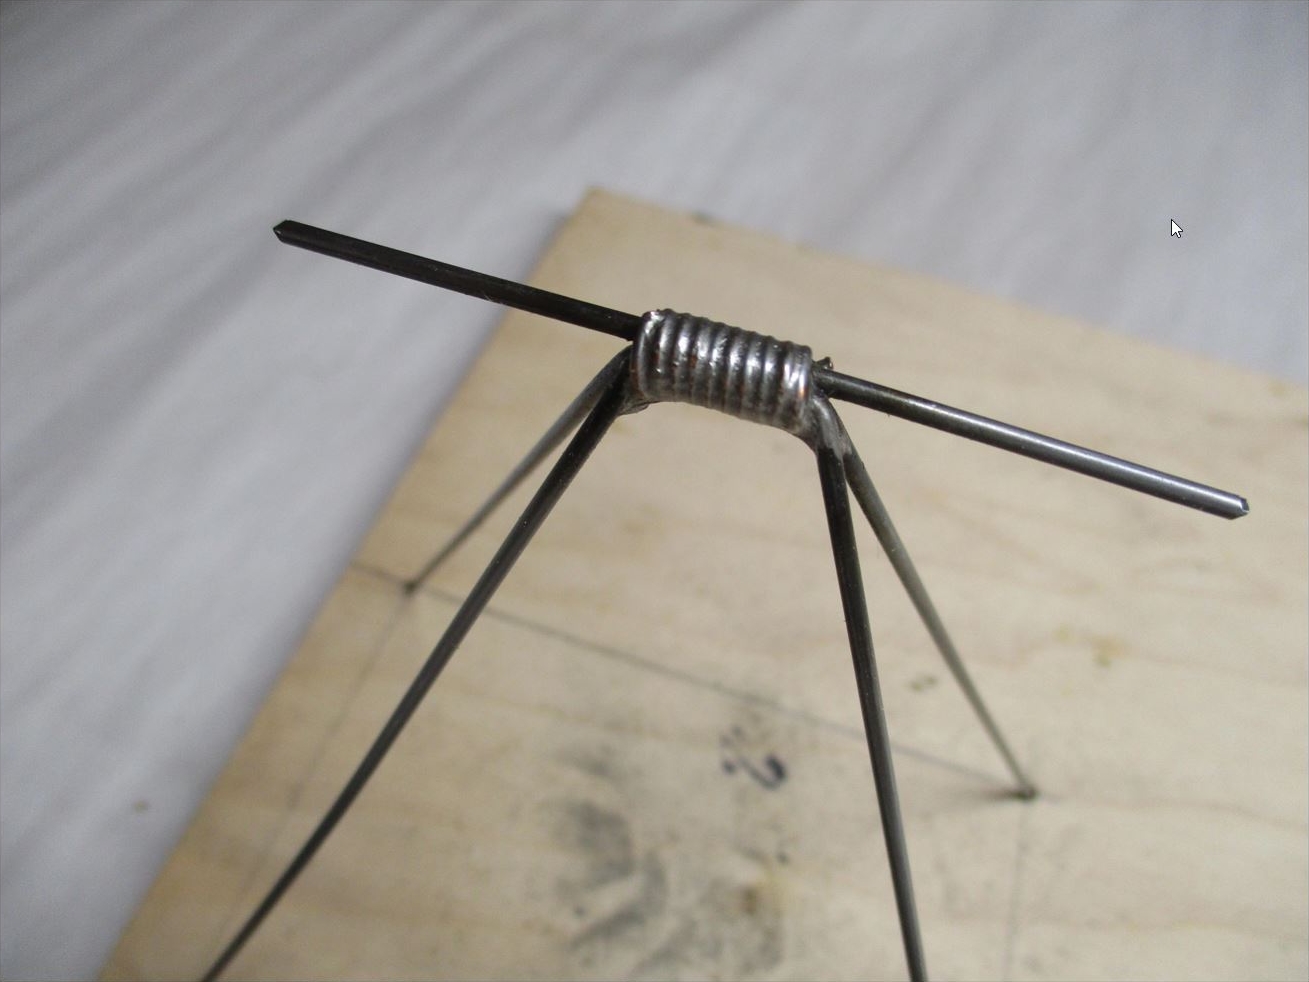
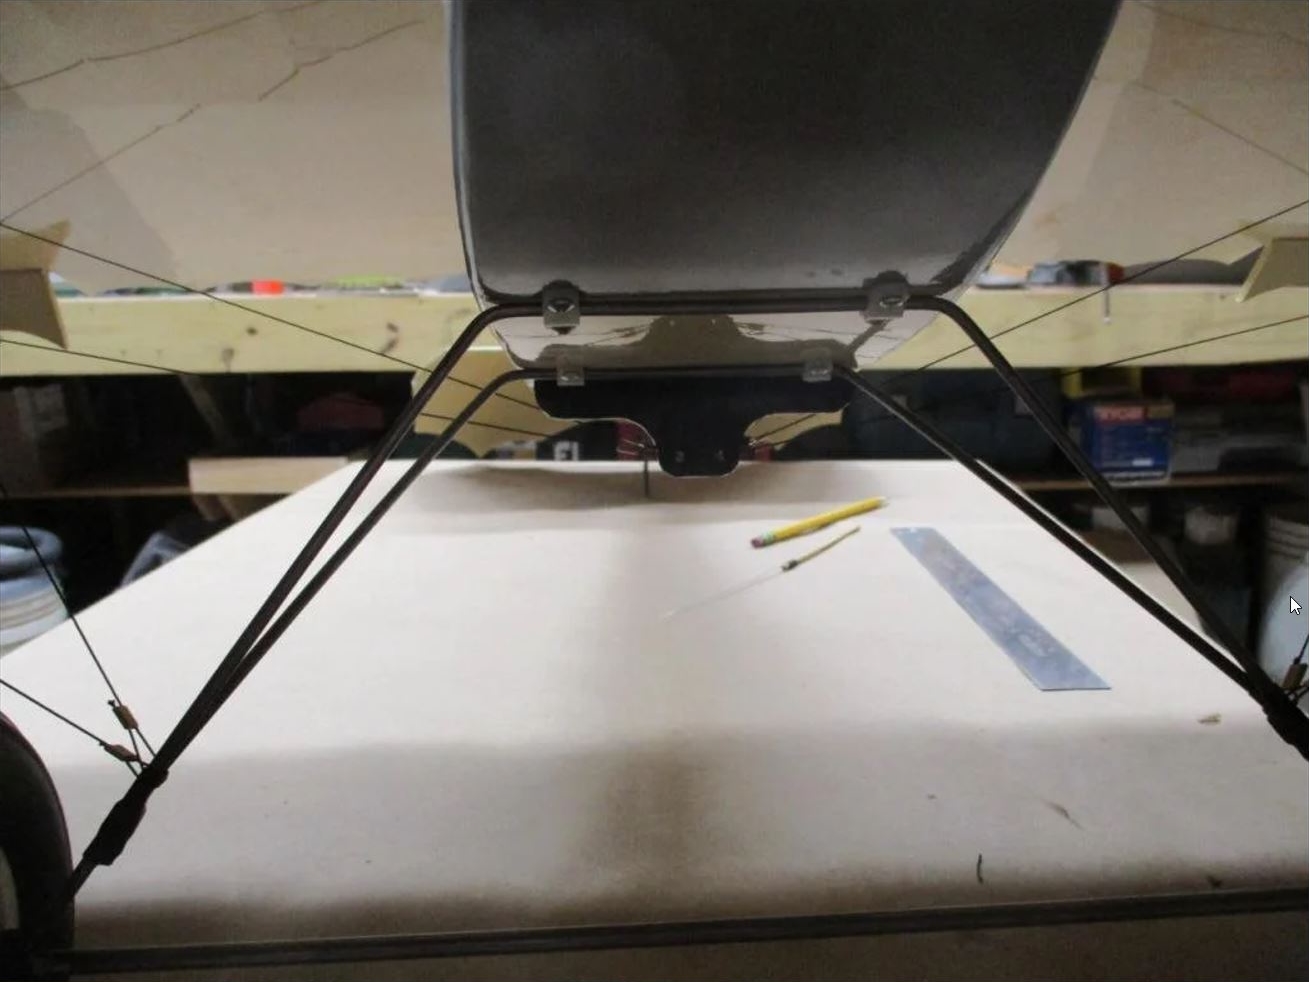
The cabin is made
of welded piano wire. A drilled template facilitates assembly.
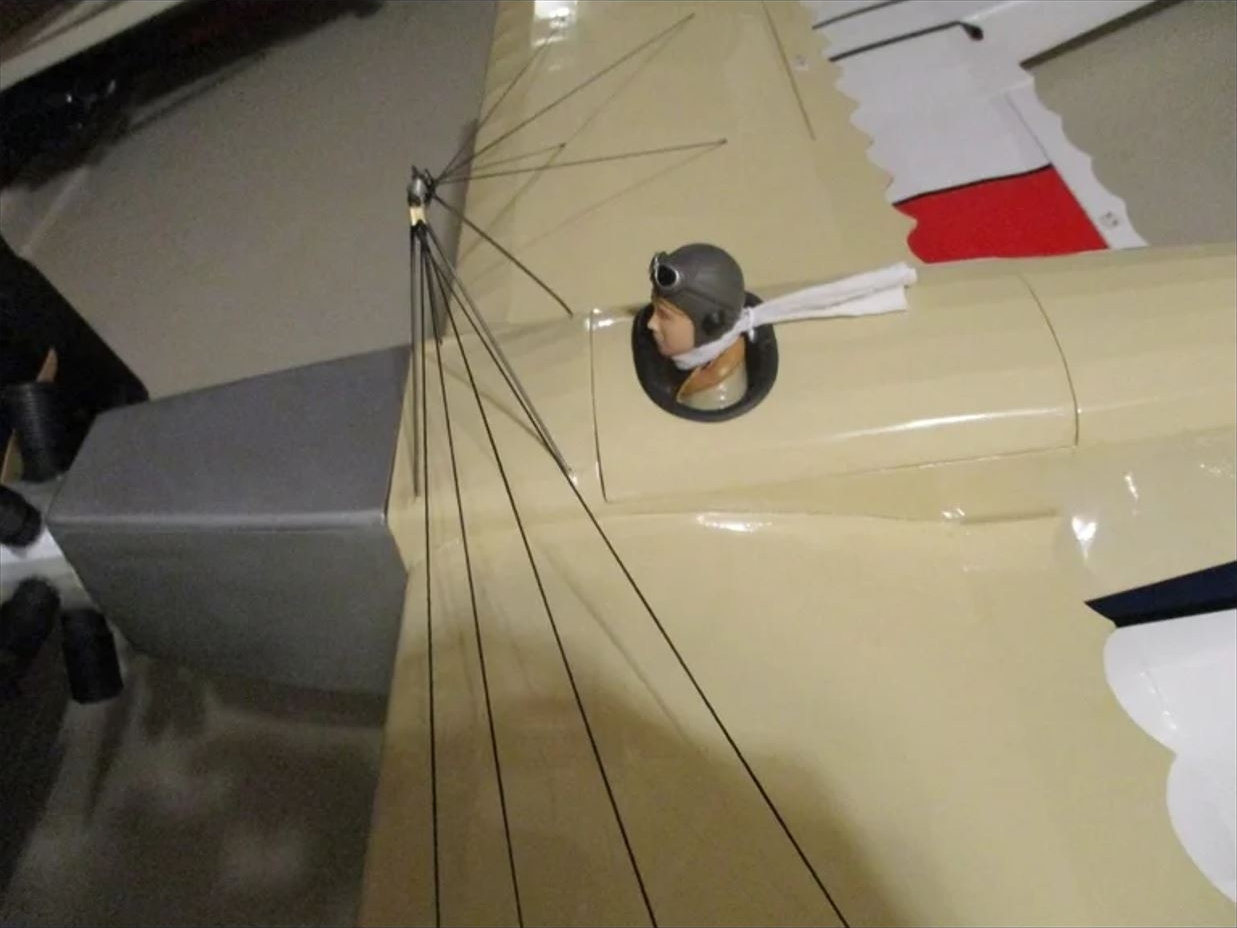
A pilot bust is essential
to add a touch of realism.
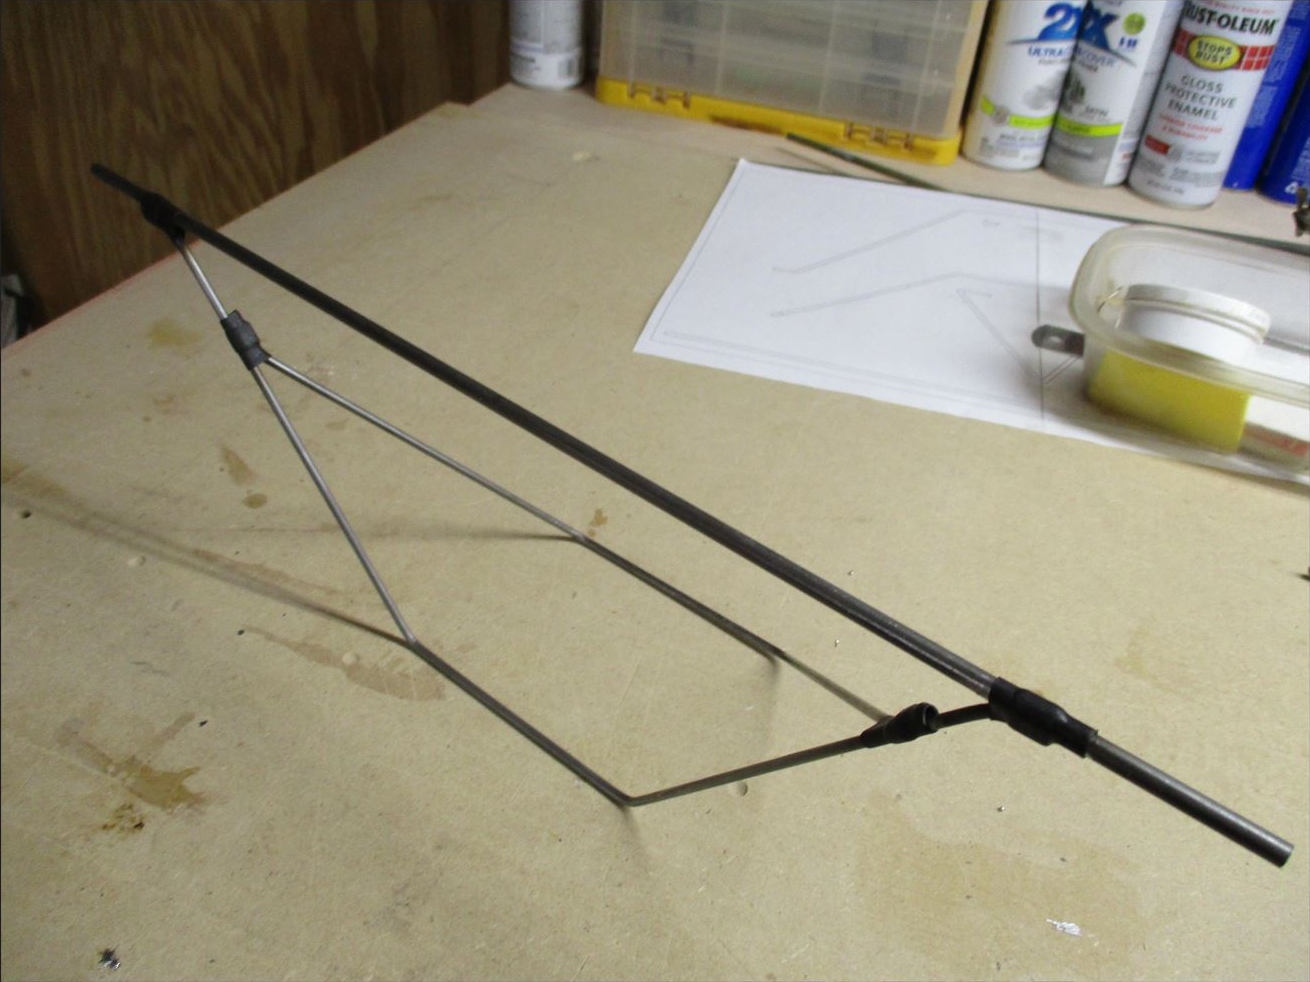
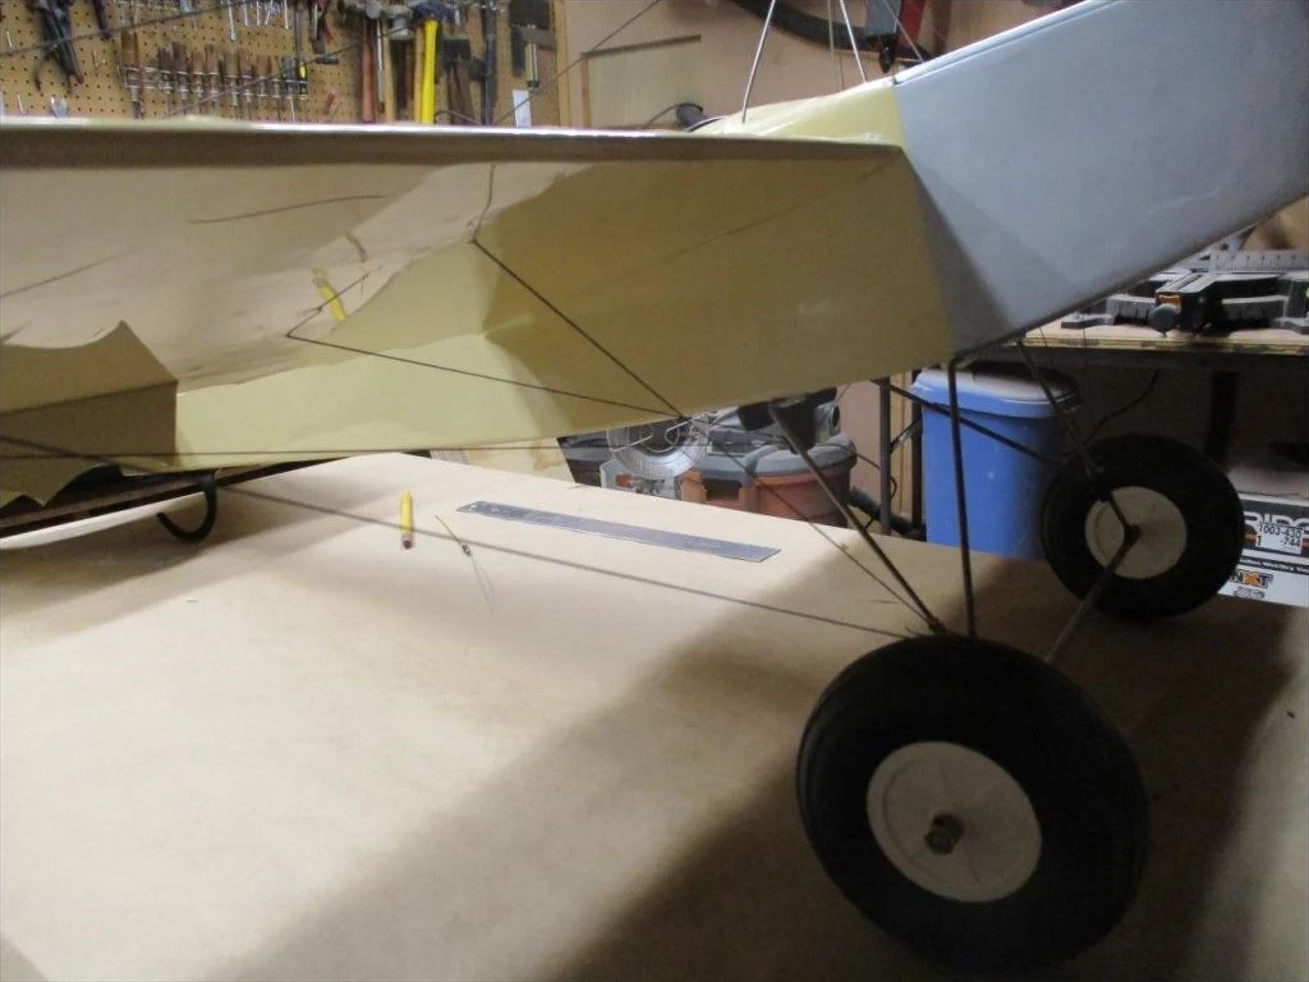
... followed by the landing gear wire...
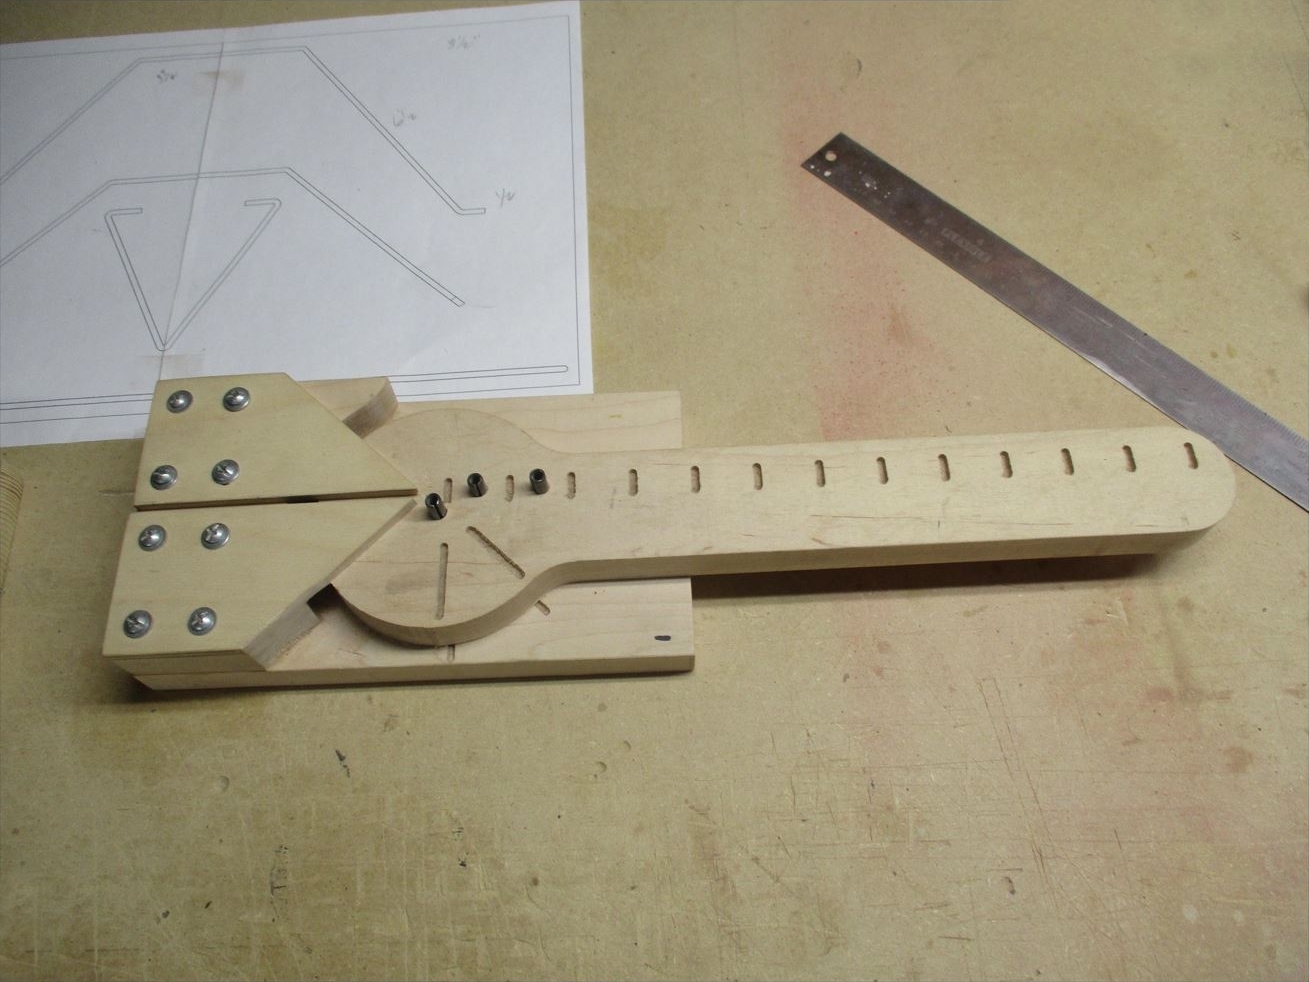
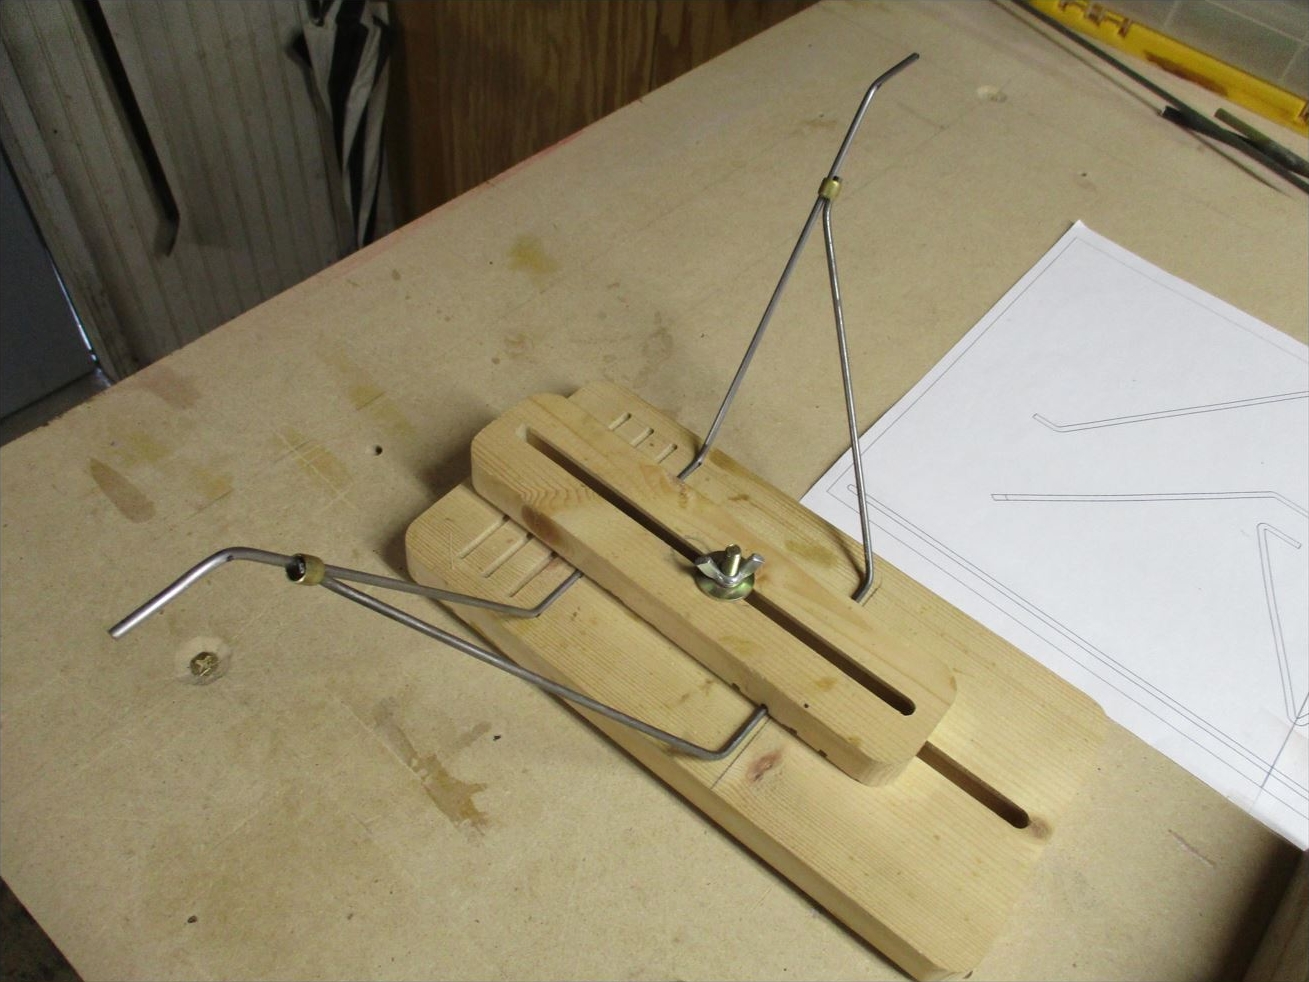
The landing gear
is made of piano wire shaped using a folding machine.
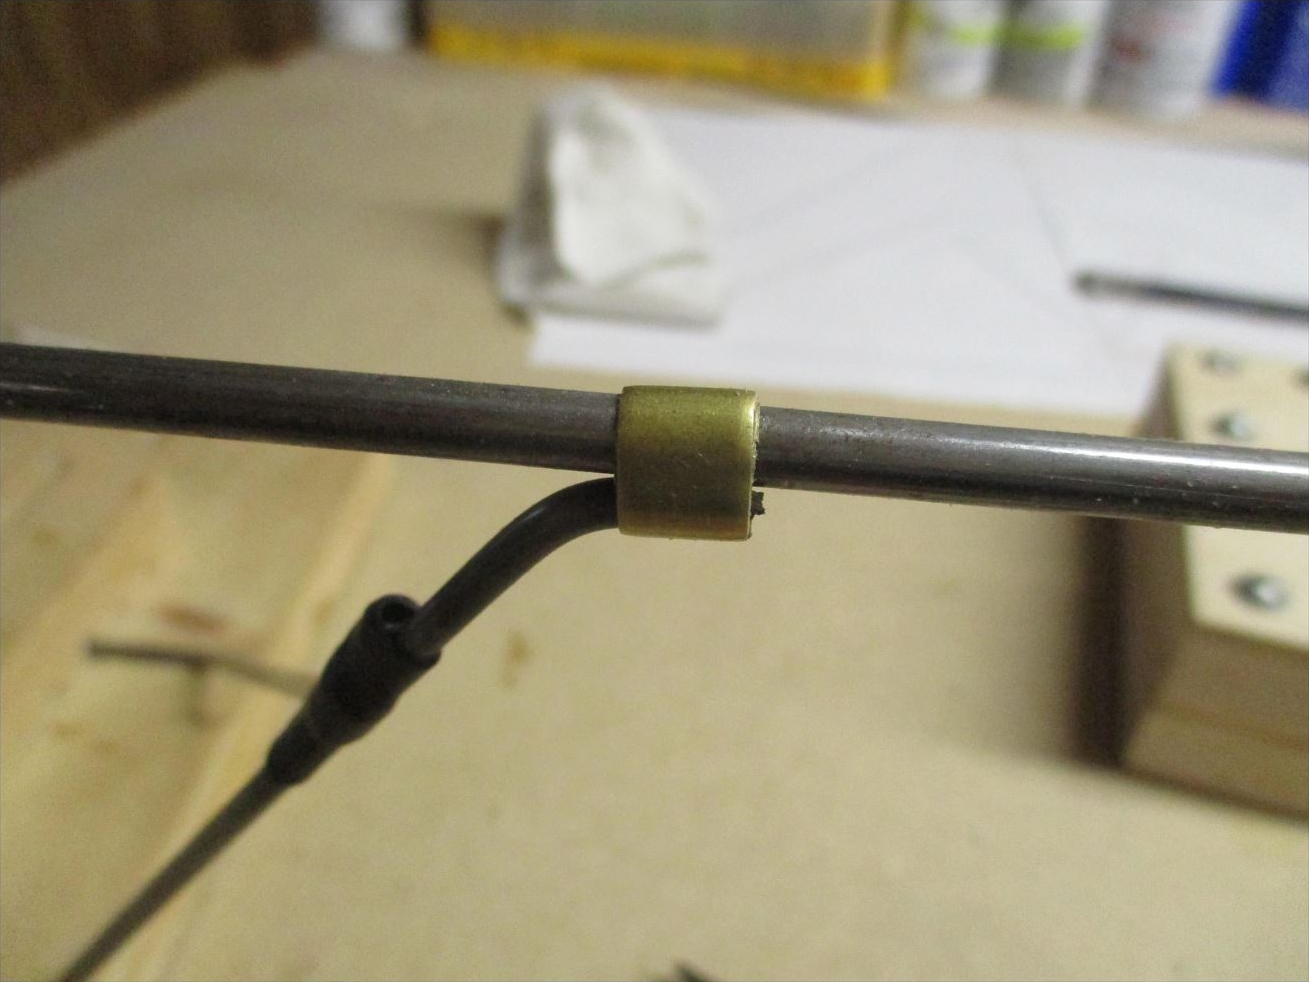
A section of ovalized
brass tube is used to bring together the different pieces
of piano wire.
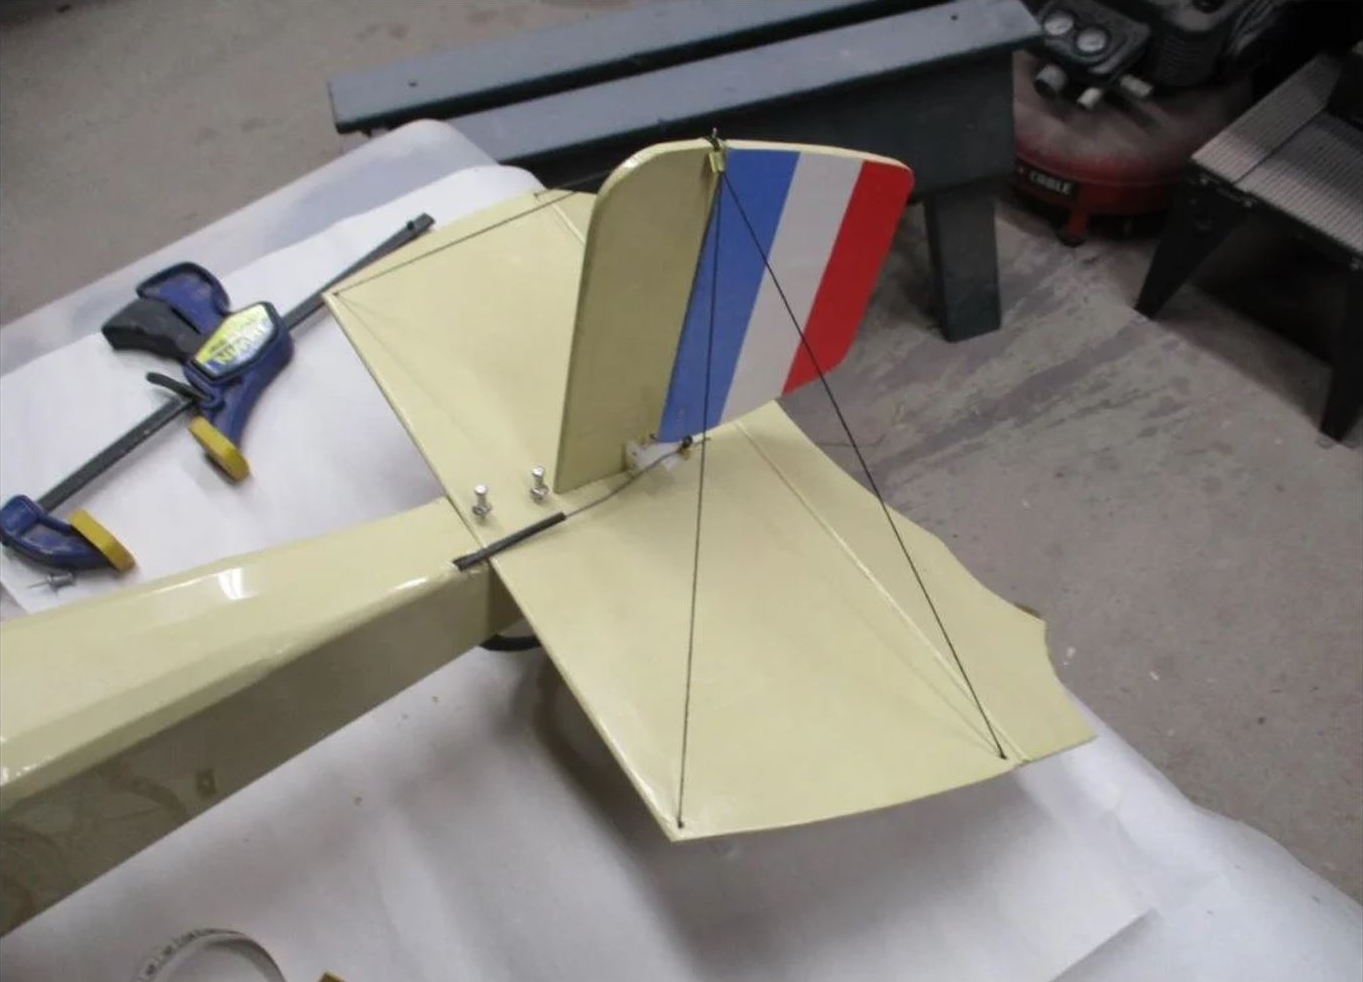
Then the tail planes...
Fin assembly and
articulation.
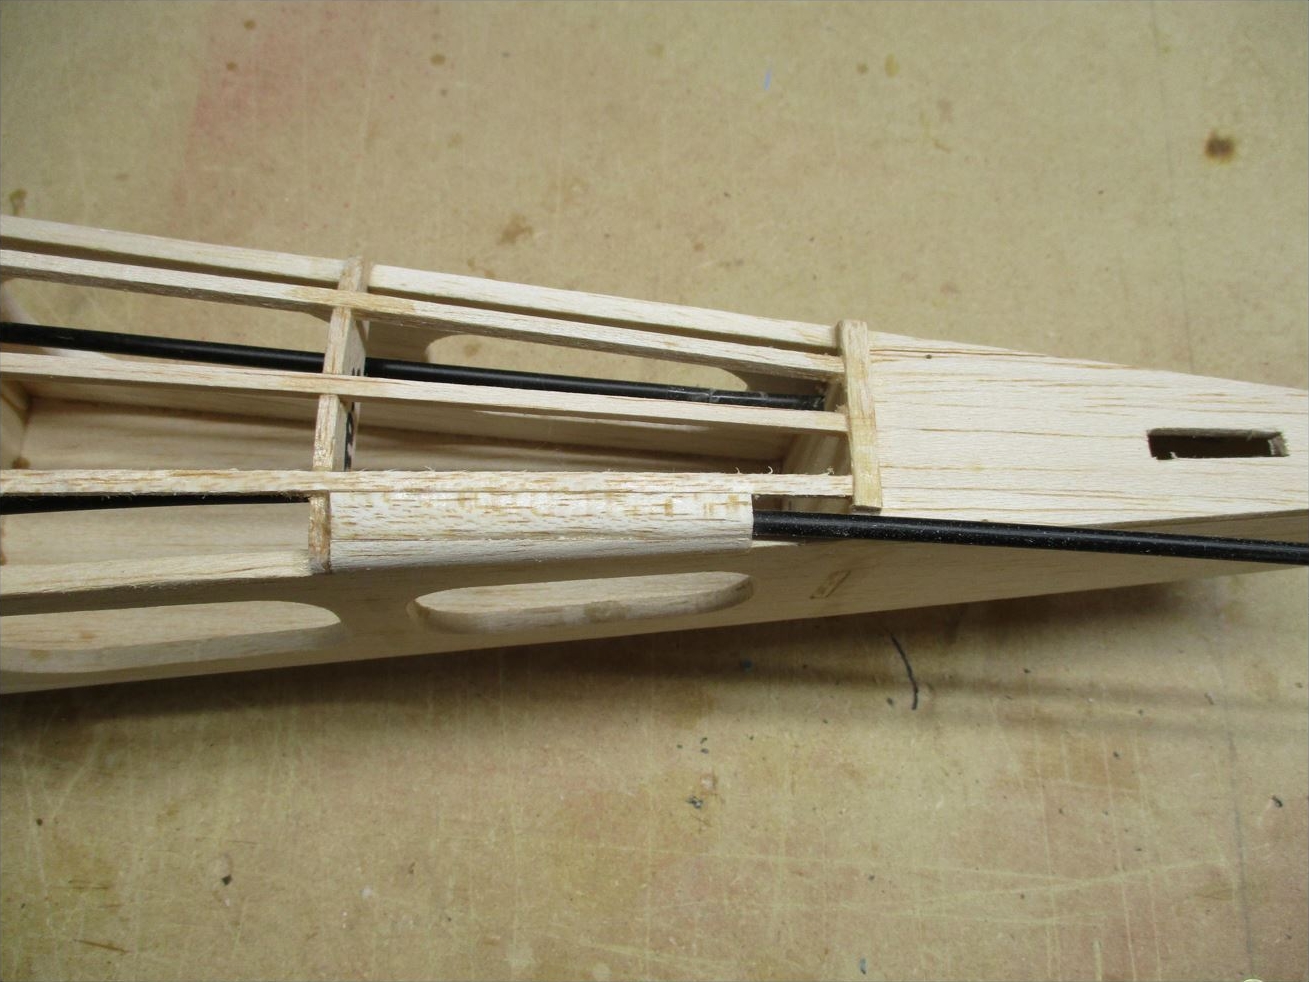
The controls were
not made with round-trip cable but with flexible sheaths.
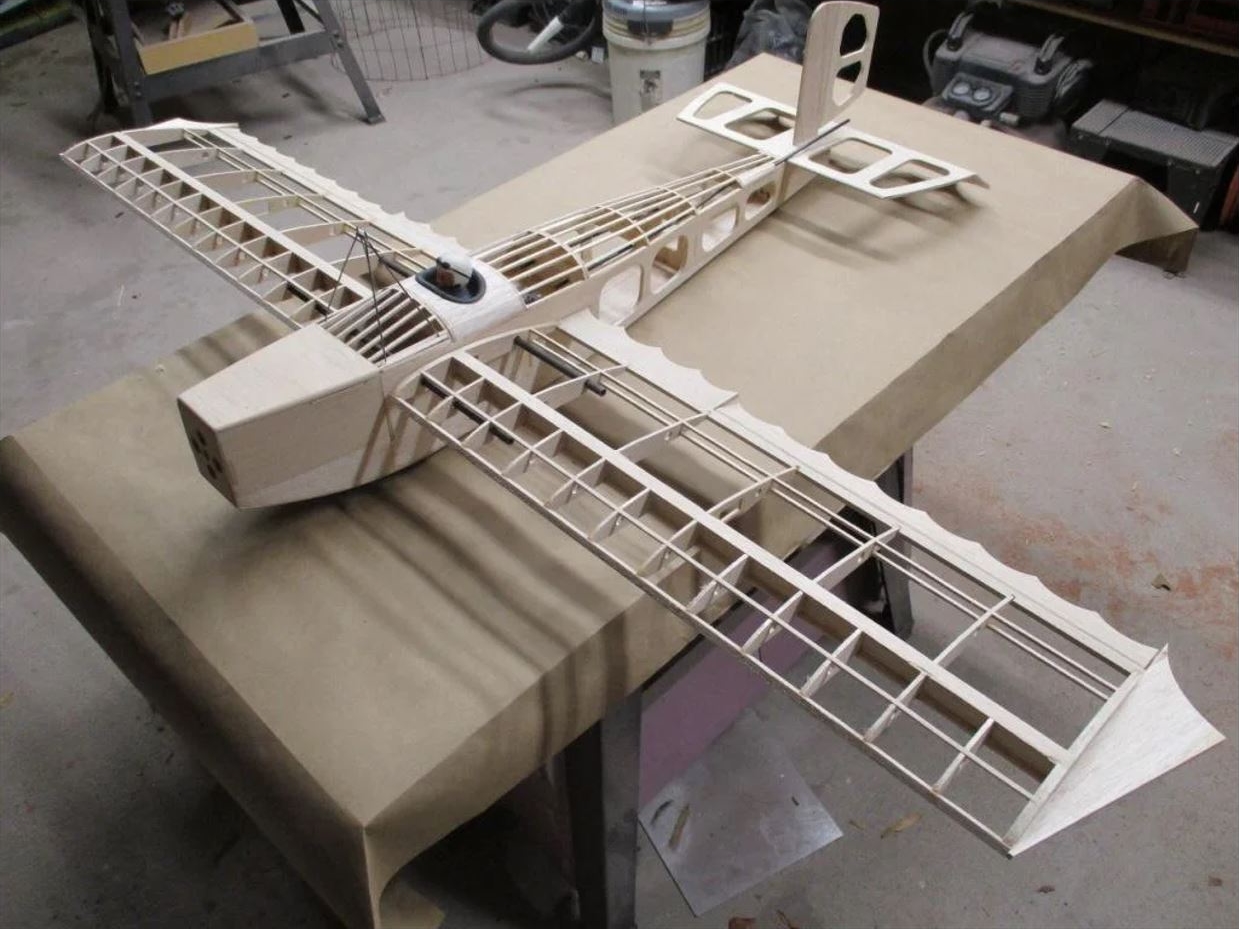
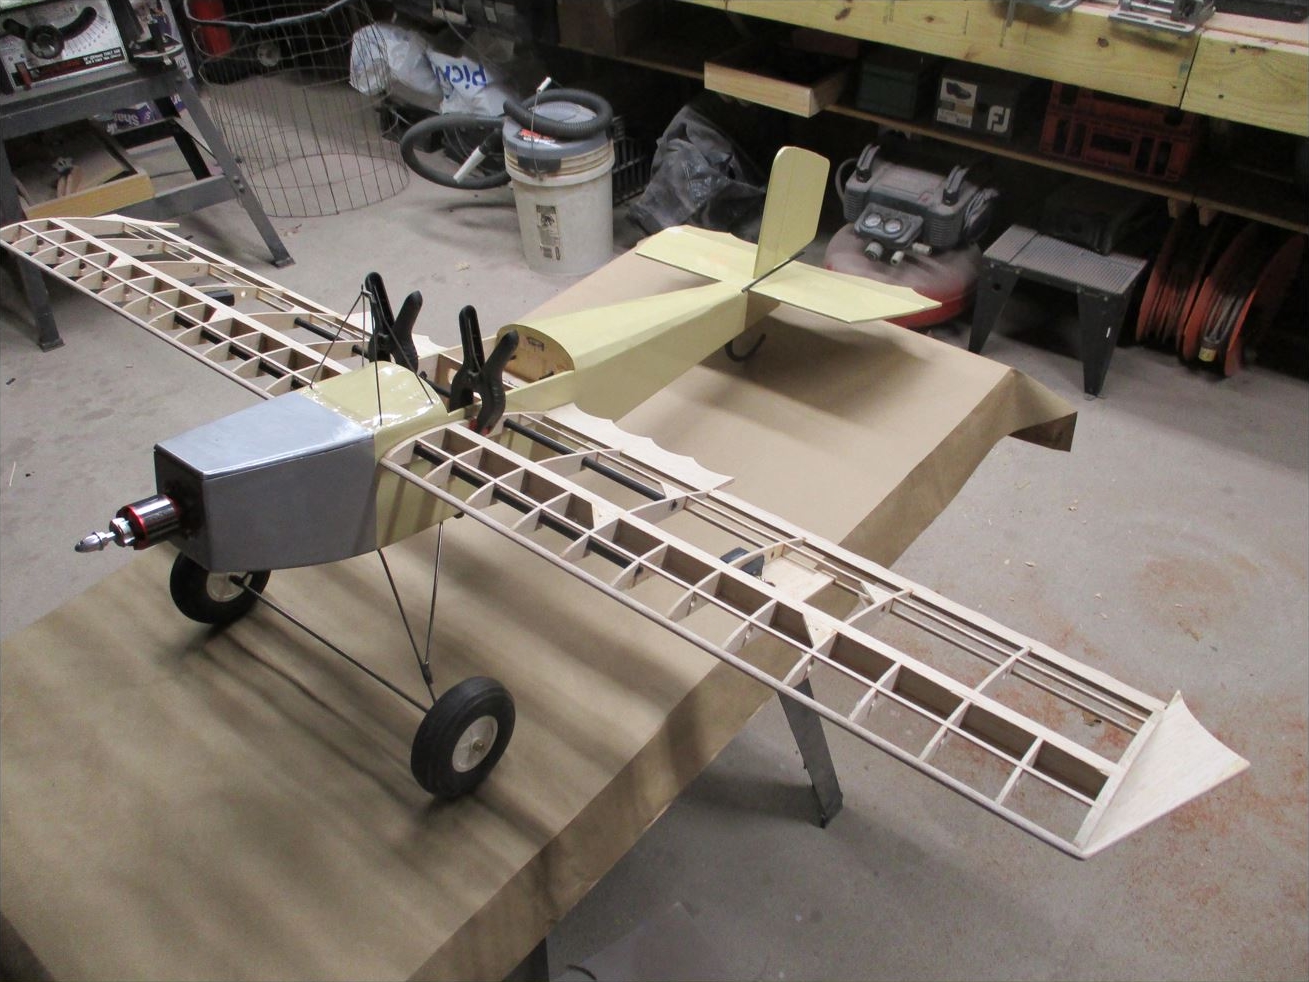
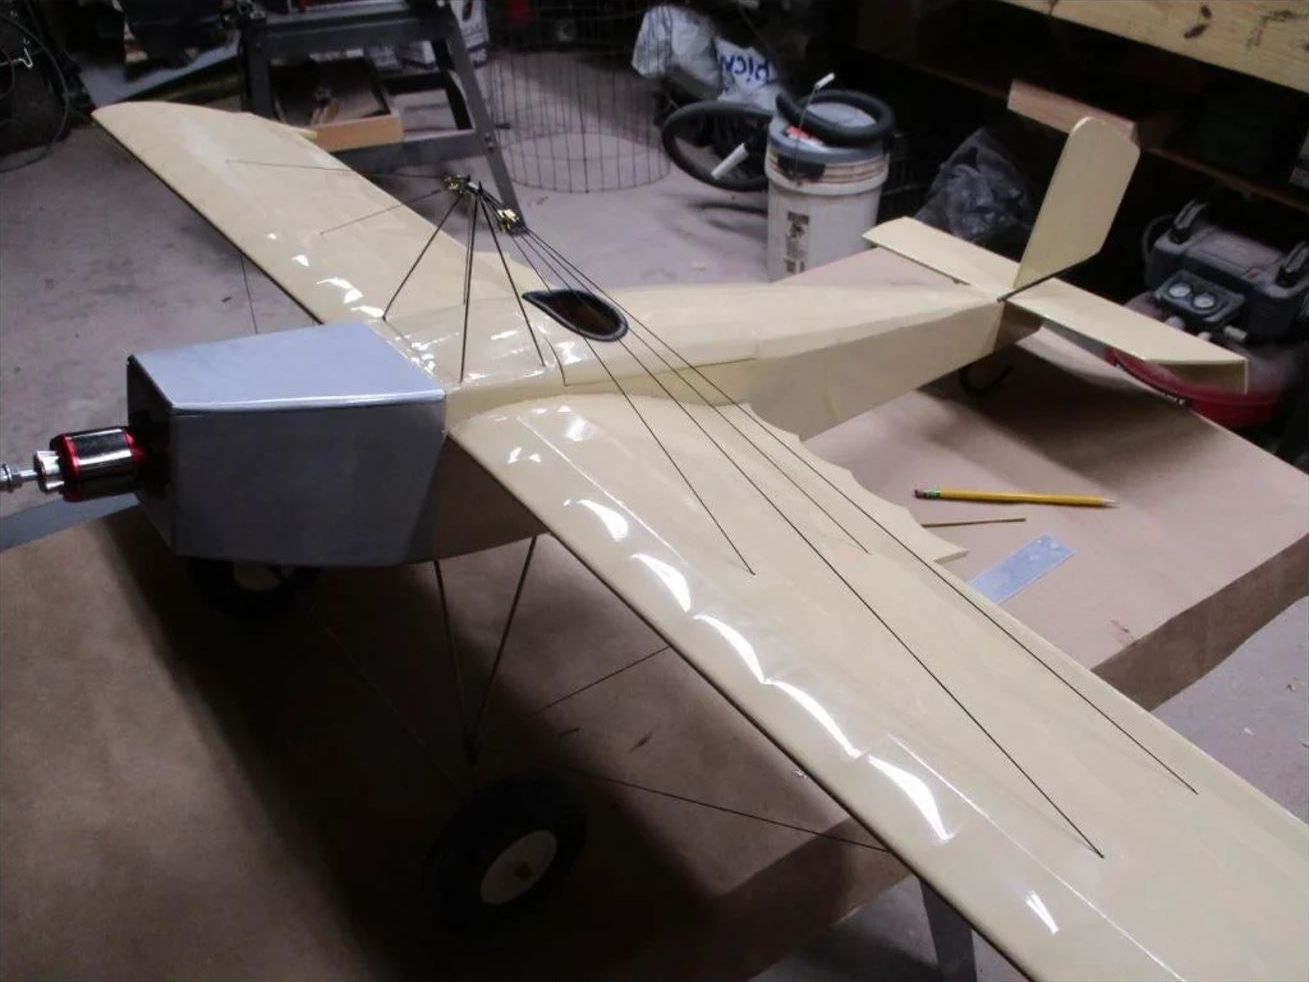
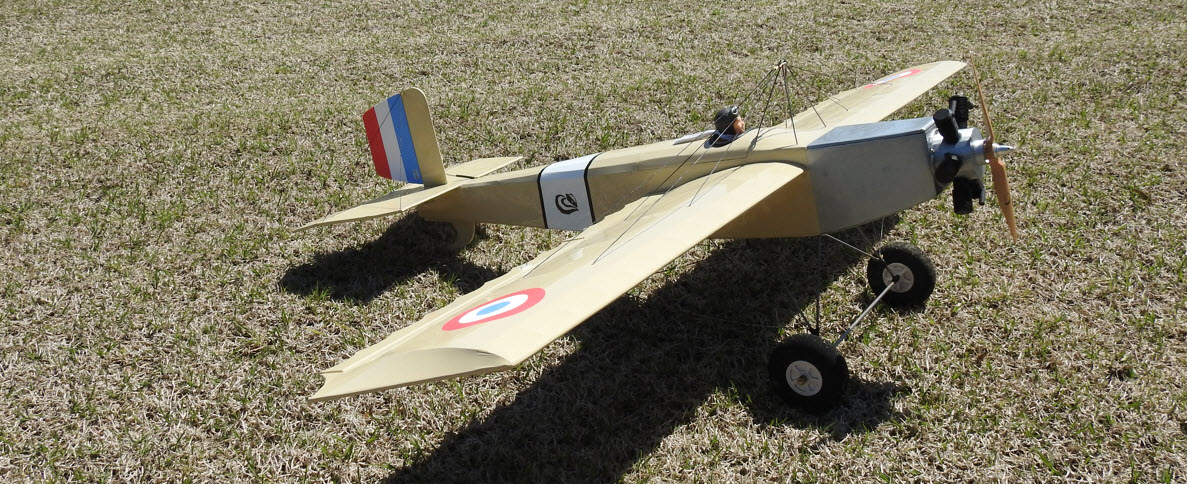
The model is finished,
ready for covering.
And finally getting her up
on her legs.
How and what she’s covered with is the builders
choice. For me, I’m much better with an iron than anything
else, so I almost always cover with a heat shrink adhesive backed
mylar….
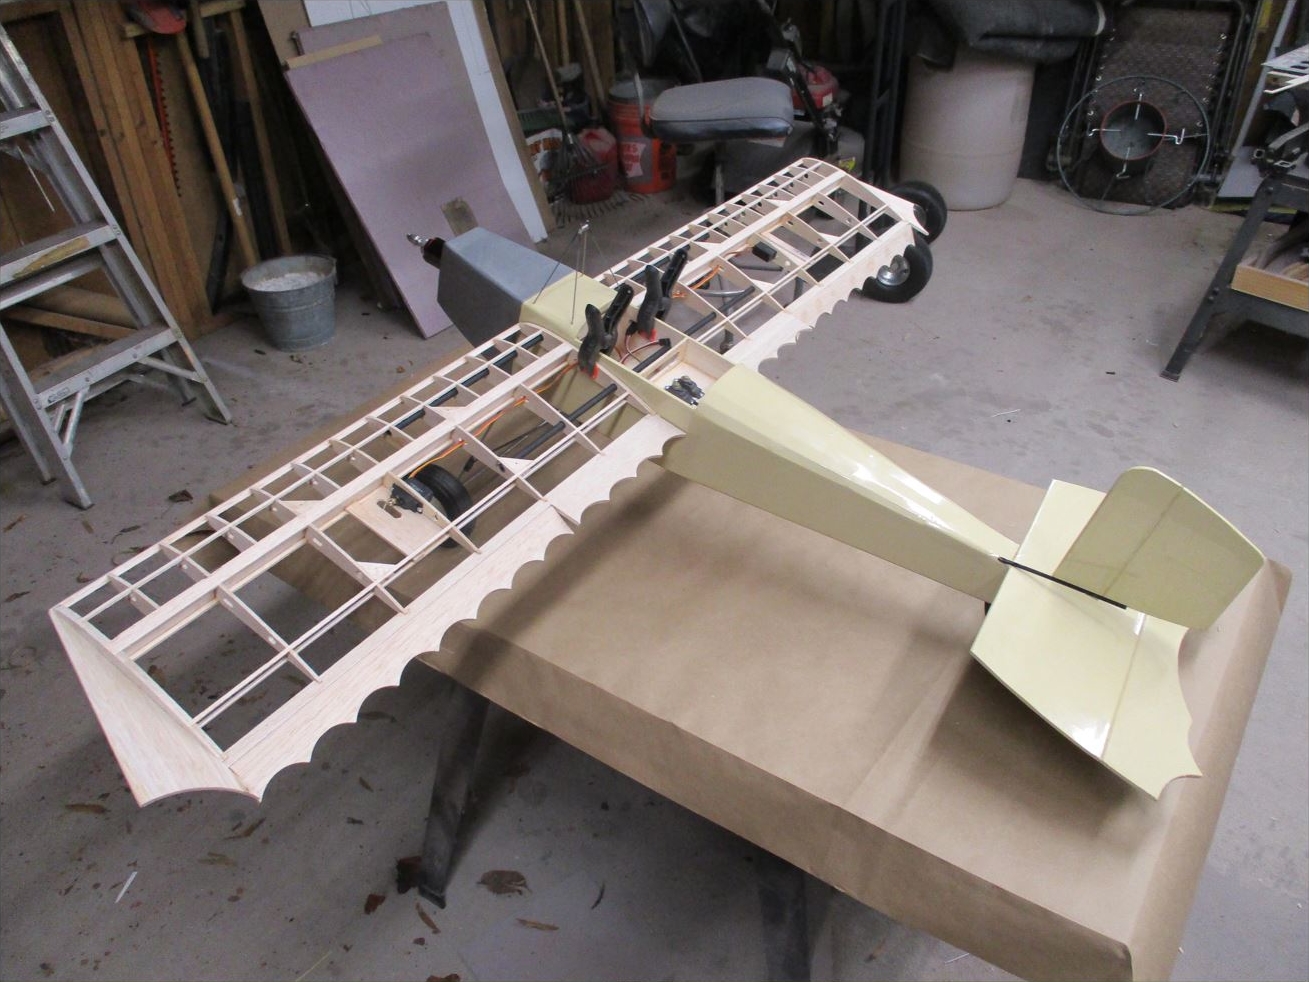
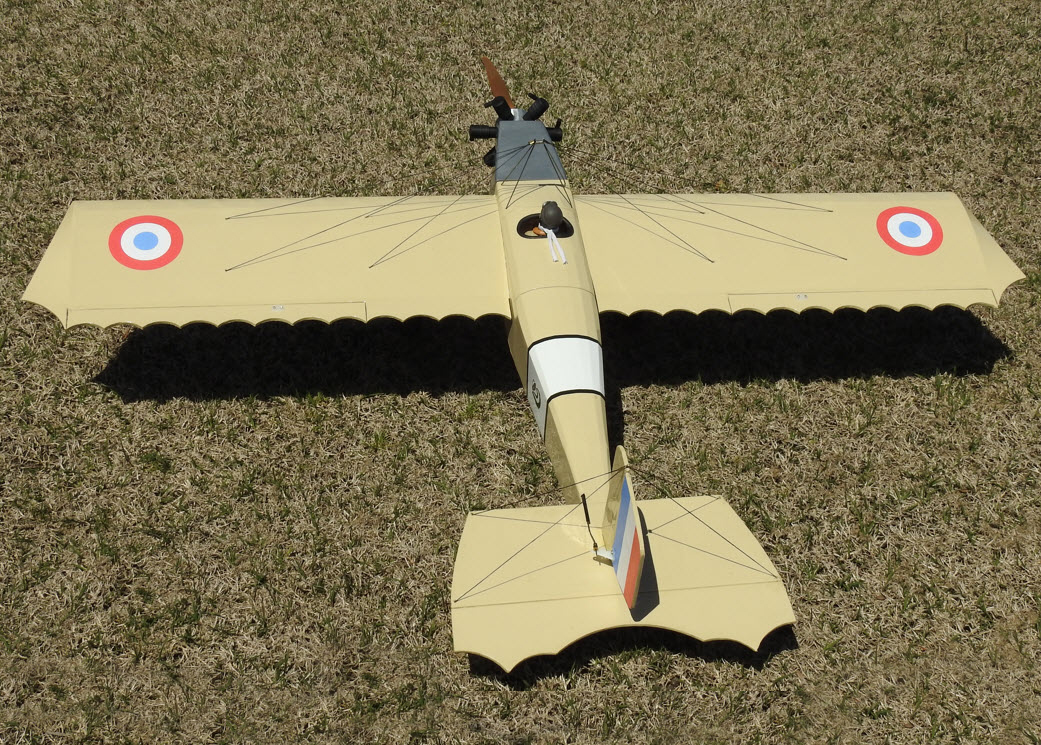
Here, the plane
is covered with antique-colored heat shrink film and silver
gray for the hood.
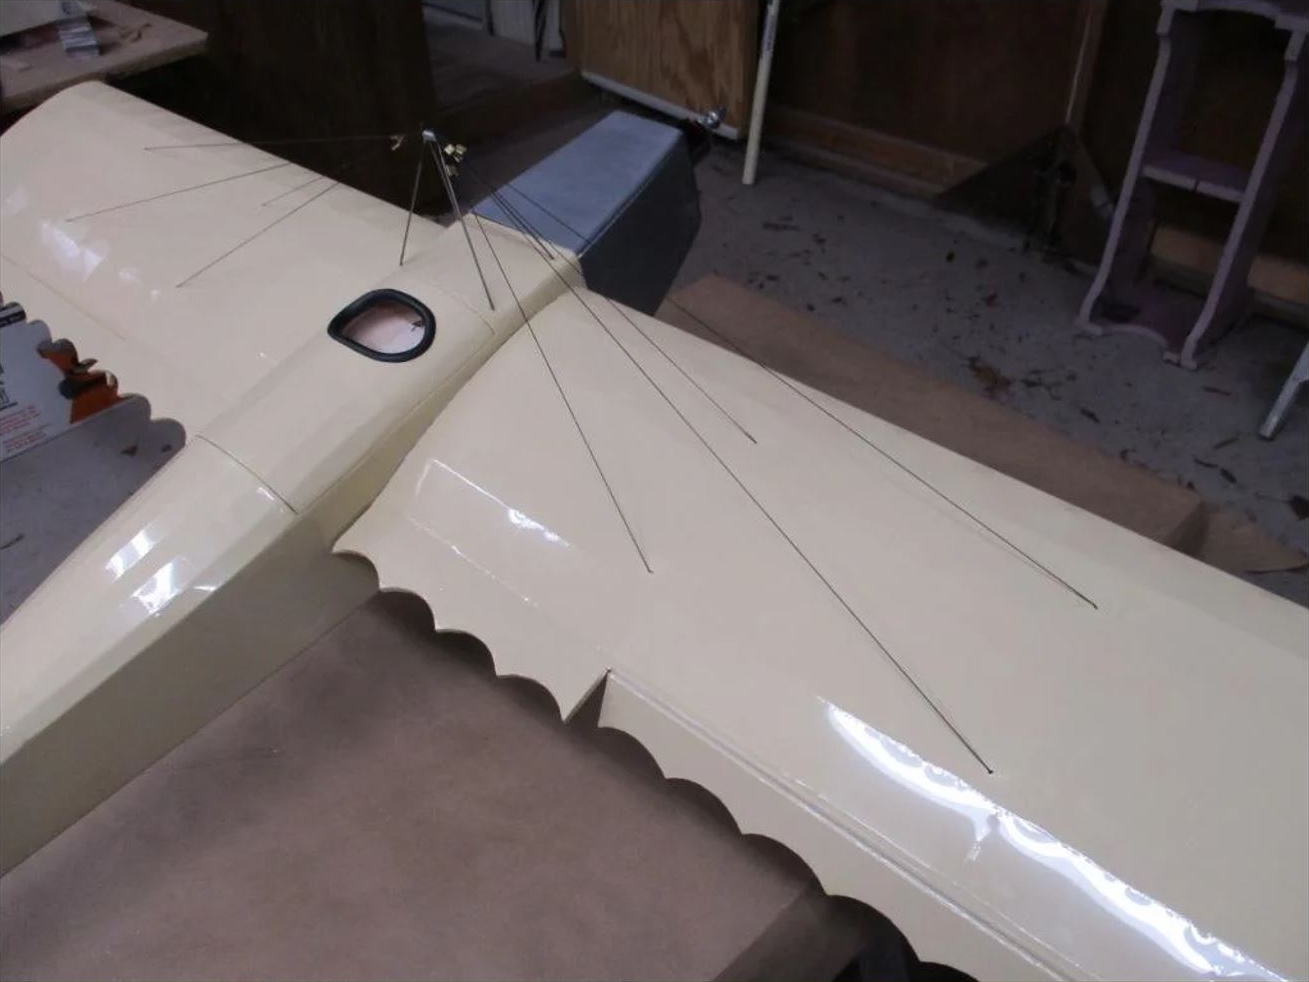
The half-moon
trailing edges take quite a long time to cover but they give
all its charm to the plane.
The last thing I did was the rigging. I made a
threading tool out of a guitar string and a bamboo skewer to make
it easier to fish the rigging up through the wings. The turnbuckles
are small pieces of brass tubing.
The guying does
not contribute to the rigidity of the plane but it adds a
real touch of realism.
The underside
of the wing and the landing gear are also guyed.
Small pieces of
brass tubing are used to crimp the cables.
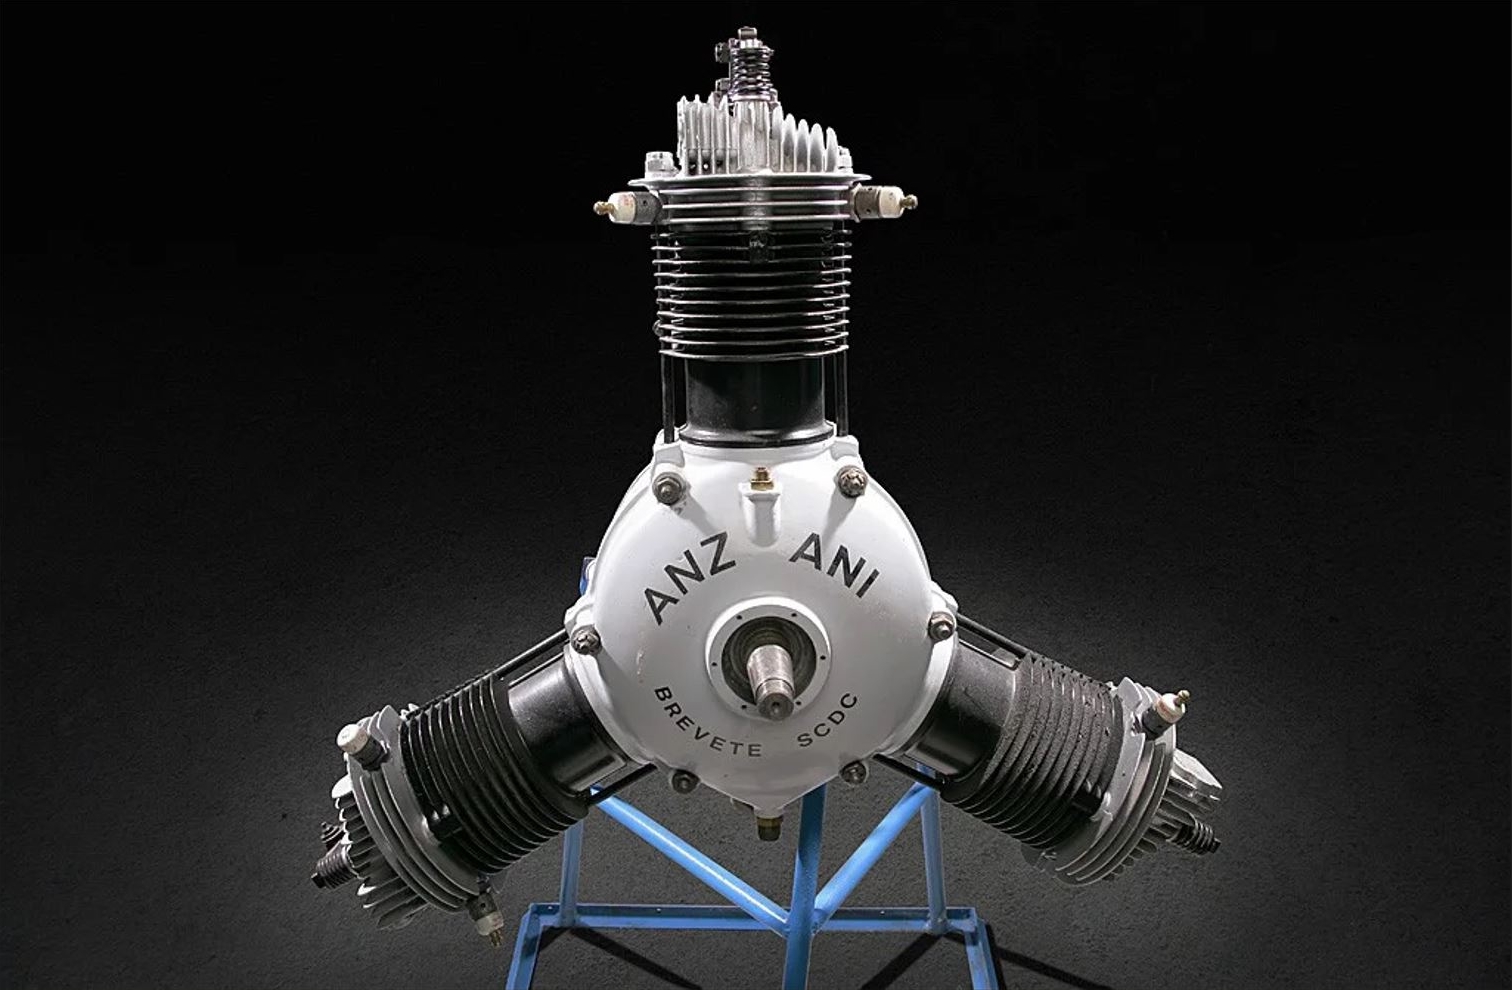
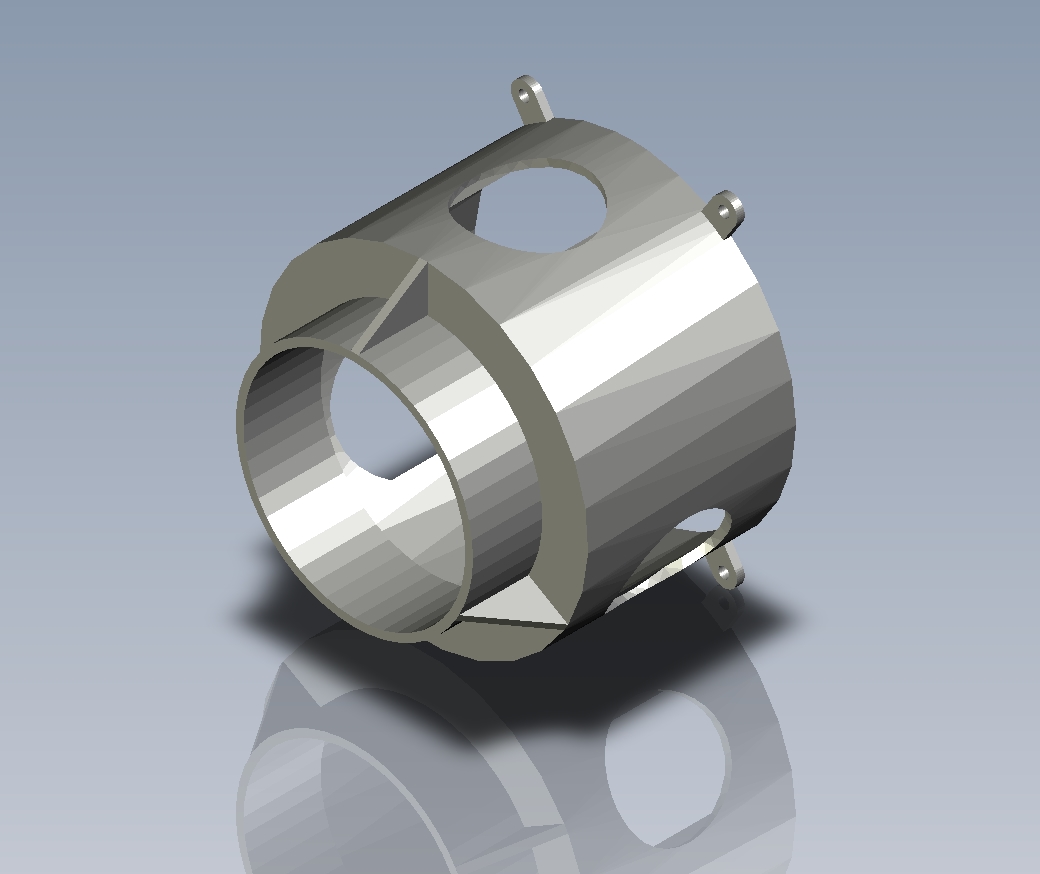
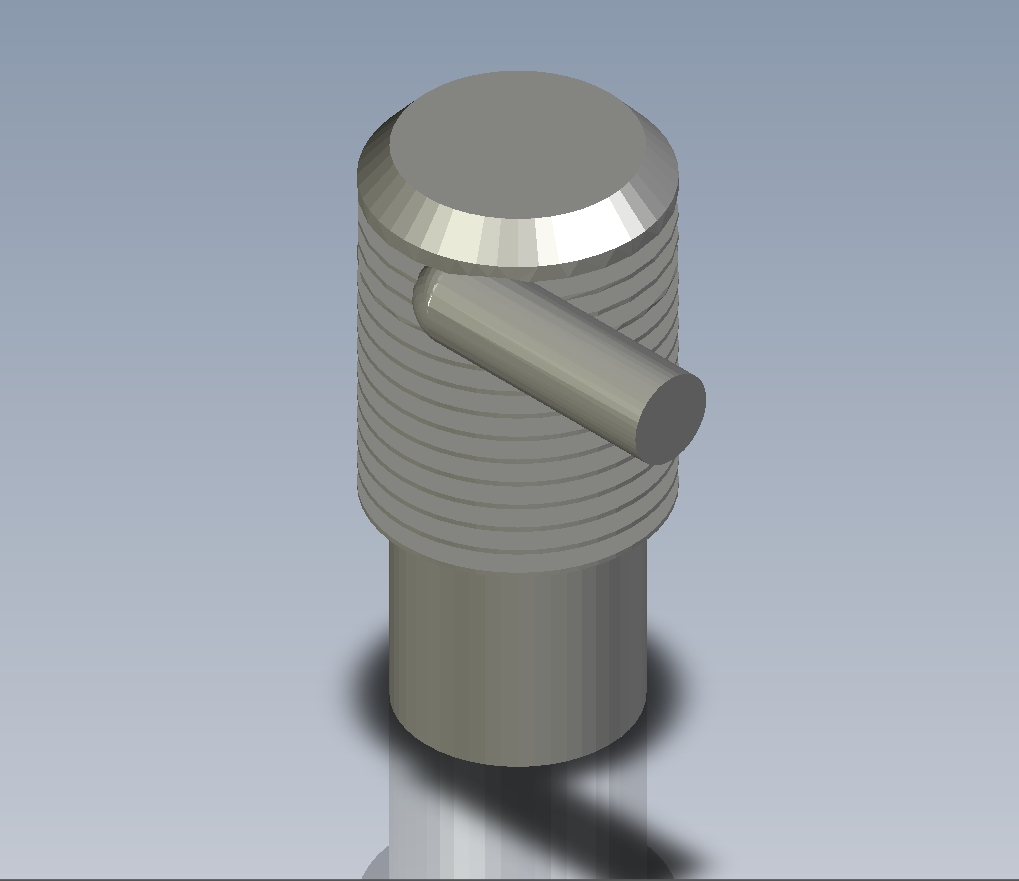
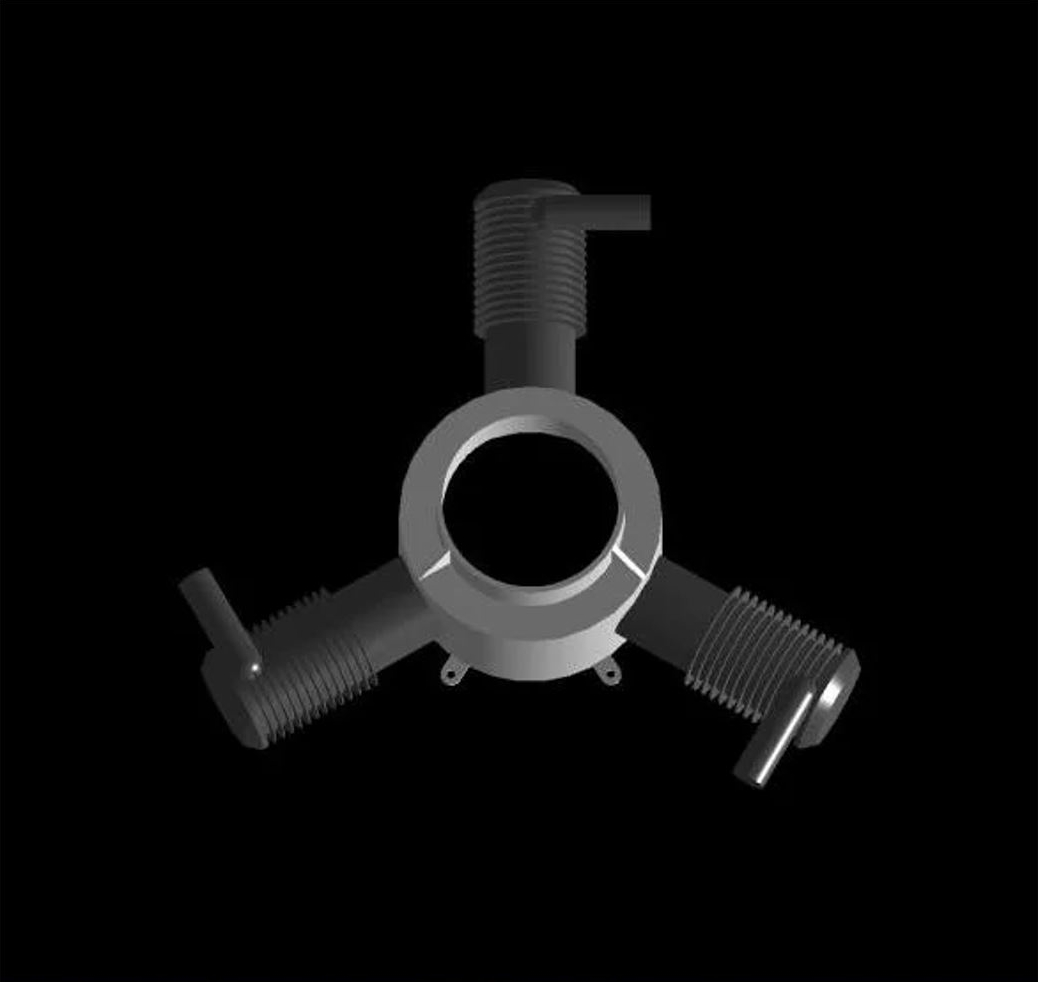
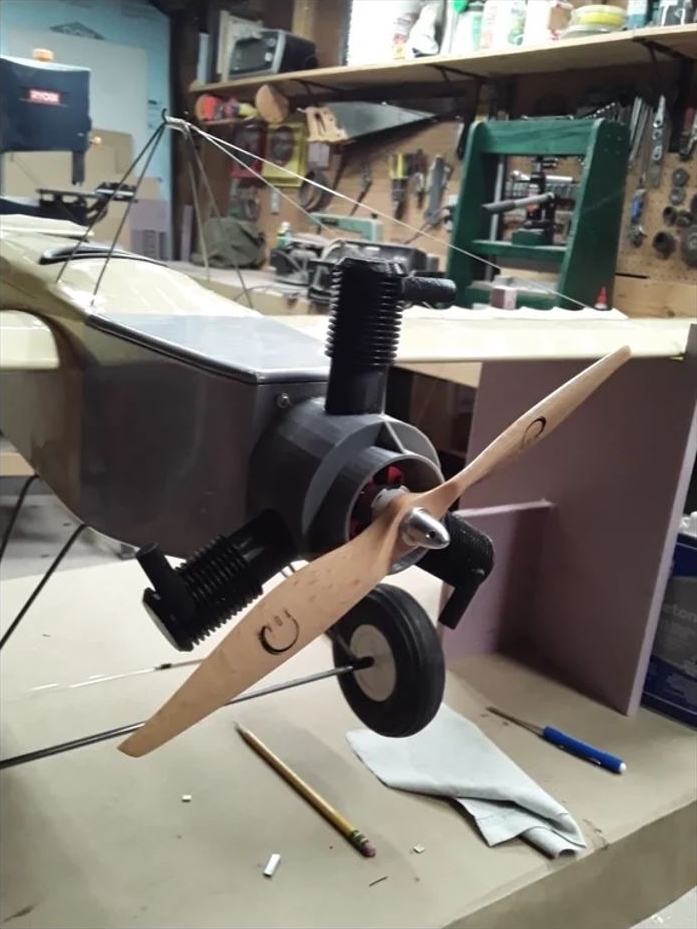
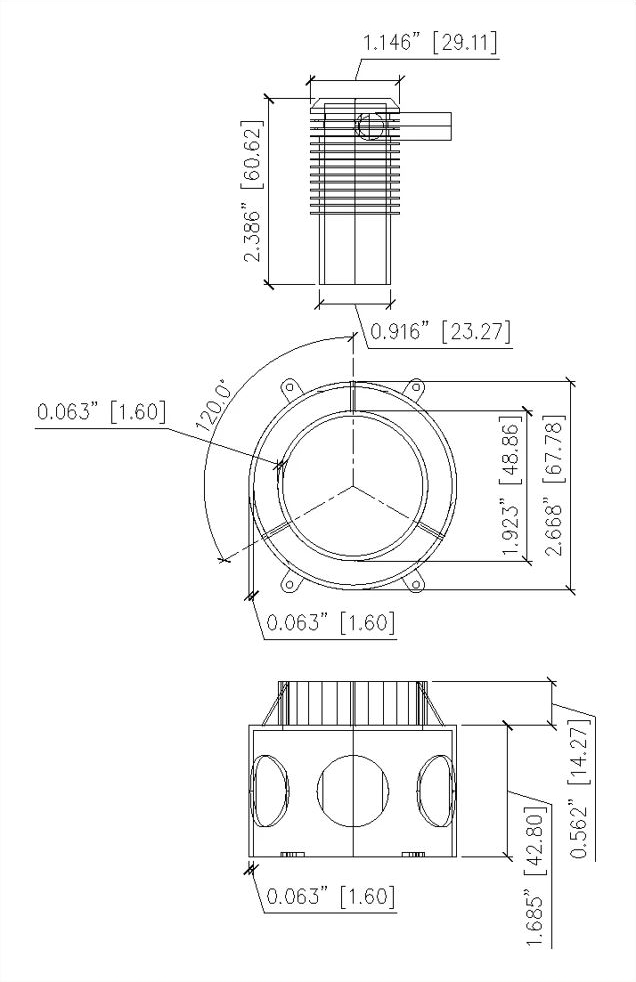
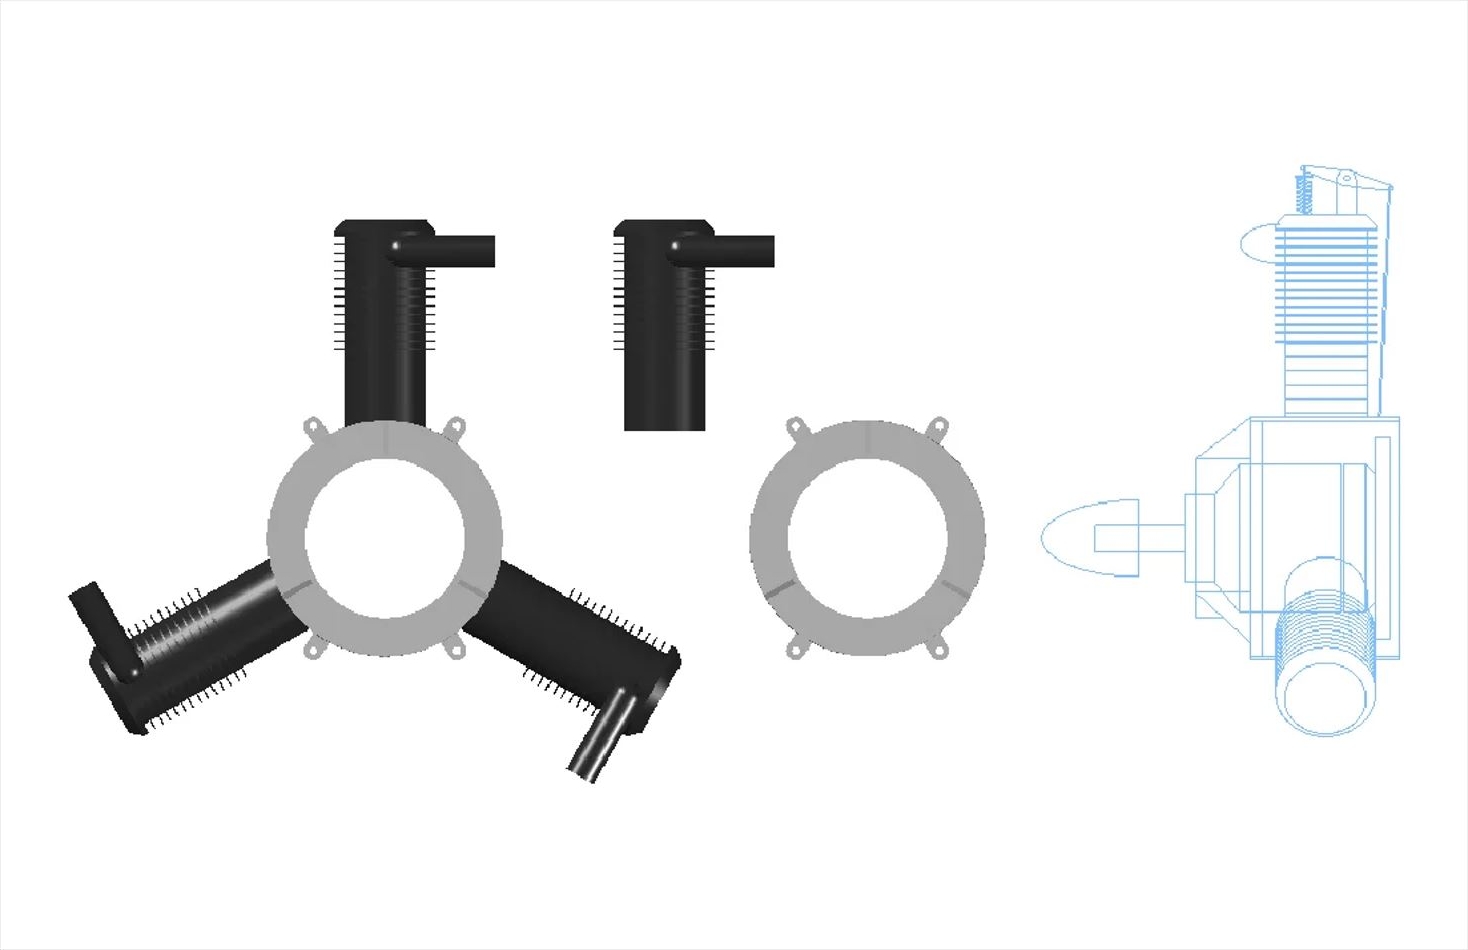
The fake three-cylinder
engine was modeled in 3D then printed. STL files are downloadable.
The crankcase here. The
cylinder here. (Right click
on the text then "save as"...)
Simple design
of the Anzani fake engine.
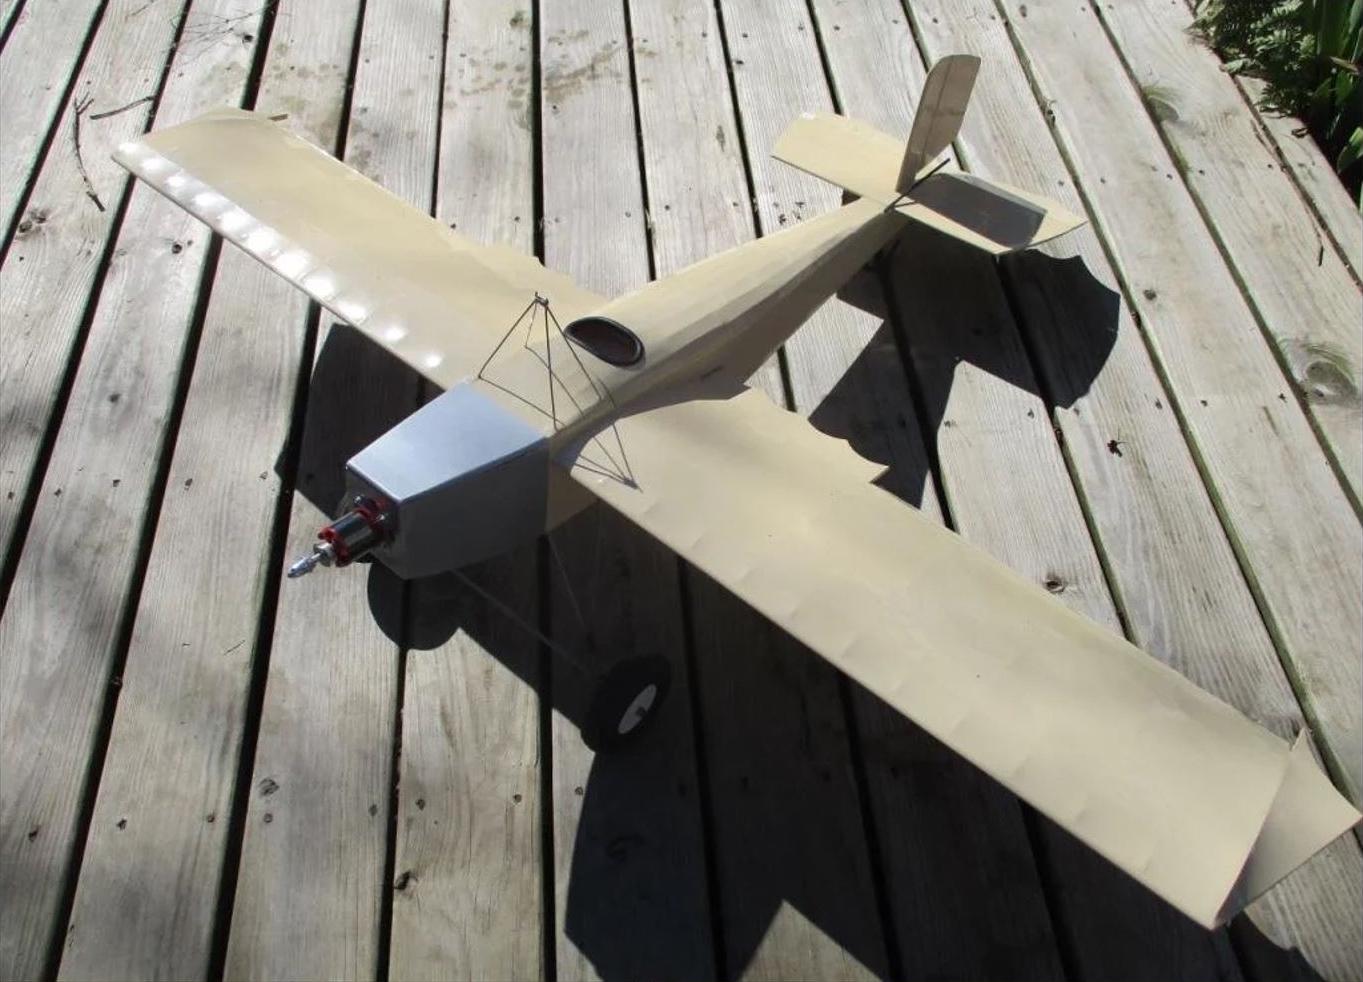
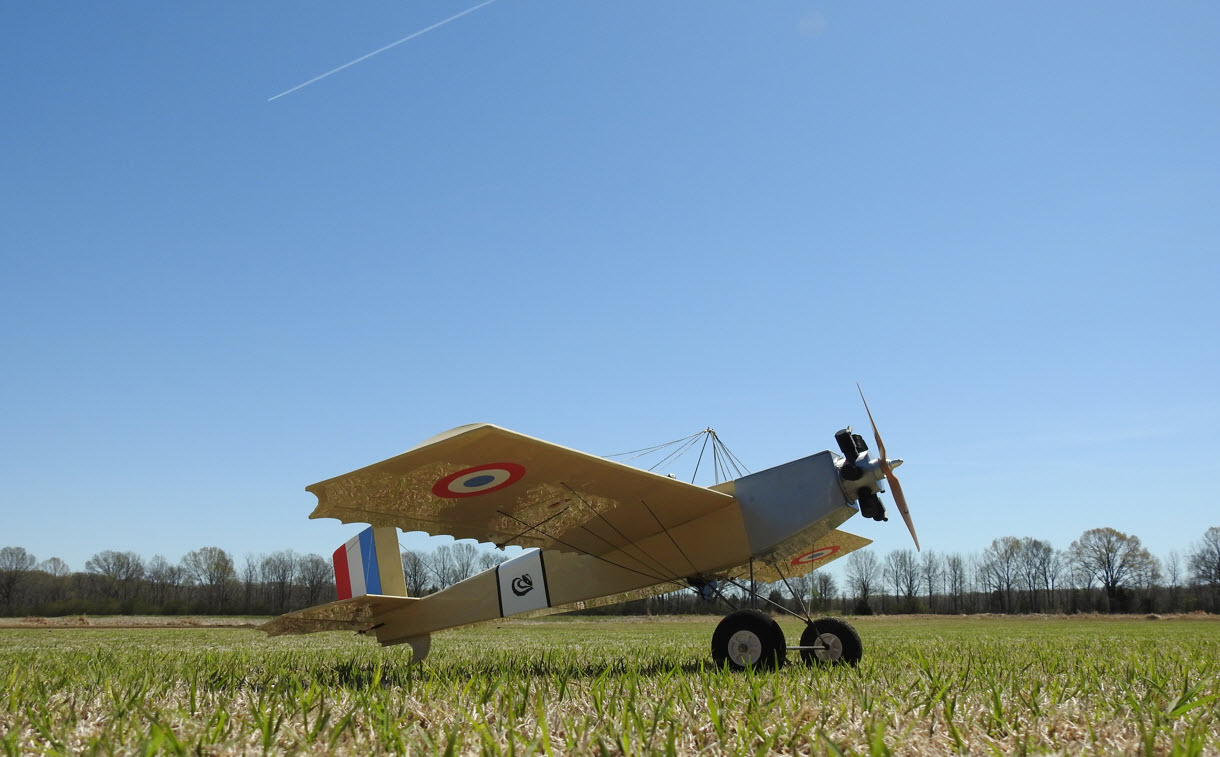
The plane is finished, ready
for its first flight.
And that’s about all there is to it. The
detail drawings and print wood show each and every piece of the
airframe, and the build sequence is pretty straightforward.
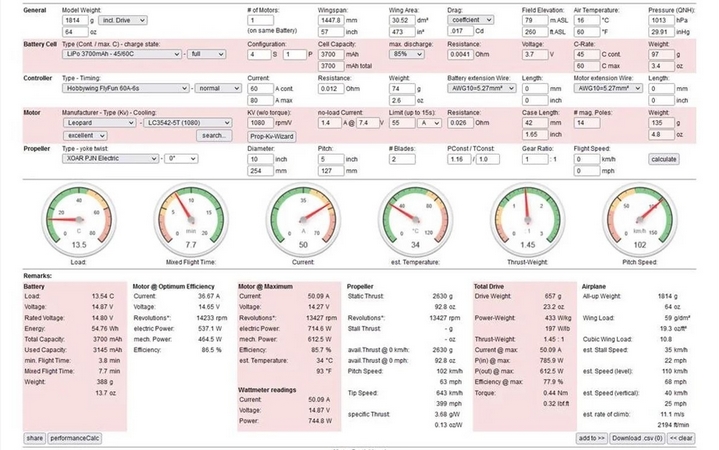
Predicted performance.
Ready for his first flight
on a beautiful day. The land is well mowed.
A few stickers
complete the decor.
Back on the track.
Don't hesitate
to send photos of yours if you start building.